Showing posts with label art projects for the blind. Show all posts

Friday, February 28, 2025

Muted Color Relief Sculpture

Last week, my students helped to create boxy, relief sculpture using saturated colors. This week they helped make a relief sculpture using curvy shapes and muted colors.

A color can only be as bright as it is when you buy it in the bottle. You can however make the color more dull by essentially contaminating it. There are two ways to mute a color: by adding gray or by adding its opposite color and the color wheel (its complement). If you want to make a bright orange into a rust color, add a little blue. A bright yellow can become a brown mustard with a little purple mixed in. 

Every student chose a color to mute and then paint on curved cardboard shapes. I didn't limit them to part of the palette like last week when it was just pink or colors with lots of yellow. The fact that all the colors are moving towards grays and browns means they have the intensity in common, and that's enough to look good tother. 

Friday, January 31, 2025

Analogous Watercolor Assignment


For a quick and easy color theory project, I had my students choose three neighboring colors on the color wheel to make an analogous watercolor painting. Students began by using masking/painter's tape to break up the picture plane into small, medium, and large, shapes. I like it when the strips of paint go off the edges of the paper, but smaller pieces can work too, as long as there is overlap of tape.

blind student uses fingers to navigate what parts of the paper still need painted.


blind student adding value to tape edges
Then the students wet their entire piece of paper with by brushing or spraying water on their watercolor paper. Next, they painted one color at one end, and then overlap a second color blending along the way. It could be two secondary, such as a blue at one end and red at another to make a purple in the middle, or they could use a primary in the middle like a blue with a blue-purple on one side and a green-blue on the other. 

That could be the end of the assignment, but I found everyone was able to take their painting to a next level but tracing their tape with a pencil and smudging it with their finger or gradually adding lighter value to fade it out, to create a shadow once the tape was pealed off.

By continuing to peal off one piece of tape at a time and shading around the intersections, a sense of layers and depth is created. For those with vision, they could even activate the background by creating even more layers. This was done by laying the tape done again in different positions and retracing/blending, and pealing off. What could have been a five minute exercise in mixing two or three colors to create a color harmony, now becomes an interesting composition using not only color, but line, shape, and value! That's a lot of ground being covered for a two day project.


Wednesday, December 11, 2024

Stenciled T-shirts and Aprons


I am really getting some bang for my buck when it comes to the stencils I bought a few months ago. My students have used them to add pattern to large portrait paintings and spray paint ornaments. In clearing out closets at school I found some boxes of unused t-shirts and aprons that we decided could be used for a fundraiser.
Spray worked on the tight weave of the apron, but didn't show up well on the knit t-shirts, so we used acrylic paint on both. We taped the stencils down with packing tape to give a wide enough border for mistakes to be made. A stencil brush is ideal, but a foam brush is the second best thing. The trick is to dab up and down rather than using strokes which cause the paint to be pushed under the stencil plastic and mess up the image. Things really got fun once students started varying the colors within a single stencil, such as adding more red to the orange or a lighter green to the outsides of the stenciled image. It ended up being a project that can be done within an hour, teach medium and contrast, and still have a wow factor.


Friday, November 22, 2024

Easy Oil Pastel Portraits

 I'm not one to waste. If I'm going to print out a picture for each student to use as a reference for their value drawing or to trace for their transfer drawing, they're going to use that copy for another project later whether it be to tear up and put in a collage, or to use as a base for a mixed media piece. 


This time I had them color their black and white images with oil pastel. Enough of the value showed through that a blending few basic colors could make it look like a colorized antique photo. Some students got creative by using arbitrary color and some needed me to hot glue the outlines of features so they could feel the boundaries of the shapes. It's not just a filler activity, it's a way to explore media under the umbrella of our portrait unit. This can be done by little kids with more interesting results than a coloring page.

Monday, March 18, 2024

Personal Cyanotype Assignment

 In education, we learn about scaffolding and the gradual release of responsibility from teacher to student: I do, we do, you do. So our large cyanotype murals that we did together came the personal cyanotype project. Each student had a 8 1/2 X 11 piece of treated fabric and was able to use negatives, blue prints, plants, stencils, doilies, and their own drawings on clear plastic. 


Once students arranged their composition on board in a dark (mostly dark) classroom, they moved everything to another board with treated fabric on it. Plexiglass was placed on top to hold everything together on a breezy spring afternoon. After sitting in the sun for 15 minutes the fabric was quickly brought back in and rinsed in a bath of cool water.

We used the shape of a house to frame most of the images in order to keep with the theme of buildings/ homes.


Friday, August 25, 2023

Oil Pastel-Glue Pattern Project for the Blind

The concept of balance gets more complicated when you try to balance color and shape throughout a composition. The goal is to lead the viewer's eye throughout the piece, placing blues and oranges in ways the form triangles and take value and shape into account as you create some visual stability.

This is especially complicated when you don't have any vision. My students, who are visually impaired or blind began their assignment by setting a squirt of school glue in motion to create a meandering line that crossed over itself to make shapes. The glue created boundaries for oil pastel, but Elmer's isn't a tall enough wall for some of my students, So I would trace over the Elmer's with Wiki-Stix for my students to feel their shapes. Or they would start their drawings with Wiki-Stix and I'd trace them in hot glue before removing the Wiki Stix.
Wiki Stix create boundaries on one or two shapes at a time.
Students would choose where to place each color and then vary the value within the shape, which made it a more interesting than flat shapes. Oil Pastels are easy to use and after coloring for a short amount of time it is easy to feel the difference between plain paper and the greasy patch of color. I was so pleased with how the assignments turned out, proving that you don't need to know how to draw to make a pretty picture, and you don't need to see to make a solid composition.


Wednesday, July 13, 2022

Summer Camp for the Blind: Wild About Learning Animal Masks


Paper shipping tape used to build and smooth the forms
The theme for Georgia Academy for the Blind's summer camp this year was Wild About Learning, with a safari twist.  I taught four Art and Literature classes a day. Students made paper maché animal masks and each group learned about animal related literature, such as the Caldecott book "Why Mosquitoes Buzz in People's Ears." They ended up writing a haiku about the animal that that they chose for a mask.

We also went on a field trip to Dauset Trails Nature Center, which is like a free outdoor zoo with rescue animals such as bears, otters, and eagles as well as a farm animal area. I'm always happy at the end of the week, getting to know the students in a relaxed environment where they can learn without the pressure of credit and grades.

A student with her fox mask
Students with goats at Dauset Trails


Wednesday, March 2, 2022

Ruth Asawa Project


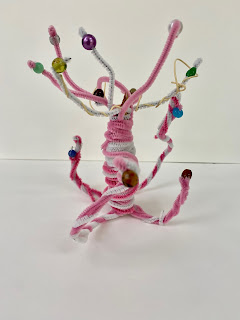
A student's peppermint tree
Ruth Asawa is an artist whom I knew almost nothing about before teaching my Wonder Women of Art unit. She was a Japanese American who was held in an Internment Camp during World War II. (Dorothea Lange and Ansel Adams from our fall Photography unity documented these camps). She was a student in the historic art hot spot: Black Mountain College where she learned form and worked beside greats such as Josef Albers and Buckminster Fuller. One day in Mexico, Ruth saw a man making wire baskets in the market place, and asked him to show her how. She'd spend the rest of her life making sculptures, many of which were made from the crocheted wire technique. She settled in San Fransisco with her architect-husband and their six children, there are many sculptures that she designed from folded paper that was later cast in bronze. I wish I had kept my eyes peeled for her sculptures when I was in San Fran last summer. I also love how Ruth was a passionate educator and community advocate for the arts.

My students had the task of using any kind of wire they wanted to use. I got bags of Twistees and rolls of copper and aluminum wire, but most students used fuzzy craft sticks (pipe cleaners). They made pumpkins, candles, stars, and water fountains by bending the wire and making something linear into three demential forms.


Tuesday, March 1, 2022

Quilling

"Quilling is my favorite because it’s something I can do by myself and I’m proud of that. When people go on tours of the school they say, ‘That kid is working by himself and that is amazing!’ And the more people who compliment us the better we get until we’re the best school in the country!" He wasn't the only visually impaired student who I won over last week with my quilling project. There is a 10 year old who has alway come to Art class grumpy. It's amazing to me because I am almost always right in my assumption that kids love art. Not this one. He always lets me know right off the bat that he doesn't want to make anything. Quilling, however, was a game changer.

Quilling is taking thin strips of paper and wrapping them around something thin like a quilling needle or a tooth pick. We used thin paint brush handles. Then You let it spring back, just a little bit to form a spiral before gluing the end so it keeps its desired size of circle. You can pinch it on one side to make a tear drop, a pinch on either side for an almond shape, three pinches for a triangle or 4 for a square. These shapes in various colors can then be used to pictures. Teach shapes can become petals on a flower or wings on a bug, for example. These can be glued to paper to make a card, or glued to each other for jewelry or an ornament. Our quilling projects were mounted on paper.

"Can I make a maze?" my non-art appreciator said.

"You can make anything you want to make," was my reply. And he was off and running. He didn't even use a paintbrush or toothpick to roll his paper because he thought it would slow him down. While everyone else was finishing up he was only half way through, but that didn't stop him from picking up where he left off. We pushed buttons through the maze at the end of class to see if it worked, and sure enough, he made something he was so happy with that he came in the door the following week with a smile on his face.

Friday, May 28, 2021

Hats Off to Trash Hats

hat from stove top packaging and a little ribbon

As my daily high school art students met to make fashion from garbage, my elementary and self-contained classes joined in on the fun with their hat making project. I started by teaching how to make a traditional pirate hat from newspaper, but students had lots of other ideas and the project quickly developed to making pointed party hats, crowns, and sunshine headbands. Two class sessions is all it takes to realize that there are lots of options on types hats and techniques to making them.a runway show stopper made of plastic cups, hot dog papers and foil.


As a literary component to the lesson I introduced students to one of my favorite childhood picture books: OLD HAT, NEW HAT by Jan and Stan Berenstain. In English class we are taught that a sentence requires both a noun and a verb, and that writers use sentences to write stories. But this book only contains one nouns (spoiler alert, it's "hat") and NO verbs!  It's a book of adjectives, opposites, rhymes, and of course hats! I love it because it's a great book to teach little kids about how to describe as well as having them make predictions using rhymes and context. It also contains a great life lesson about how about how sometimes forget about how great things are for us until we go looking for something newer and better only to realize that nothing compares to a favorite, albeit old, hat.  Maybe our lives aren't as bad as we think. 
So make hats during your language lesson or read during your art lesson, but either way, you will walk out of the classroom with a little bit of style!


Thursday, September 11, 2014

Shape Month for My Art Class

I dedicated our first month back in school to the design element of SHAPE. I've never taught any of these projects before, but I wanted to find the clearest ways possible to teach the basics of art to students who are visually impaired.

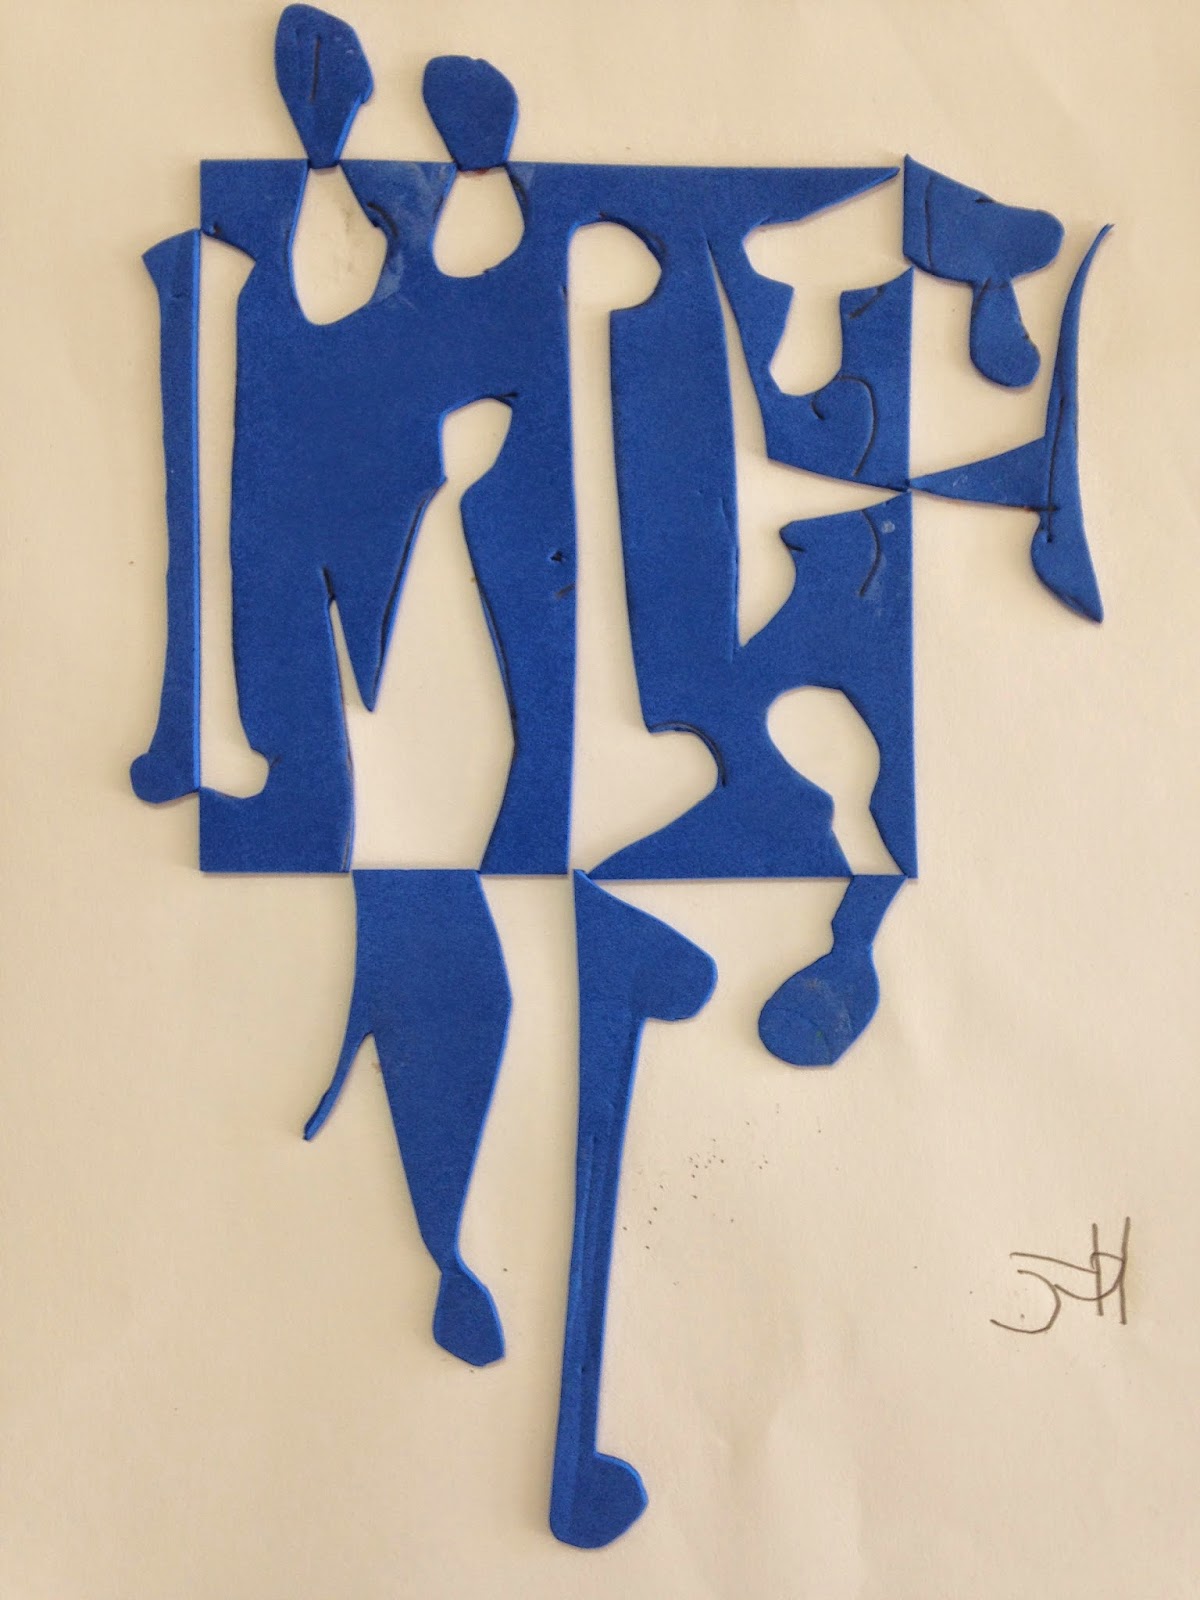
Notan
This is my new favorite way to teach the concept of NEGATIVE AND POSITIVE SHAPE. Notan is a Japanese design principle in which dark and light shapes are juxtaposed in an image.  With blind students I found it very helpful to have them use  foam sheets because they could feel the indented lines they drew in creating a shape, and once it was cut out they could put it all back together like a puzzle. After they flipped and glued each piece, they could feel the negative shape (the hole) and the positive shape (the piece they flipped). They each made two images, one symmetrically and one asymmetrically balanced.



Rectilinear Relief Sculptures
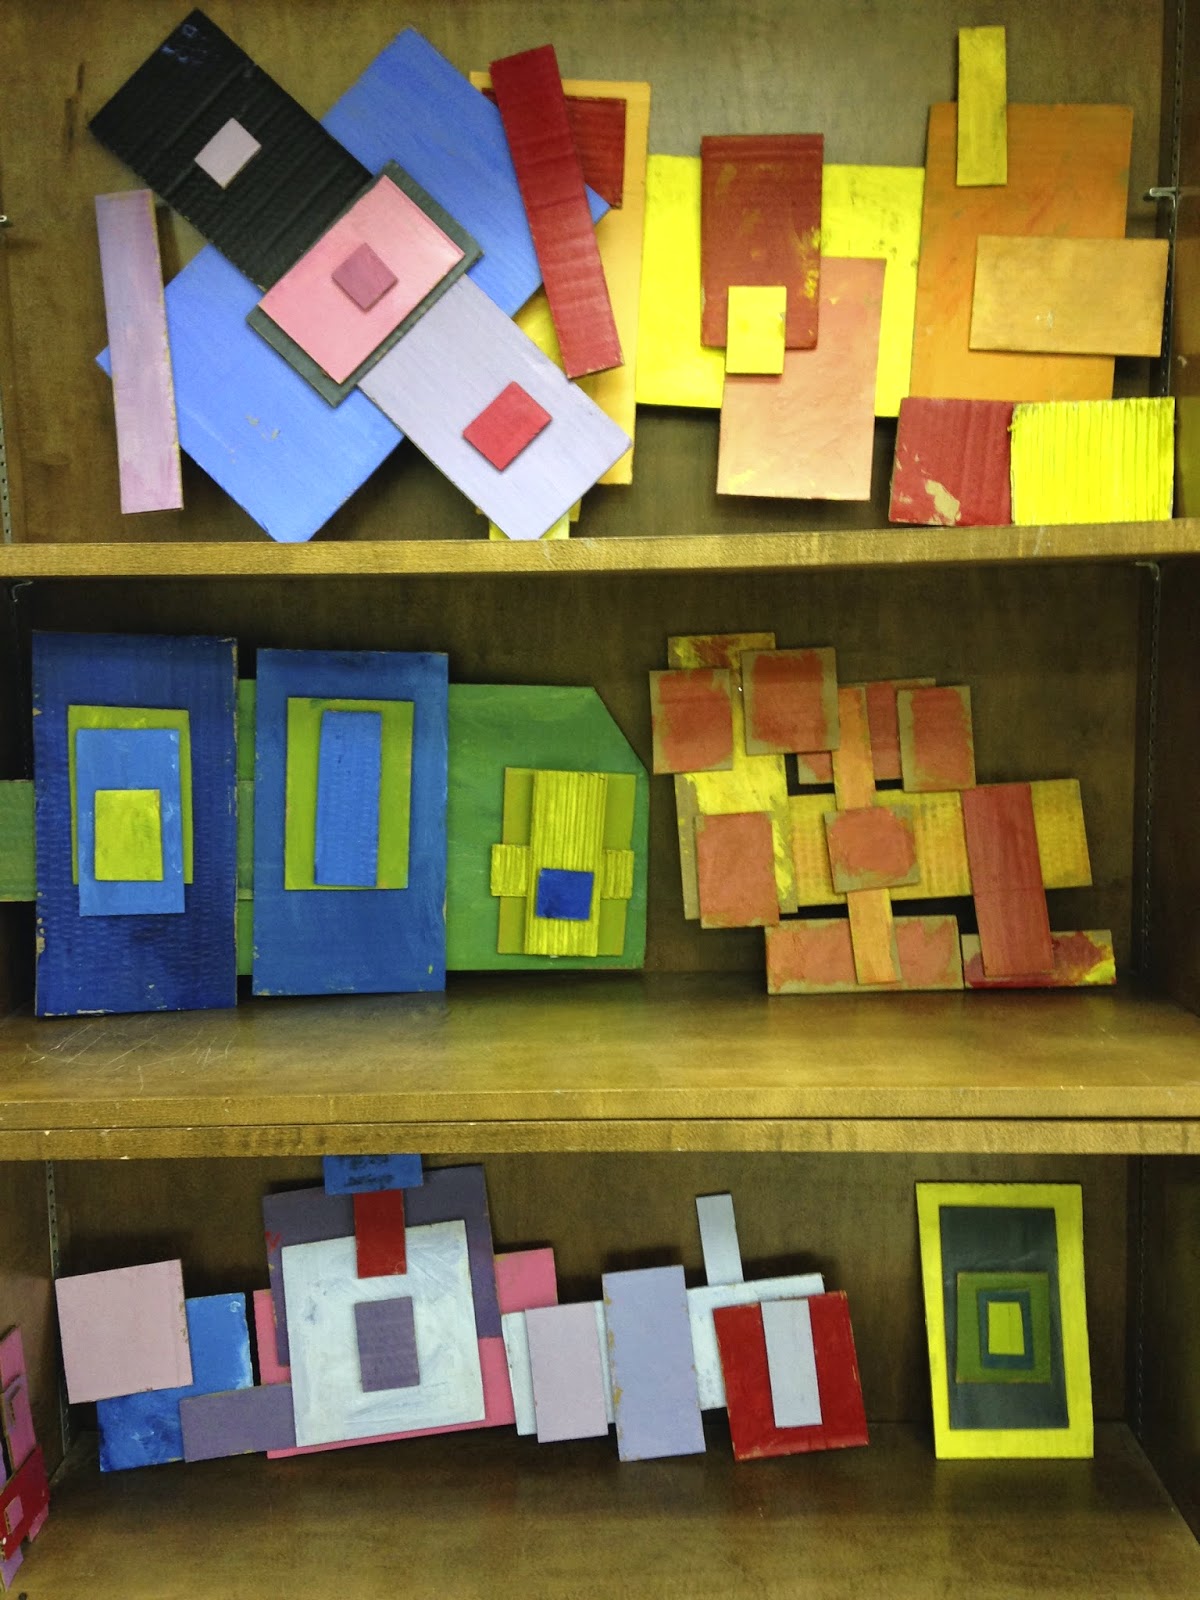
I felt like a little kid at Christmas when all my new classroom supplies rolled in; I just wanted to play with the boxes. I cut these boxes into hundreds of cardboard rectangles which I sorted into piles according to size.  Students gathered a variety of rectangles and picked two primary colors, which they could mix to create an analogous color scheme. They learned about visual unity through color and repetition of RECTILINEAR SHAPES. They arranged the rectangles several times and took digital photos of three different compositions before they chose one for me to hot glue.


Sports Posters
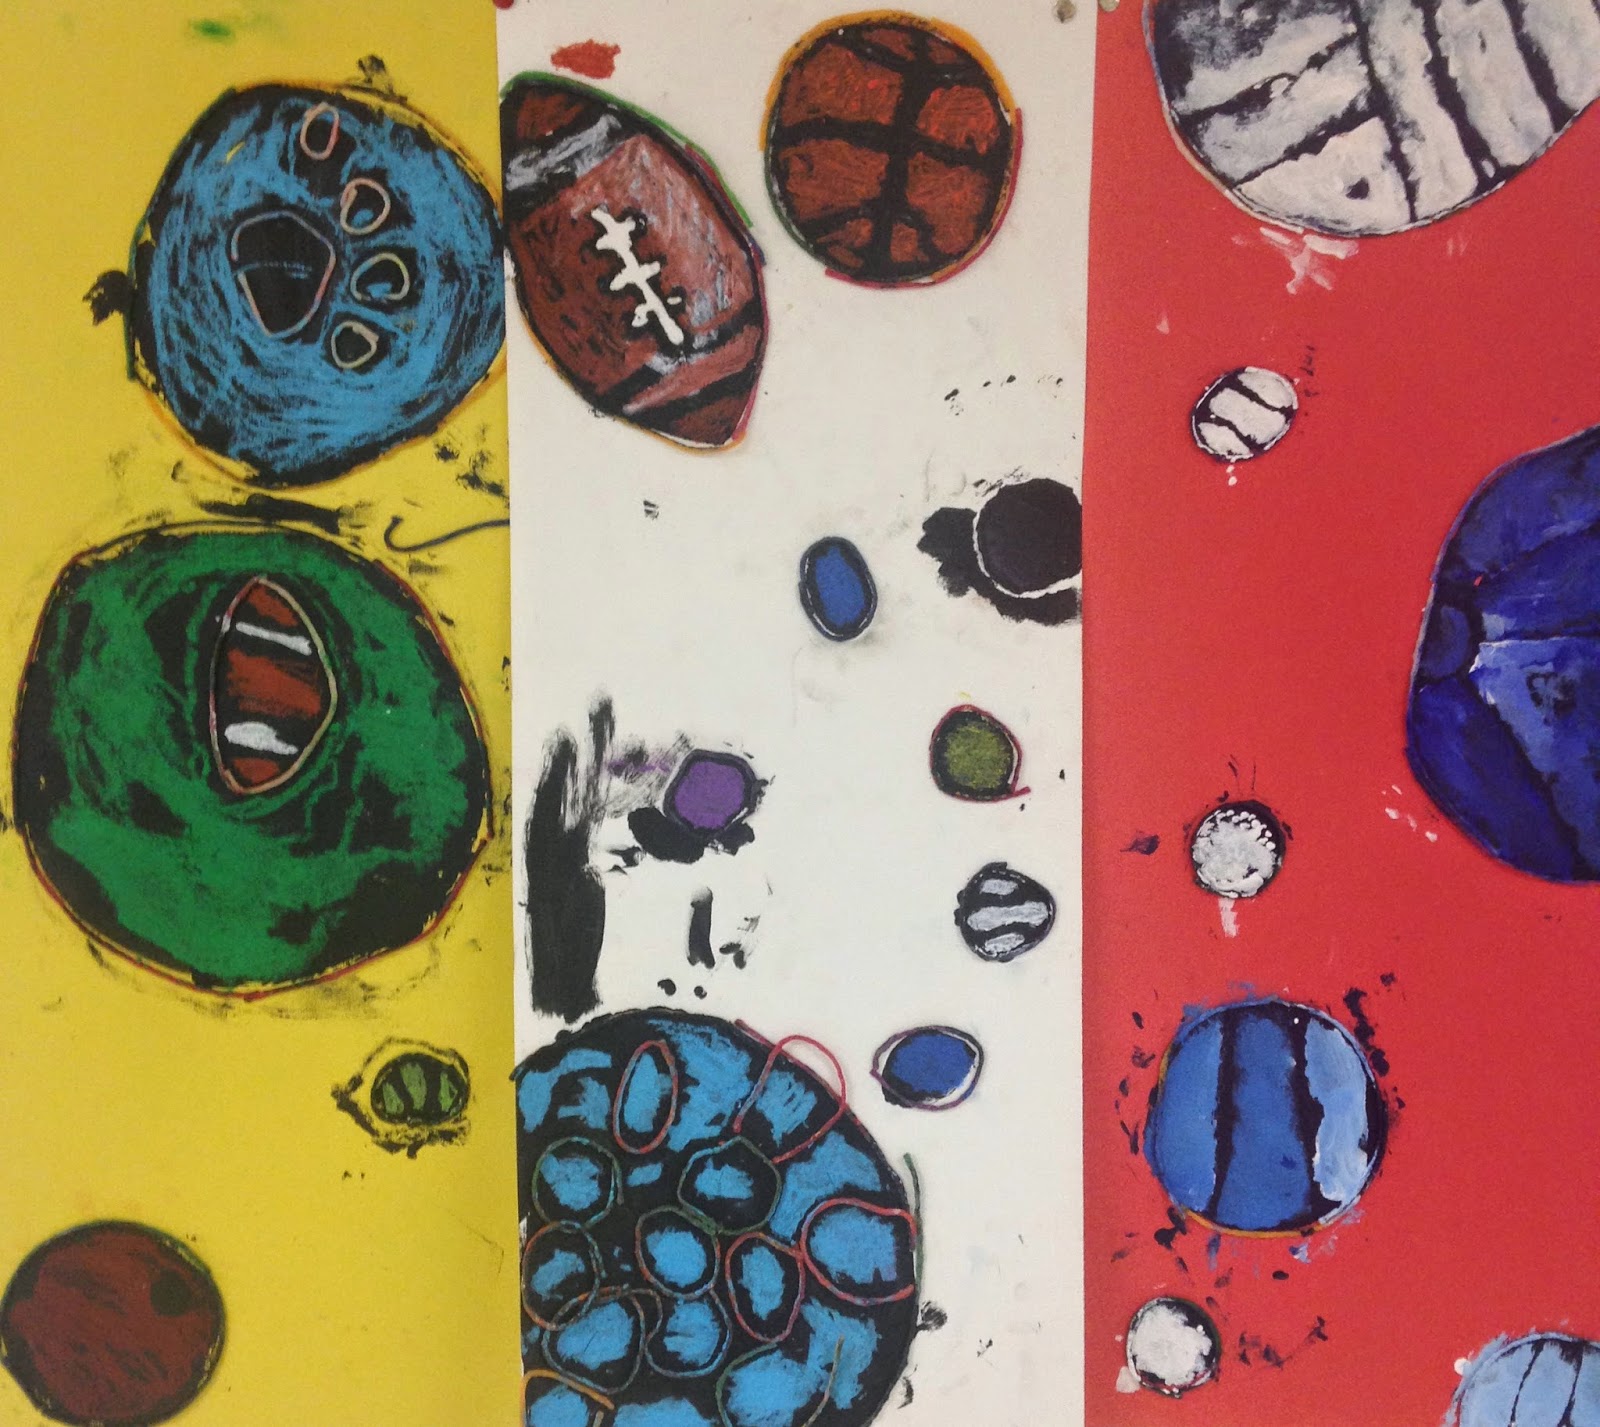
This assignment came about because Coach asked me for help covering his ugly cupboards and I'm all about interdisciplinary assignments.
CURVILINEAR SHAPES are the opposite of the rectangles we worked with the previous week. But we were still building unity through variety of size and unity through repetition of shape. My blind students traced circles with wiki sticks. This provided the tactile boundaries so they would know where to paint. They used black acrylic for the under painting, and then acrylic or oil pastel for the color on top.The fingerprints and smudges come from trying to feel for the dry areas that still needed painting.

Half Face Drawings
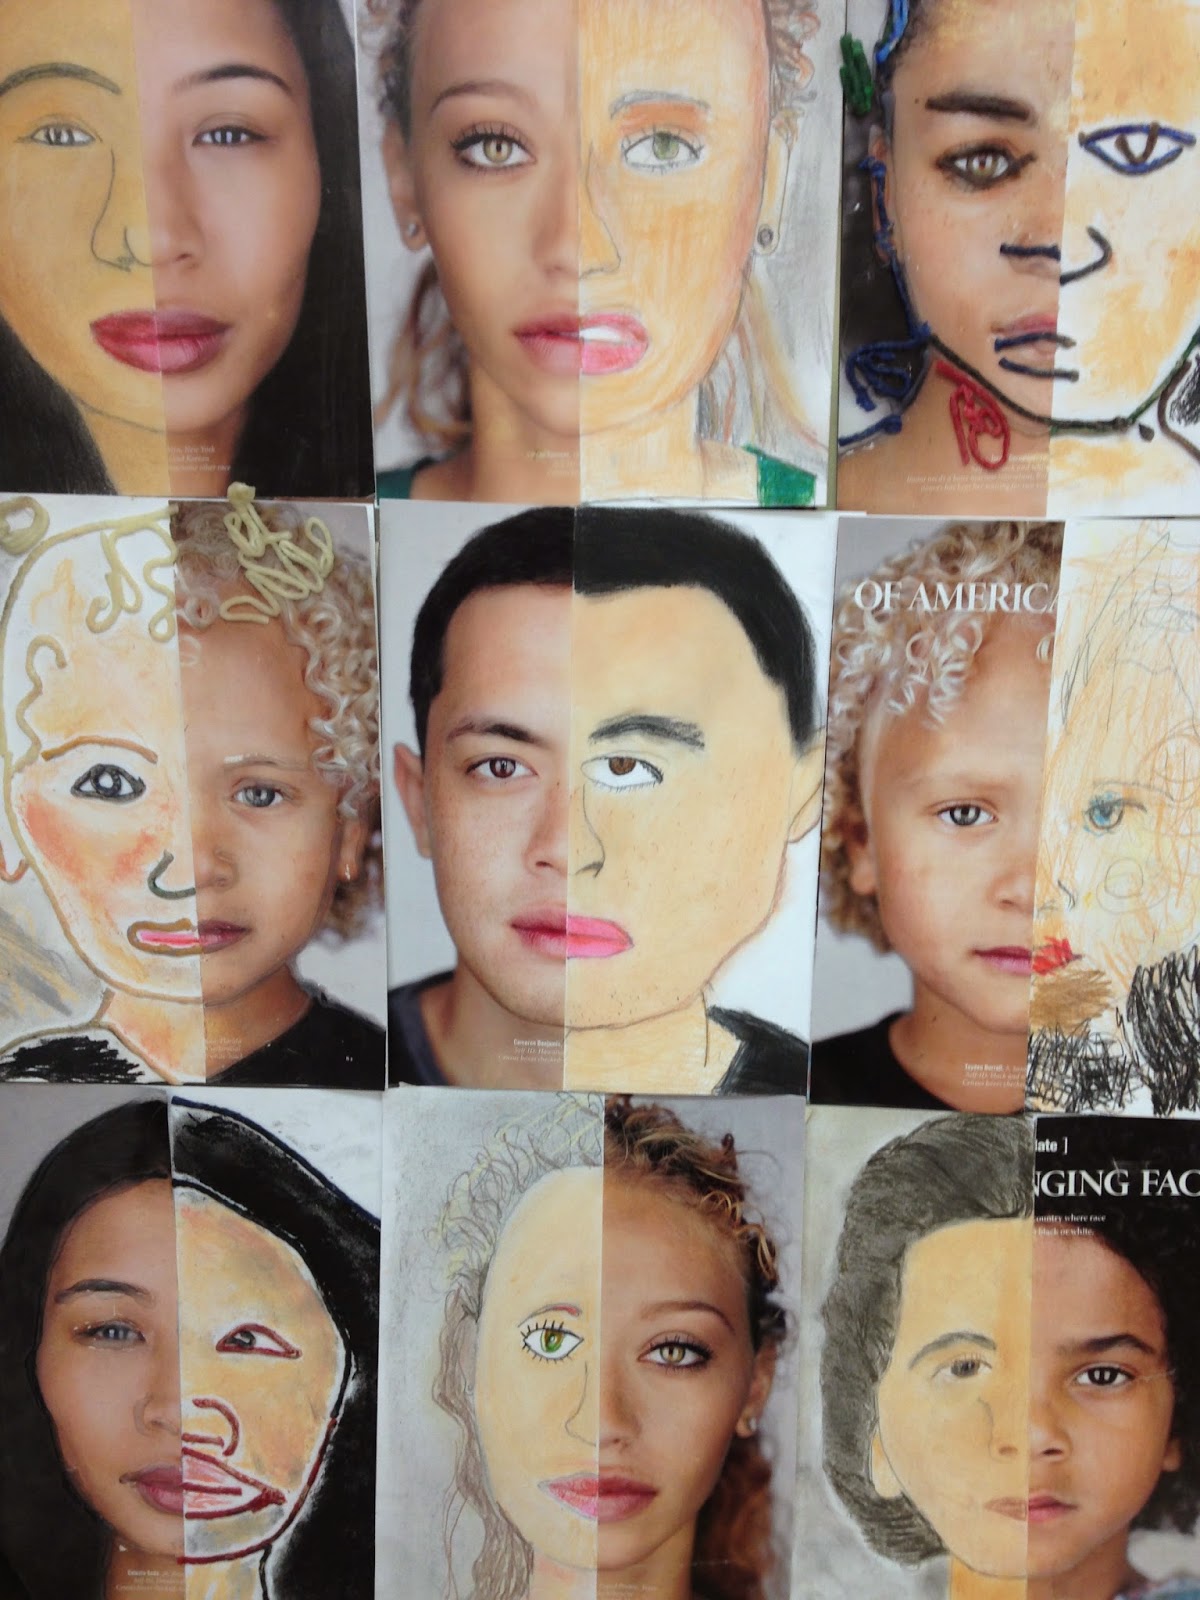
I remember loving this project when I was a kid and have been wanting to try it out with students for a long time. National Geographic had a great article about race in America and I was able to read it and discuss a little genetic science with the students. This assignment was used to teach about NATURALISTIC SHAPE as well as symmetry, proportions of the face, and observational drawing skills like trying to match color. Observational Drawing is hard when you are completely blind, so I traced half the face in hot glue for those students, and after they glued that half face, onto a piece of card stock, they used wiki sticks to create the other half the face. Then they used colored pencils and pastels to color it. Students really enjoyed the process.