Saturday, December 3, 2022

Cardboard Gingerbread Houses & Paper Snowflakes

 Nothing beats edible gingerbread houses for hands-on seasonal craft projects, but when an emergency bulletin board situation arrises, 2D versions can made quickly and easily. Cardboard is the perfect gingerbread color, and white paint is the perfect substitute for piped icing. 

The thing I love most about this simple 30-minute project is the endless variety that can come out of it. It's a great time to talk about parts of a house: door, window, stairs, shutters, roof, chimney, etc. But you can also discuss the importance of shape. A barn is usually a different shape than a castle or a church. The front of a house is different from the side. A rectangle can be a two-story town house, or a southwestern ranch house. Windows can be rectangles, squares, circles, arches. The window size may vary depending on whether it is a store front or a log cabin.  So even though it's an easy and straight forward craft, it brings up such lofty concepts as form and function in architecture. And even very young and totally blind students can choose and paint the house shape before choosing, placing and gluing smaller architectural elements.


Snowflakes are another one of those required childhood craft (see hand turkey post). Some of my students struggle with scissors. Those of us with vision learn so much from observation, but it may be difficult for those who are blind to know how to even hold scissors with the thumb in the small hole and the fingers in the larger hole, thumb up and fingers down, unless someone teaches you explicitly. My students also tend to use the tips of the scissors and close them completely with each snip, when it requires much less effort to slide the paper back towards the thick part of the scissor blades and just close the scissors slowly and partially while maneuvering the paper to make small shapes. For students who scissors are a serious hazard, I just had them fold the paper, which  is a challenge in and of itself. Snowflakes have six points, so getting the 60 degree angle means folding the paper in half, and then finding the center of the fold, making a cone to get complete overlap from the back and two front flaps. Then creasing before cutting the corners will help get a circle with six sections. Some students make the point of their triangle on the folded side and then are surprised when their finished snowflake is two semi-circles instead of one whole. By cutting a V shape on the opened, rounded edge of the triangle, and then cutting a few half diamonds or half hearts on the folded edge, a snowflake can be made with three or four cut shapes. Once a child gets the hang of it, they can become a one-person snow factory and turn a window or tree into a winter wonderland.

Festival of Trees

It's that time of year again! The Museum of Art and Science has it's annual Festival of Trees and my students and I love to! At the Academy for the Blind, we make sure our projects contain a tactile element, but this year, one of my students suggested we incorporate sound. So we made clay bells to hang, and we have a speech device on the tree skirt. It was truly a sensory tree. The museum employees say that children know just what to do when they see the button. They run over, push it, and hear my students wishing them a merry Christmas!
For our 3D snowflakes we used discarded Braille book pages. It's been fun watching my students find words and parts of words on these ornaments that they can read, like little hints on what story may have been contained there before we cut each page up into 6- 3 to 5 inch squares. We folded the squares, diagonally twice to make a triangle, which had three slits cut into the side, parallel to the none-folded bottom, longest side of the triangle, Then we opened and glued the strips to make each of the six portions of the snowflake which were than glued together. You'd probably need to watch a video to know what I'm talking about and there are plenty out there for you to choose from.


We spray painted some red and some green, while leaving plenty of them white. They are supposed to be snowflakes after all, but we didn't want it took look like we just dumped a bunch of copy paper on the tree, and the spray paint helps intensify the Braille's texture. Then we used red and green card stock to make different kids of ornaments, that don't require much time. We were down to the wire
I took about a dozen students on a field trip to the museum to decorate the tree. Our assigned tree ended up being right by the entrance to the museum and it didn't take us long to finish the task. Then we were able to explore the museum.
The hands on exhibits are the most fun, and my high school students are fun enough to participate in things like puppetry, building toys, fossil digs and magnetic tiles. I love the museum; I love my students; and I love celebrating the season!


Clay Bell Ornaments


Making bells out of clay is not as hard as you might think. A simple pinch pot technique is the starting point. I gave my students who were blind a small ball of clay to push their thumb into. By creating a paddle of straight fingers, the thumb and fingers gently press against each other and turned in increments to create even walls and a big enough hollow space for a clapper to move freely. Students rolled a very short coil and attached it to the top of the upside down "pot" and then two holes were poked into the upper part of the bell, and a larger hole at the top of the handle.  Some bells had rubber stamp images pressed into the sides for decoration. Students rolled little balls of clay and poked holes through them for beads, but many of these ended up being too small, or having the hole close up in the drying process.  Remember, clay shrinks, including holes so make everything slightly larger than you want in the end. Plastic beads, jingle bells can be strung on wire and then tied onto the bell through the two holes, but glass beads ended up making the best sound. By spray painting the bells gold and adding some red ribbon, the end product felt much more presentable. Because my students are all blind or low vision, being able to make ornaments that appealed to their sense of hearing made it all the more appreciated. Ring in the season!


Tactile Ornaments


It's easy to make tactile Christmas tree ornaments with young children with dried beans and pasta. My elementary school art students with visual impairments loved making something tactile that they can hang on their family tree. I offered them a piece of mat board cut in the shape of their choice, and then it was a matter of them choosing from bowls of dried foods to glue into place. Some made turtles from pecan shells and beans, others made flowers from pasta shells, but they each ended up with something they could feel and remember for years to come. These can be spray painted silver or gold, or left with the natural colors contrasting with the board. Make the next snow day a craft day and try this simple ornament idea with your kiddos!


Monday, November 28, 2022

Cross Contour Portraits


You would think that students automatically know that our bodies are three dimensional and not flat. But when they draw portraits and figures they always start off with a flatness. I tried to help them get a sense of space by having them draw cross contour lines on flat images, pretending that the person was wrapped in string or had lines projected onto them. This is far less intimidating then doing a cross contour drawing of someone on a blank piece of paper. It's a quick and easy exercise with hopefully lasting results when it comes to creating the illusion of dimension on a piece of paper.


Turkey Crafts

As much as I steer clear from crafty projects with little variation in my Art classroom, I can't help but think that every childhood requires at least some of the holiday staples, like the timeless Thanksgiving turkey crafts.

The painted turkey handprints are a classic. Little hand sizes are fun to document and it's a five minute way to teach children that they can look at one thing (like a hand) and see an entirely different thing (like a turkey). It's about making connections and seeing potential.


For pinecone turkeys, students had a choice of leaves, paper or foam, or real feathers to tuck into the cone. They could cut out foam bodies to glue to the wide bottom of the pinecone that is laid on it's side, or just a foam neck that can be tucked into the pinecone in front of the feathers. Eyes were made from buttons, wood, foam circles or google eyes. Craft foam beaks and legs are glued on to bring out the bird-ness of the thing. Allowing variations in size, shape, and materials helps for students to exercise a little creativity within safe perimeters and allow them to make a quick.


Friday, November 11, 2022

Autumn Tree Tissue Paper Collage


To go along with our autumn leaf rubbings and prints, we decided to make a tree from tissue paper. It's easy to make a brown piece of tissue paper much larger than a glued trunk shape and push it into the glued tree to make the illusion of bark. Students tore tissue paper into small pieces: yellow, red, oranges, and greens, before gluing them into the branches. Some choose only one color while some chose many. Some students had leaves falling from the limbs, or on the ground, while others kept them neatly in the tree tops. This is a quick crafty lesson about fall and there's enough wiggle room that each child's finished product can look different from their neighbor's. Happy Fall y'all!


Fauve Faces

Matisse, was lucky enough to have a mother buy him an art kit during a bout of appendicitis, which caused him to abandon his pathway to becoming a lawyer and step on the pathway to become an artist. Andy Warhol and Frida Kahlo are other famous artists whose careers were born from illness and injury. Matisse and other Fauvist painters weren't actually part of an organized movement, but more of a group of people whose style overlapped for a brief painting that allowed their strong brushstrokes and arbitrary color choices be given the name, "Fauves" meaning "Wild Beasts."

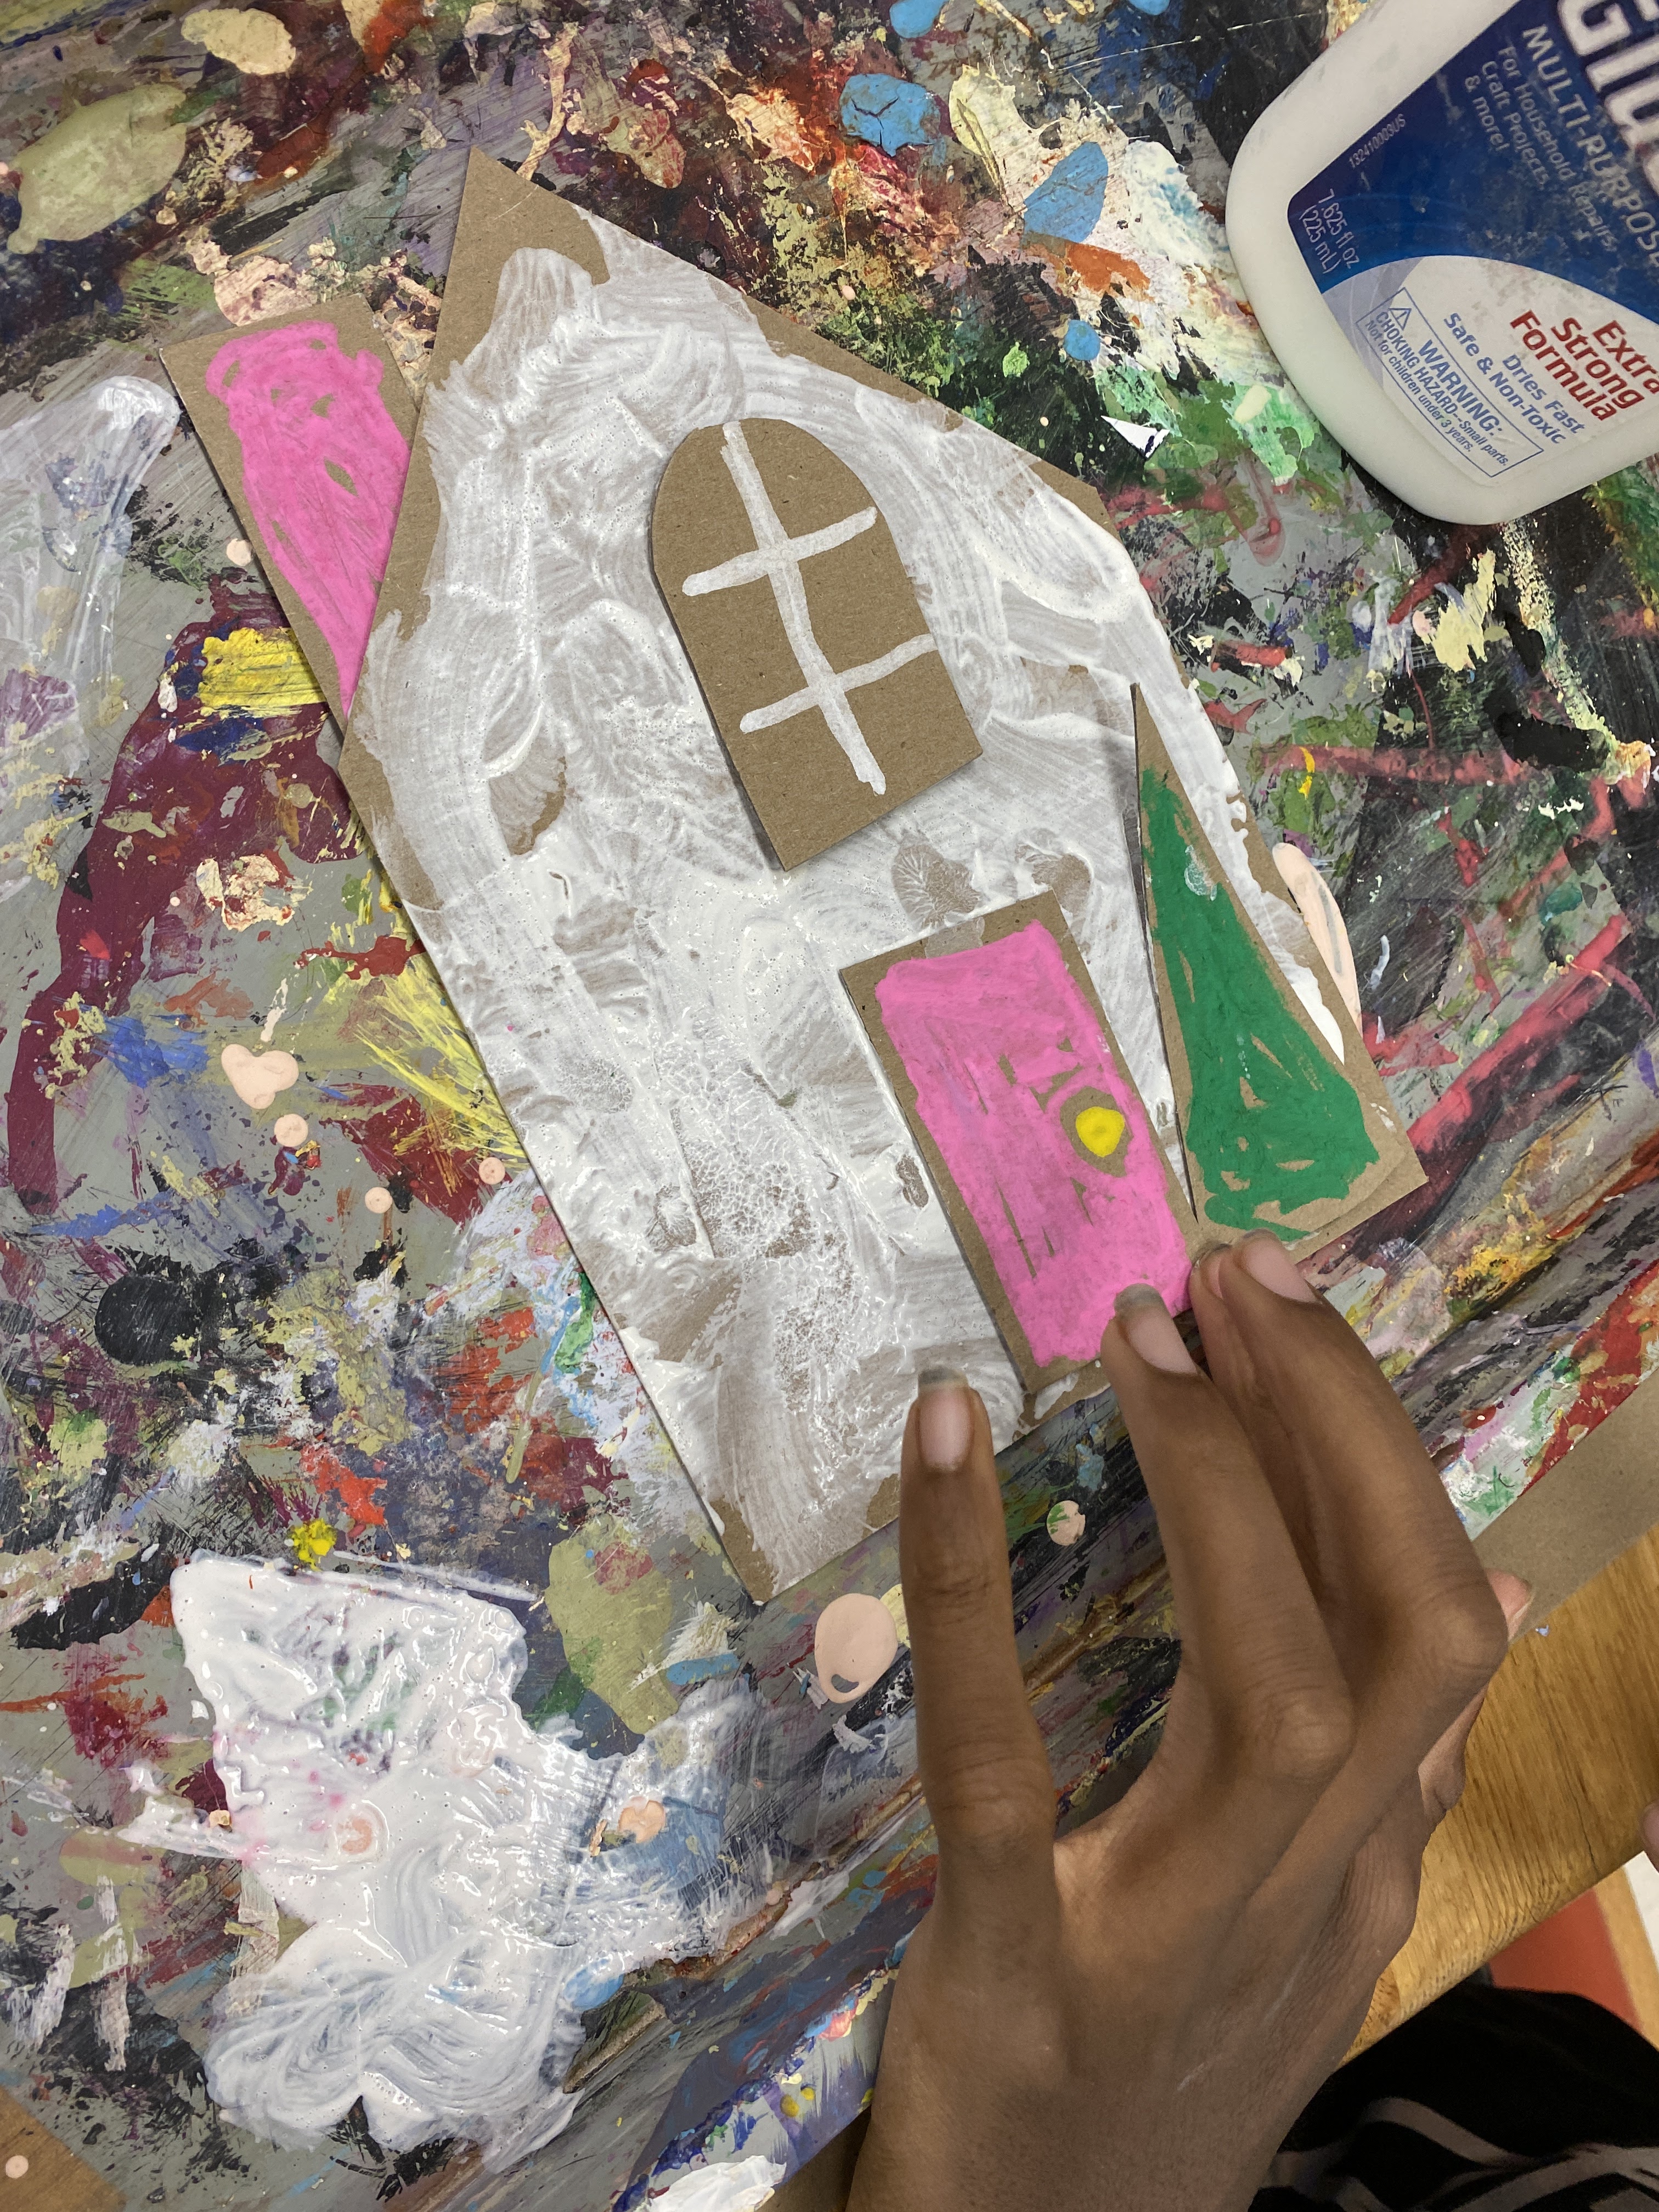
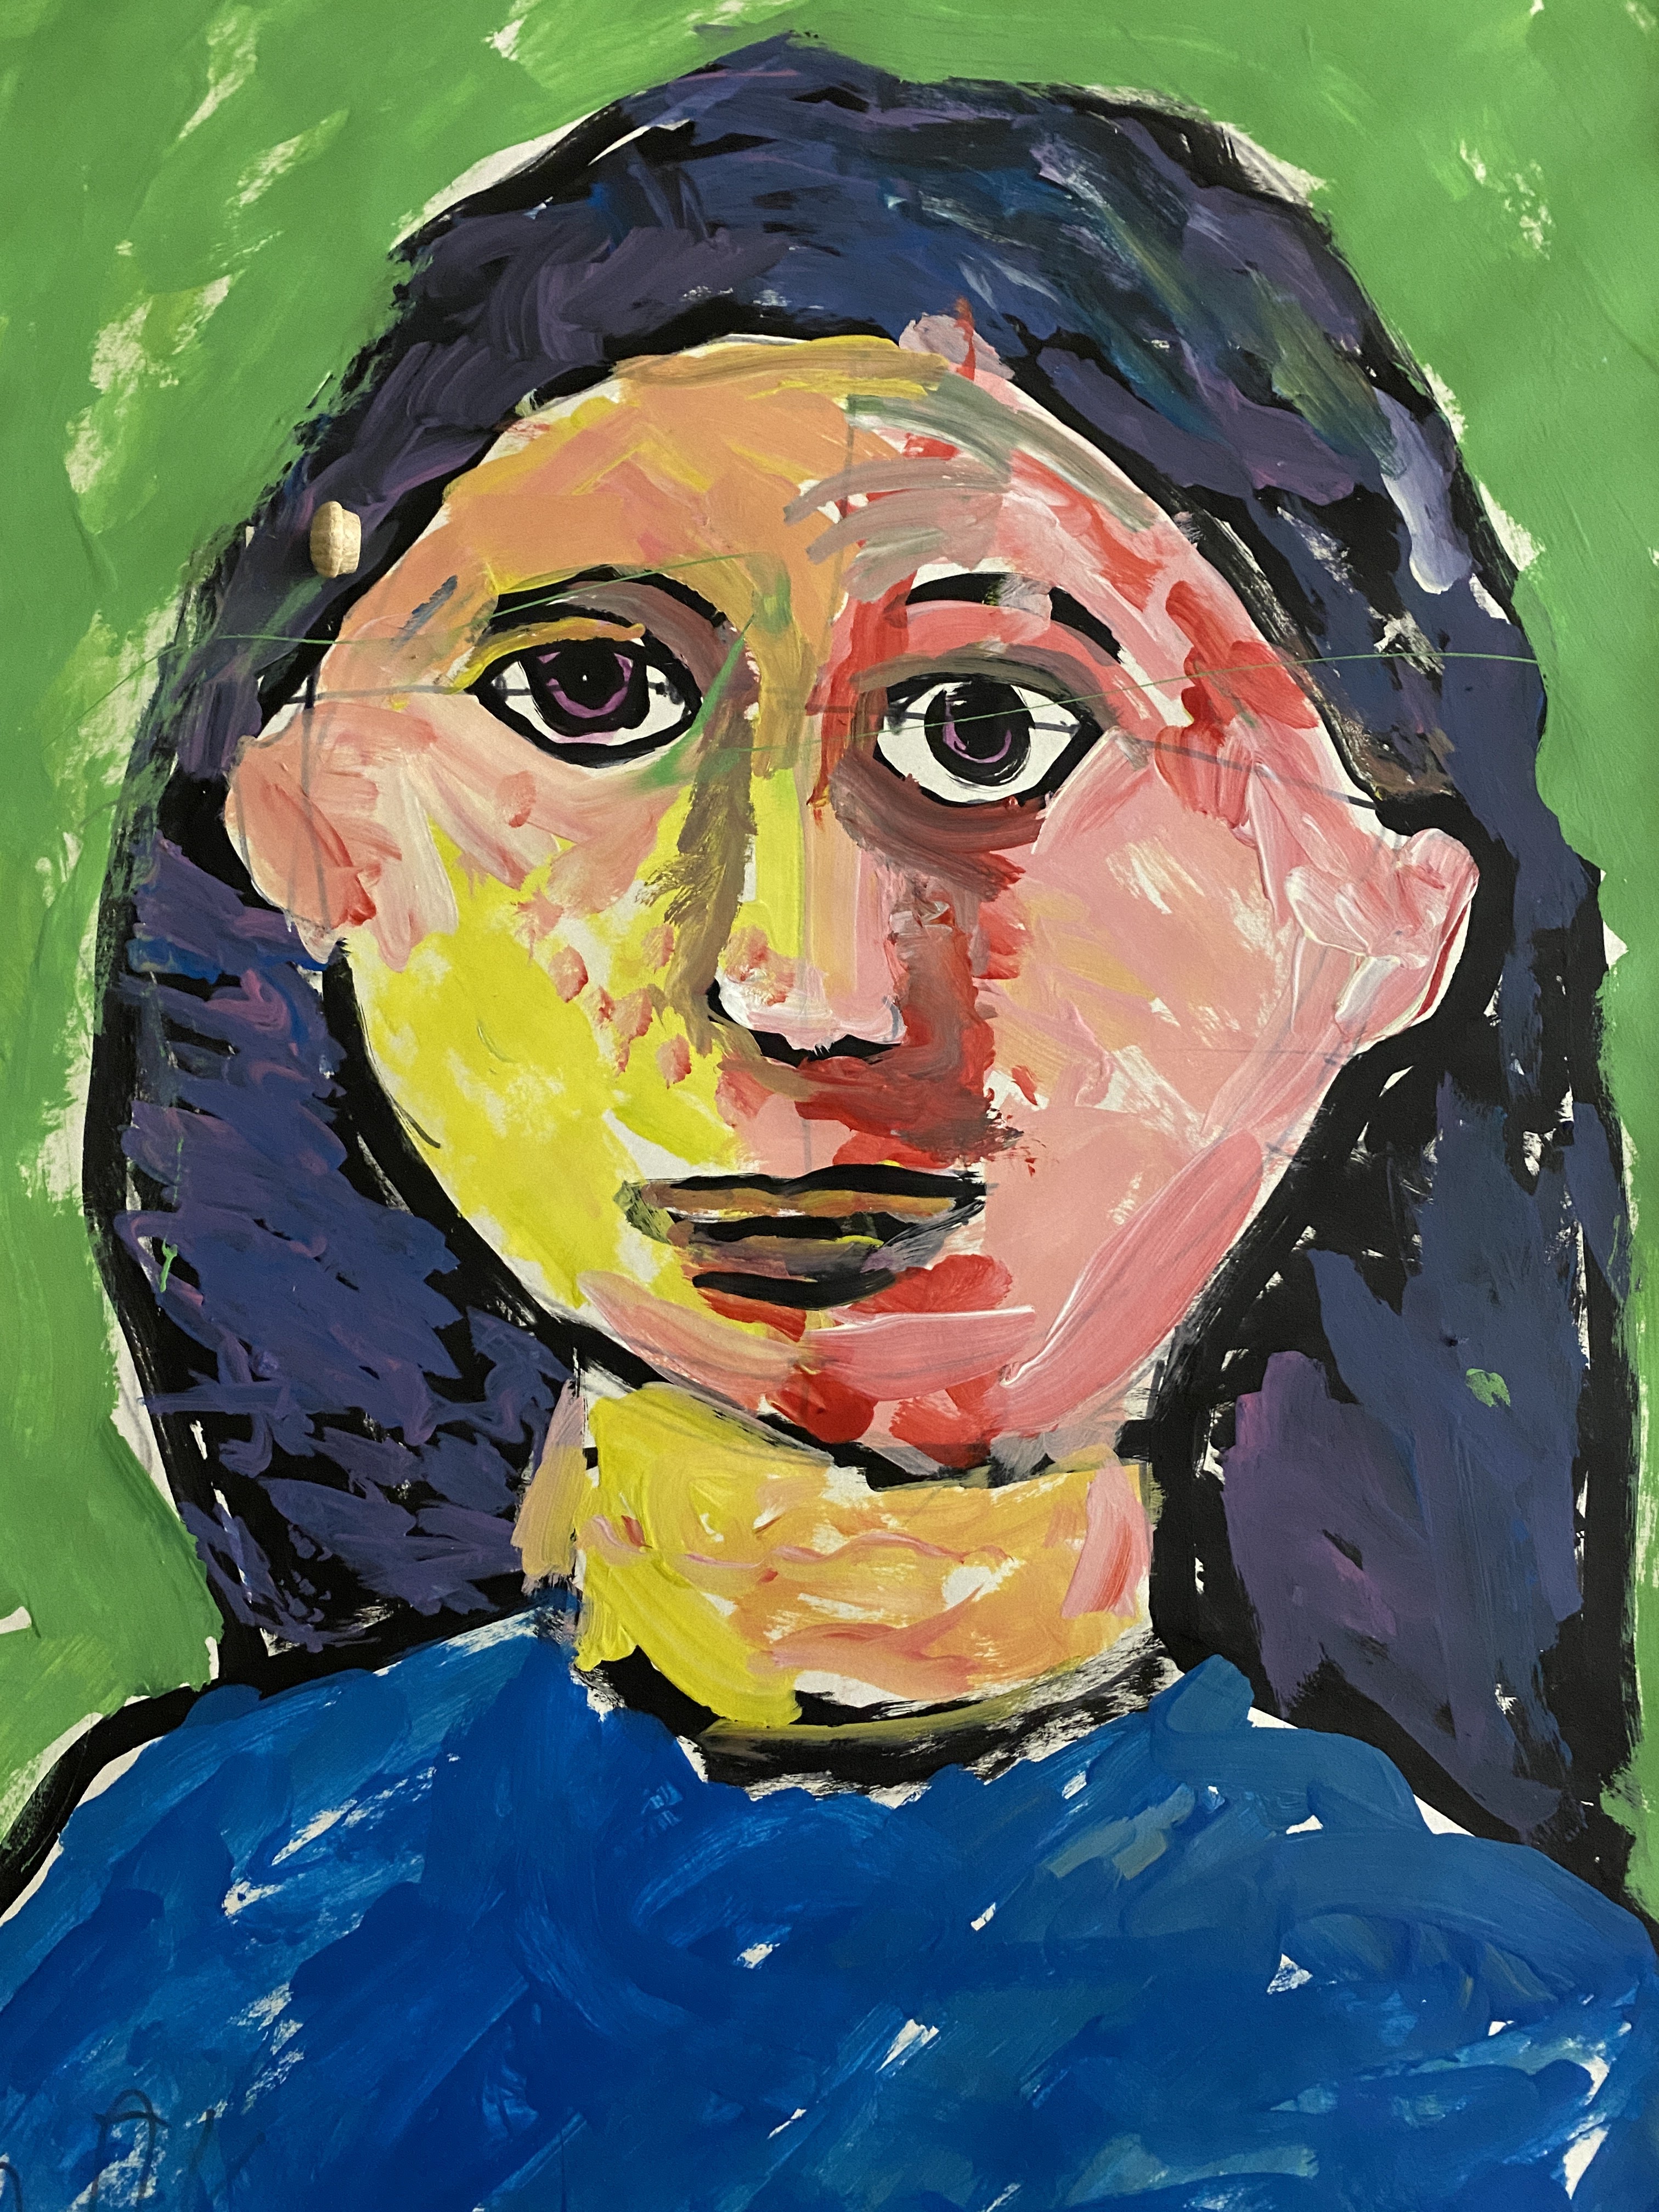
I encouraged students to work large for their Matisse style portrait assignment. They were to use the correct proportions for drawing a face as the starting point, and then try to find a way to use color in an unexpected way. Faces were divided into areas of greens, oranges, purples and yellows. Most of the time it was two main colors on the face, and then the shirt, hair and background were to use contrasting primary or secondary colors.

Students who are totally blind can still participate by drawing with Wiki Stix and choosing colors. I try to encourage all my students to use a lose brush for this assignment. Some want to create smooth, flat shapes of color, but by adding a drop of one color and a dash of another every couple brush strokes, it creates an energy and allows students to try a gestural approach. I'm happy when students try something that pushes them outside their comfort zone and introduces them to a new way of thinking...even if that way of thinking is 115 years old.


Printmaking and Leaves

Autumn is the perfect time to do a cross curriculum lesson by marrying printmaking and leaves.  I began the lesson with a 5 minute video about why leaves fall from the trees as the days get shorter in the fall (hint, it has to do with chlorophyll and photosynthesis). Then we took a hike around campus, touching bark, identifying the trees and collecting leaves and pinecones as we went.  

Our first art assignment, used the leaves we collected to make rubbings. The students would arrange their leaf or leaves with the vein sides up, lay a piece of copy paper or newsprint on top and rub the paper with the side of a crayon to reveal the texture and shape of the leaf. Rubbings are a simple form of printmaking and most households have all the supplies on hand. 
The second project was to make leaf prints by painting with tempera or acrylic on the vein side of leaves and then turn the leaf upside down and rolling it with a brayer or rolling pin. You have to be careful not to get uneven pressure through things like finger prints and it helps to place a piece of paper on top of the leaf as well to keep the roller clean. The same leaf can be used multiple times, although if more paint needs to be applied, use it sparingly so as not to fill in all of the gaps between the veins.


Finally we used stencils of various leaf shapes. Students placed a sponge in yellow paint to pat lightly, covering the exposed shapes. A sponge with blue paint dabbed around the edges creates green, and red paint sponged on the wet yellow creates orange. So students are learning leaf identification (biology), mixing of primary colors to create a secondary, (color theory), shape and texture (elements of design), and three different printmaking techniques (techniques and processes), in 3 hours of Art class.
Help the children in your life slow down and enjoy their fall through art making!


Saturday, November 5, 2022

Modifying Portrait Lesson for the Blind

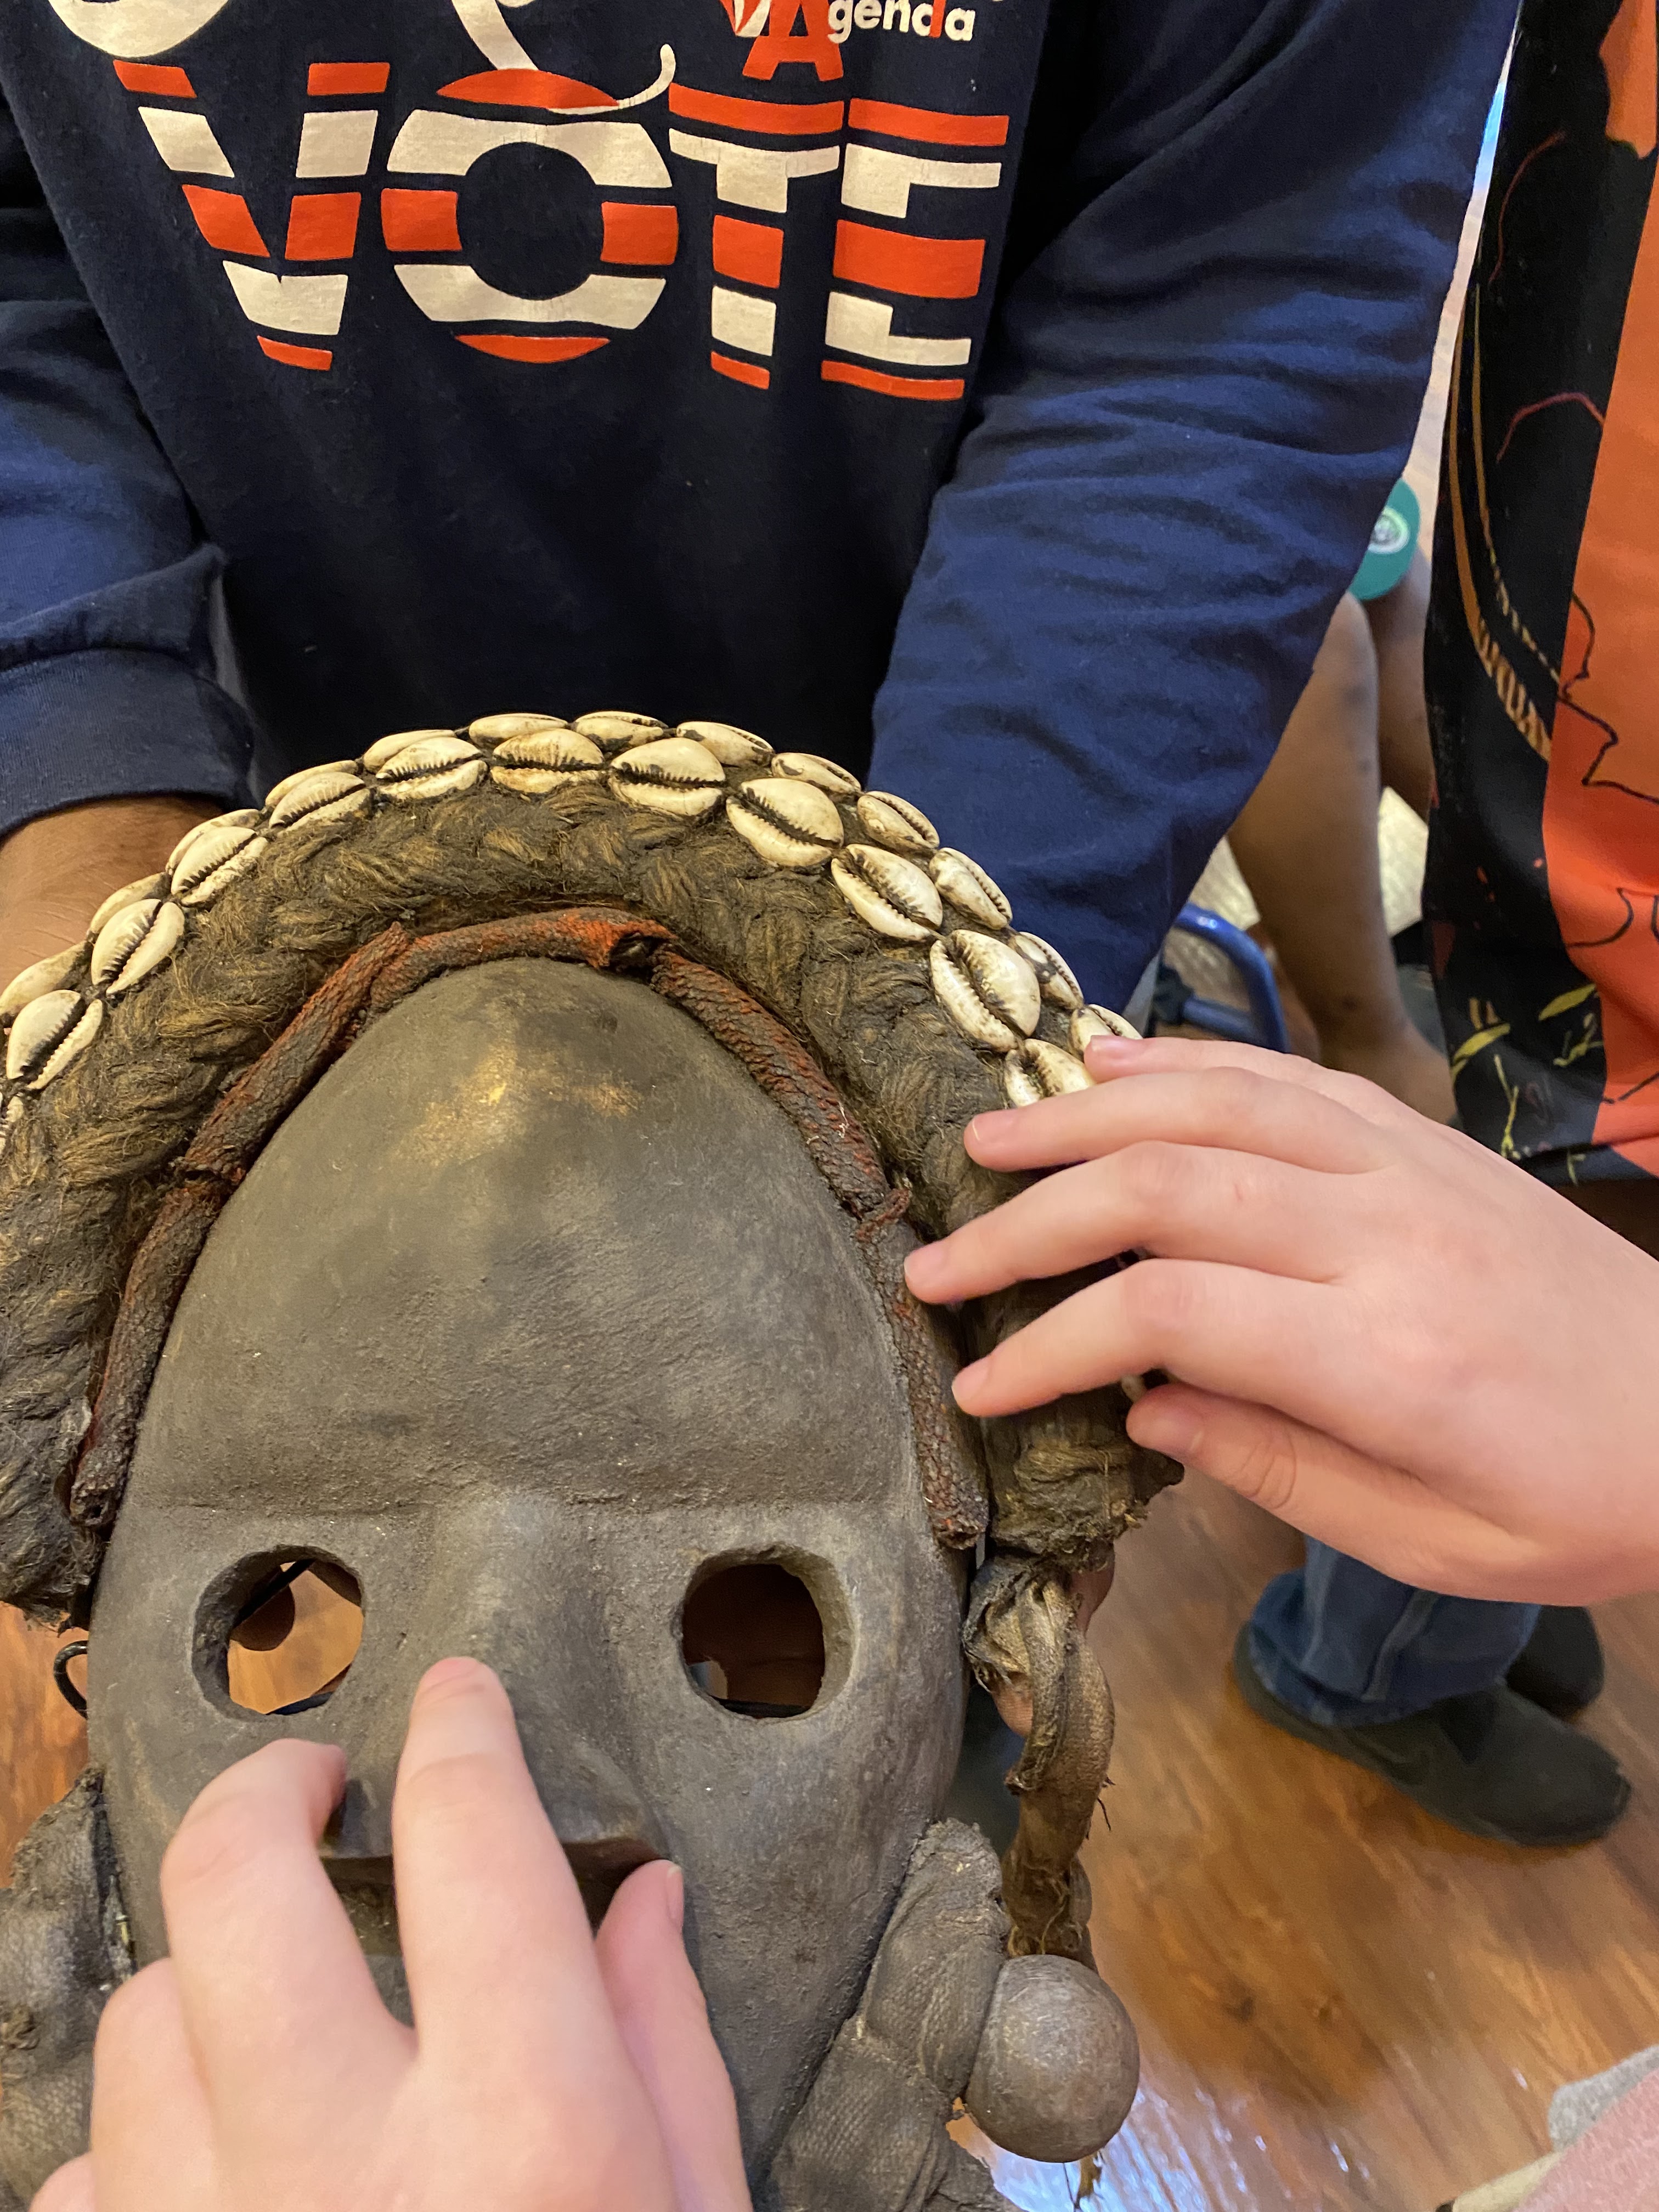
Tactile Doodle and Wiki Stix make it possible for my students with no vision to do the same portrait assignment as my students with low vision. For this project students take an oval, draw the line of symmetry, and divide it into fractions to make sure the face is proportional. Some students have enough vision to see up close or with magnification devices, but for those who need the art to be tactile, Wiki Stix are the easiest thing to find. The downside is that they don't always stay on the paper permanently, and they may need to be cut into smaller pieces for smaller features. The Tactile Doodle is perfect for students with sensory issues and you can draw small lines with immediate results. The drawback is that you can't color or paint on the plastic sheet that you need to make the raised lines, and the sheets are expensive.


Wednesday, November 2, 2022

Monster Mash Project


 Shape, Color, Size are all design elements to consider when creating a monster collage. Elementary and Middle School students were able to use their imaginations to come up with their own original monster.


Wednesday, October 19, 2022

Alumni Achievement Award

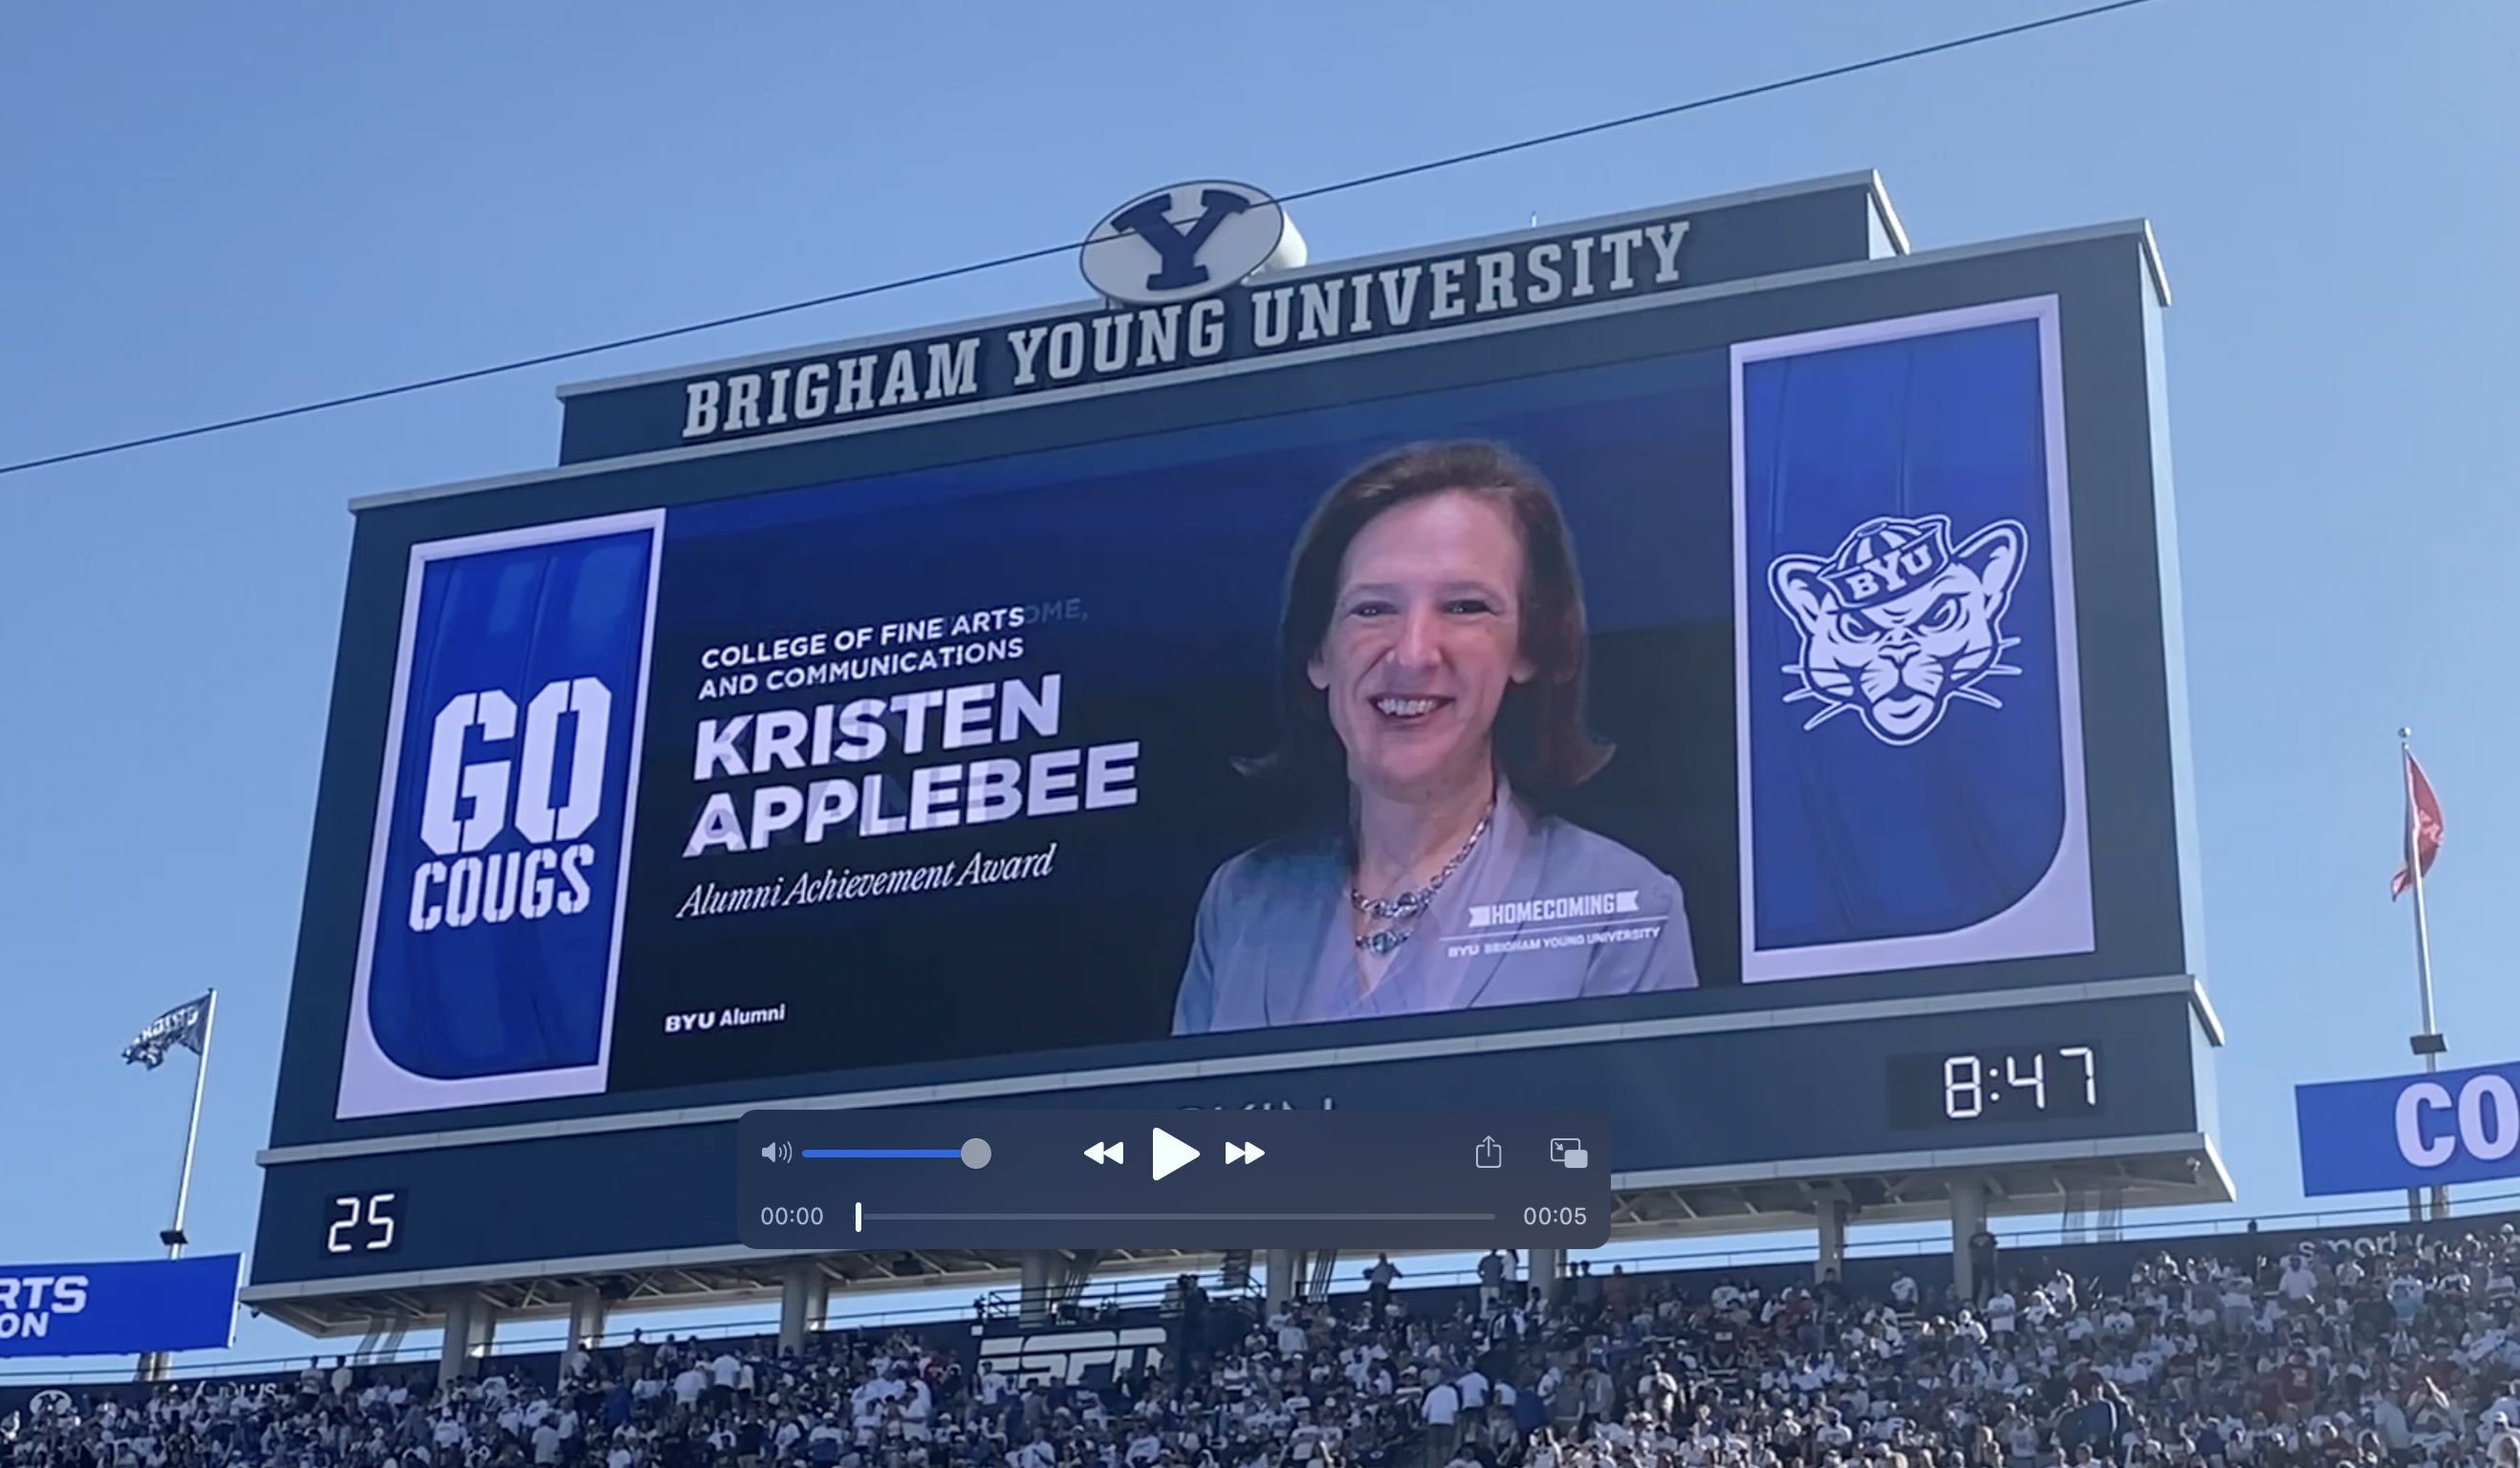
 When Brigham Young University told me I was going to receive the College of Fine Arts and Communication's Alumni Achievement Award, I wondered how they found out about the twenty pounds I lost during COVID quarantine. If that wasn't my greatest achievement, I don't know what was. I didn't ask questions, I just showed up and let them pamper me.

photo by Scott Young

Photo by Scott Young
One of my favorite parts about my trip to Utah, was getting to give a lecture in the Harris Fine Arts building, where I "lived" as a student for six years. It's hard to believe they will be tearing down the building in just a couple of months, to build a new one.
I spoke about my belief that accepting the life calling of an artist is an act of faith. There will be times when you will be asked to do what seems impossible, but if you step up and try, you'll be able to look back with joy at what you were able to accomplish. There were so many familiar faces in attendance, including childhood friends from Pennsylvania, and  students whose parents I knew from living in Georgia and Ohio. 


My old art buddies and professors from 26 years ago were in attendance at the awards luncheon, as well as some family members. The greatest reward was reconnecting with loved ones! (But I'm not going to say "no" to the goodie bag with football shaped fudge).

They gave me tickets to an amazing ballroom dance performance and my daughter and I to run a 5K. It's the second time in my life I'd ever done that, and the first time in 35 years. I beat my high school time by 4 minutes and lost 8 pounds, the last couple of months while training for it. Getting the award changed my life before I even showed up on campus. My husband and I loved our stay at the campus guest house.


A bonus was getting to take my daughter to the homecoming game and watching from the President's Loge. They had some amazing food and a great view of the field. After the marching band did their half time show, I was able to walk onto the field with the other award winners and wave at the crowd.  My picture was also on the Jumbotron. The week was truly an opportunity of a life-time and one I will never forget.


APH Insights Art Contest Field Trip


After two COVID years and an online ceremony, it was so great to finally get to take my students to Kentucky for an in-person APH Insights Art Contest exhibit and awards banquet.

I had five student pieces that got into the show, and was able to take four students, including two of the three award winners. 
It's a thrill for me to take students who have never flown before on a plane. We definitely got our share of ECC (Expanded Core Curriculum) practice. Students with visual impairments are required to learn skills to navigate life, on top of the normal school curriculum. Orientation and Mobility, for example is an important skill that we used a lot: using elevators, escalators, moving sidewalks, buses, Uber cars, planes, airport trains-we did it all! And don't forget the experience eating a fancy meal and knowing which of the 3 forks, two knives, to use first.

While we were in Louisville we took advantage of the Jacko-o-Lantern Spectacular! All four of my kids were low vision, rather than totally blind, so they could appreciate the lights, and they loved the sounds and music throughout.
The tour the Kentucky Museum of Art and Craft is always a treat, as we get a guided tour with great audio description. I hope Kevin never retires.


And of course, the tour of the American Printing House for the Blind is interesting. We see giant rolls of Braille paper that stretch 3.2 miles long, watch someone recording an audio book, and get to peruse the museum that includes Stevie Wonder's piano and Helen Keller's desk.

It was a fantastic trip and will inspire other students to work hard and try to submit top-notch art pieces to be able to attend in the future.


Wednesday, September 28, 2022

My Journey In Art Exhibition

My friend and colleague, James Caldwell, has his hands in just about every good cause there is in Macon, Georgia, so I'm not surprised that he donated an entire gallery of Art to the Harriet Tubman museum. I was there for the special luncheon where he received the Medal of Courage, and he was there to lead my students through his exhibition: My Journey in Art: Selections from the Collection of James Caldwell.


The Harriet Tubman Museum houses a wide range of art, from folk art to contemporary pieces. They allowed our visually impaired students to handle artifacts from Africa as well as inventions made by African Americans. We saw music memorabelia as well, such as Jimi Hendrix's guitar and Little Richard's boots.


The ten minute drive made for a quick field trip, but I think our students were happy to experience a wide range of displays and a personal tour by our very own French teacher.

Friday, September 23, 2022

Relief Sculpture with Found Objects


Playing with blocks is one of the first ways a child learns to play and create. Architects and artists never outgrow the activity.  For our study of Louise Nevelson, I had my students create assemblage sculptures using found objects. Each student went "shopping" at my table full of wooden blocks, stretcher bars, popsicle sticks, and etc. They arranged their items in three different ways, documenting each one with a photograph so that they can discuss the strongest parts of each one and be more intentional with their arrangement before gluing it together.
Then they painted their sculpture a solid color. Some students chose one of Nevelson's preferences of either white or black, but others choose orange, purple, or blue.

A handful of students donated their piece to be part of a large collaborative sculpture. Arranging each individual relief sculpture into a larger structure and filling in the gaps in a way that created a unified piece was a lot of fun. We used wood glue for the small pieces and screwed large boards together. The finished piece was spray painted black, with some turquoise highlights to accentuate the shadows. It's nice to have a 4 foot sculpture that my blind students can experience through touch, that teaches about form, the use of tools (as part of our larger unit on building) and iconic sculptor, Louise Nevelson.