Thursday, April 28, 2022

Hat Stands

 My students made hats as part of a Careers in Art: Costume Design assignment that also served as a "Let's make hats to use for our Wonderland Prom!" project.  That was a couple of years ago, and now that we're finally going to use the hats as table center pieces, I thought hat stands were in order. You don't want to just have a few hats of the same height sitting next to each other, you want to create some negative spaces and differing heights for visual interest.

I used some dove candy canisters, which were already gold (under the paper wrapping), and a poster canister, which I painted gold, and glued a cardboard top to each. Done. I also found a little wire spool, which was an easy, mini hat stand once it was painted. 

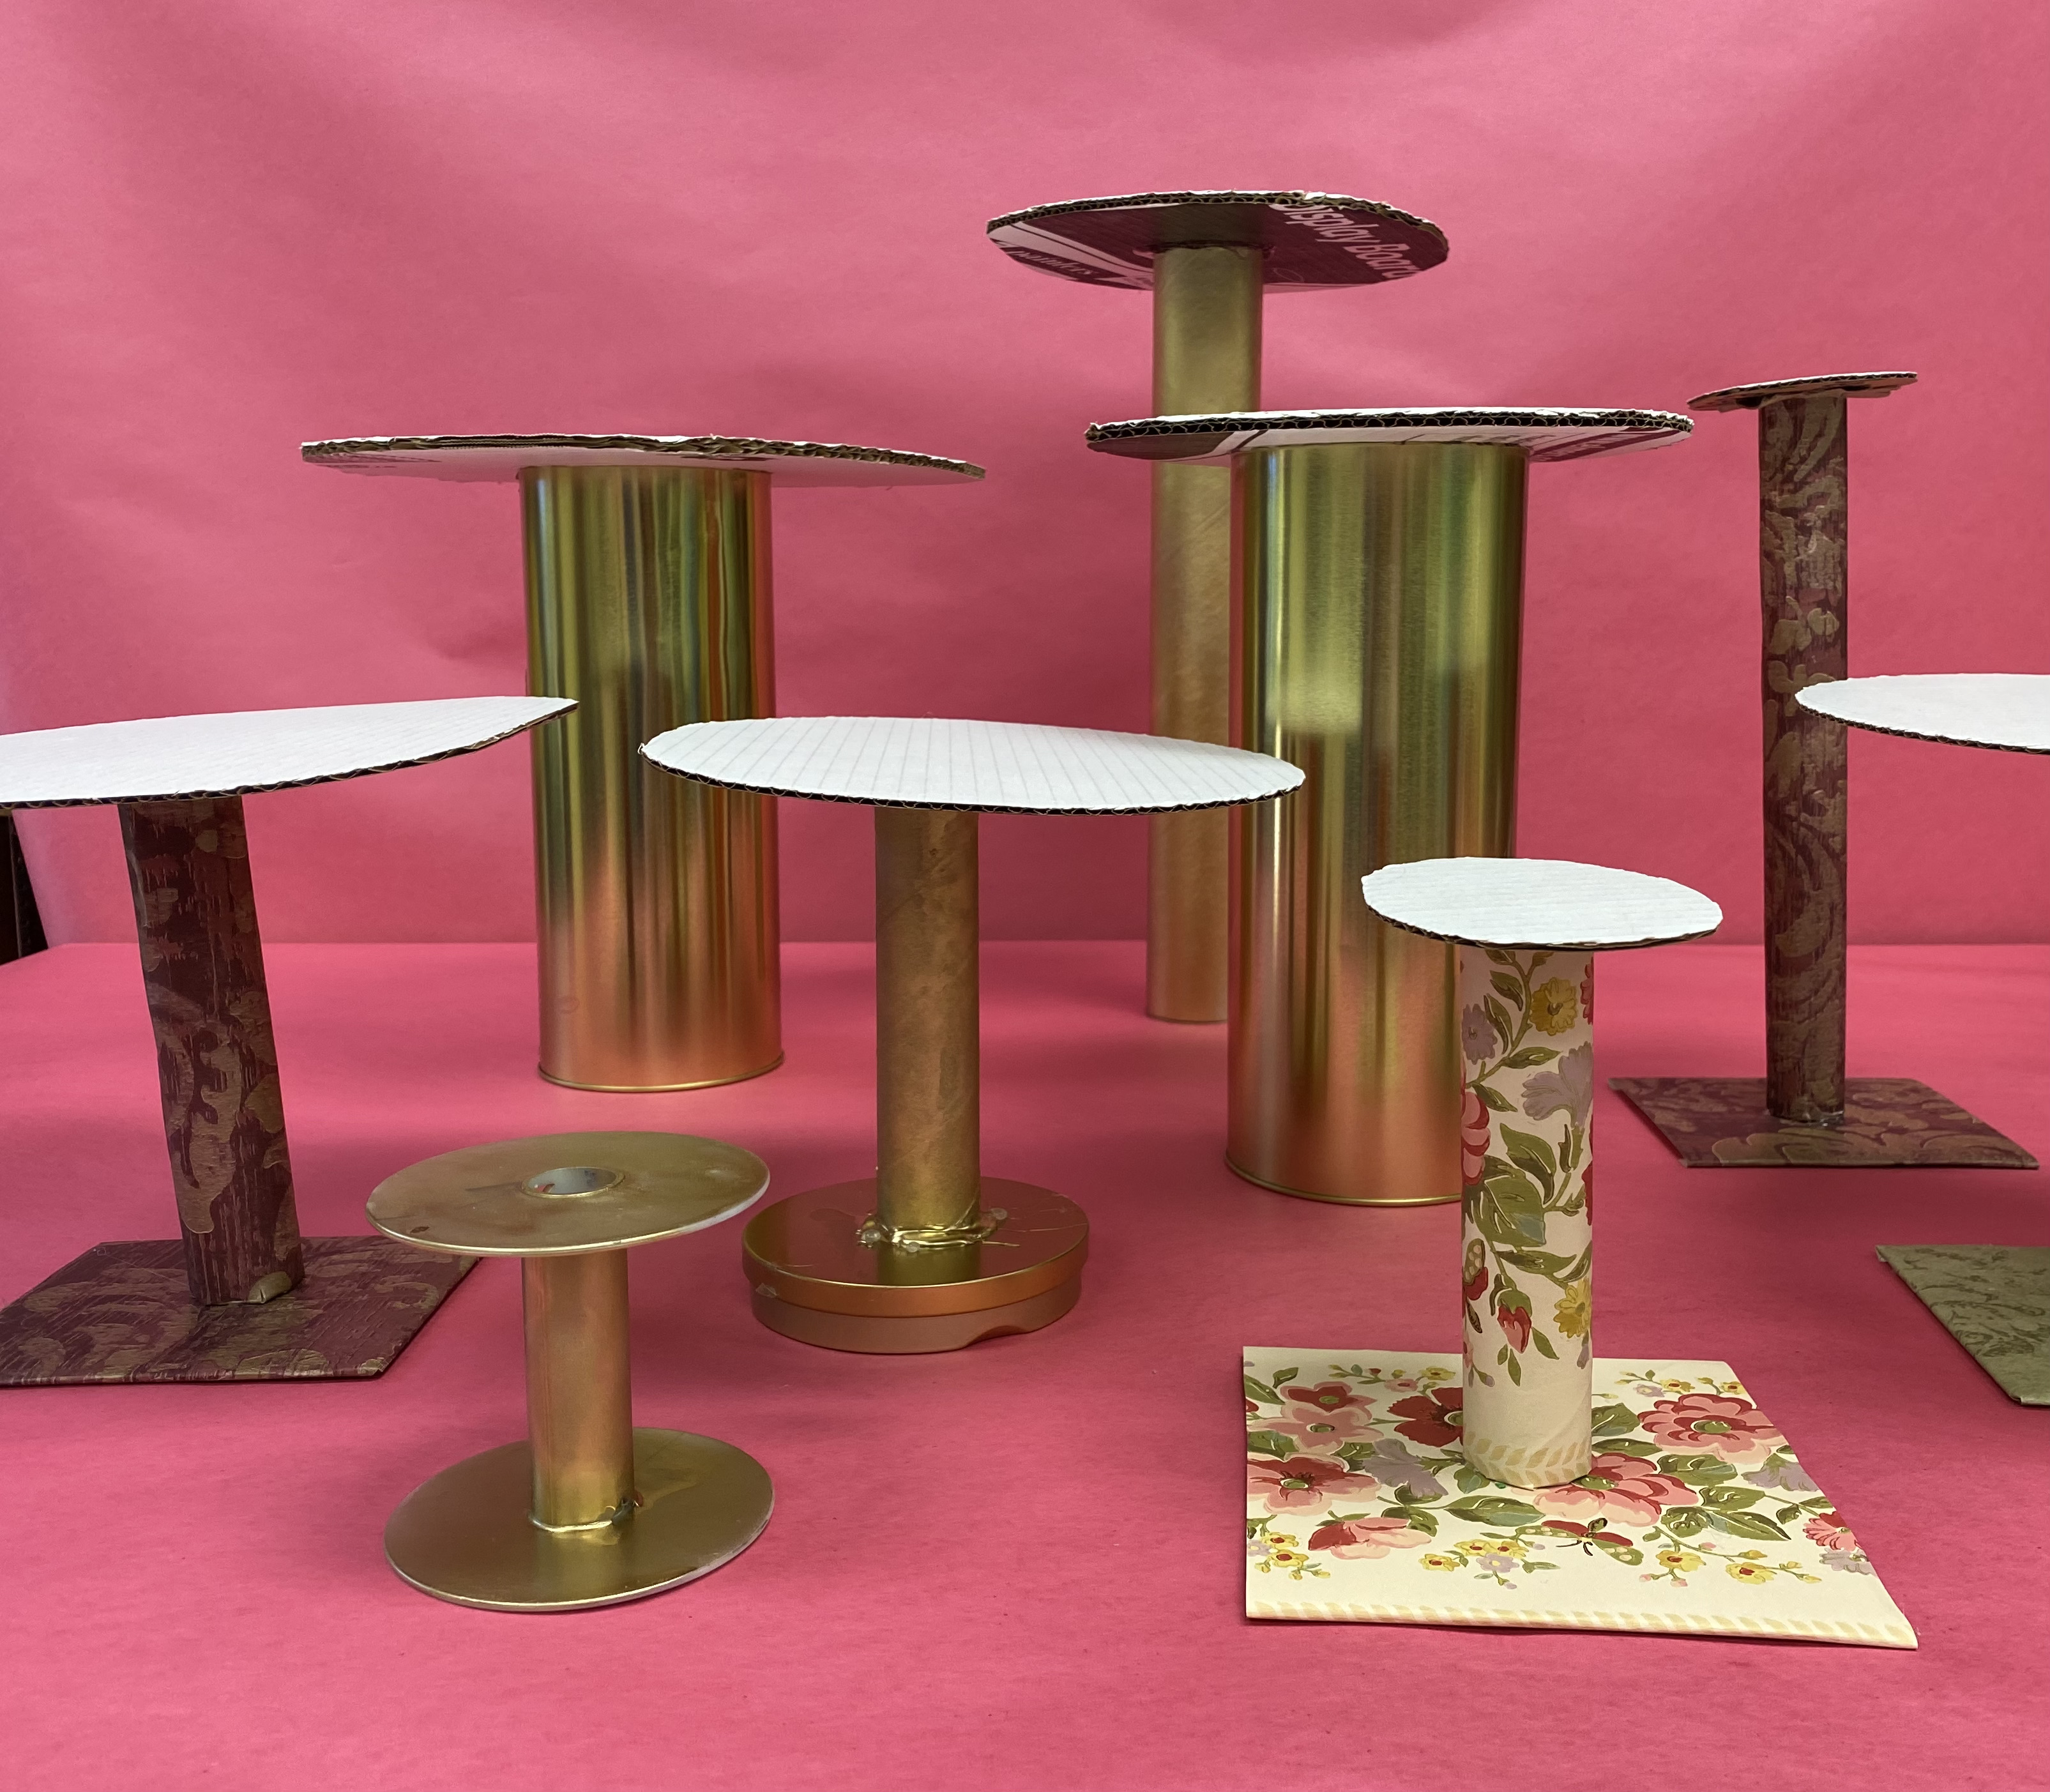
For the rest, I wrapped paper towel tubes (cut to various lengths) with vintage looking wall paper. Wall paper was also wrapped around square pieces of cardboard for the base. These are a little wimpy, and so you need to be sure the paper is securely glued to the top of the cardboard base, so the tube is more secure. I also filled the tubes with sand to give it some weight and stability. The trick then is to put the glue on the top of the tube and attach the cardboard top without lifting the tube upside down to attach it, or you'll have a big, sandy mess. Another tip is to cut vertical slits in the top of the tube, and fan out the tabs like flower petals so the hot glue has more area to stick to the top. I didn't worry about  decorating the top since they'll all be covered with hats, but a little lace around the edges might be a nice touch.

Tuesday, April 26, 2022

Make Time for Time: Pocket Watch Decorations

 My set design class has been very busy the last few Fridays since the Spring Concert, making prom decorations. The theme is: A Night in Wonderland!  The class of 2020 picked the Alice in Wonderland Theme, but COVID canceled that dance, and we've had giant chess backgrounds and chess pieces waiting in storage since then. (You can go back and see my blog posts about how to make those things.)

In the meantime, I'll fill you in on some of the new decorations, starting with the famous pocket watch that the white rabbit was obsessed with looking at.

I kept large white cardboard scraps to cut out watch shapes and paint with gold spray paint. I figured it would be easier to glue a white watch face on top, rather than try to keep the white part white safe from the paint to draw or paint the numbers and hands on after the paint. Then I realized that printing out various watch faces from clip art, would be easier yet. And FINALLY, it hit me that using gluing two plates is the most easy solution yet!  It also gives the illusion of being a real, 3D pocket watch. I found 20 clear plates in my cupboard,  so I painted them all, hot glued them together with a little loop and windy thing (that I did cut out of cardboard), and I glued the watch faces to the front. It took mea little over an hour to do it alone. Print, plates, paint, and glue-it's that easy!


Soapbox Derby


I love seeing students outside the classroom, so it was fun to work with them on a Saturday in April to participate in the soapbox derby. It was an unusually cold day so we bundled up and brought hot chocolate, but we held our own in the competition and it was fun to revisit the car my art students and I painted, after a couple of years collecting it dust during COVID. Memories were made and we ended up making the front of the Sunday Telegraph to boot!


Saturday, April 23, 2022

Pysanky Lesson

When I planned on teaching the Ukrainian art form of Psyanky decorative eggs to my art class, I had no idea that the Ukraine be in the news every day after Russia's invasion. We were able to look at this decorative egg tradition in 1,000 years of historical context from ancient Pagan symbols, to Easter tradition, and to current event stories of fundraising pysanky eggs for Ukrainian refugees. I also didn't know we'd have an April school-wide Eggs-tranvaganza that included egg games and that I'd get 4 dozen leftover fresh eggs to use for my students. It was a trick poking holes in each end, scrambling the inside with a tooth pick and blowing each egg out for hollow egg shells.

The wax resist technique is the same as the Indonesian batik process, except that we are dying eggshell instead of fabric.

You draw with a kistka stylus. Beeswax is melted in the kistka cup which funnels to a point. Thin wax lines are drawn on the egg before dying it the first color.


Then more drawing can be added between each color to follow.

The colors are revealed by melting the wax lines with a candle flame and wiping them with a paper towel.


Classroom Chihully-style Chandelier


I may not have a hot spot and the ability to teach students how to blow glass, we did the next best thing. We created our own version of a Dale Chihully glass chandelier by upcycling water bottles and platic scraps from the laminating machine. Chihully is not only, arguably, the most famous contemporary glass artist in the world, he also has worn an eye patch since a car accident decades ago, and that loss of perifial vision makes him legally blind, just like my students. He works with a team, just like we can work as a team. And he makes large scale art for specific places, which is what we wanted to do for our school

We started with a tube of chicken wire and hung it from the ceiling. We colored donated bottles with sharpies, taped wire to the top to wrap in plastic wrap and then packing tape, colored laminating paper or cellophane. A heat gun helped melt the plastic into shape. The wire made it possible to twist the ends to make the shapes more organic and less bottle shaped. We ran out of laminating paper, and cellophane, and our sharpies even dried up before we were finished, so we ended up using tissue paper for the tips of some of the "tentacles" for better term.

We poked holes on either side of each bottles bottom, and then threaded a wire through the bottle, long enough to attach it to the chicken wire. It's easiest to start from the bottom and work your way up, but it did help to place a bottle or two of each color hire on the wire skeleton just to know how to space out each color. It's been really fun to see people walk past my door and then walk back and come in, noting that they had to see what that amazing thing was. We may not be able to afford a real Chihully chandelier, but our first attempt will more than do.

Thursday, April 21, 2022

Clay Slab Vases and Wall Vases


You don't need a potter's wheel to make functional pottery, a slab roller, or even just a rolling pin will do the trick. Students learned the "slip and score" (or "score and slip" if you want to be chronologically accurate) technique through this process.


 First they rolled a slab. Next they traced a circle around a jar, and rolled the right amount of clay around the jar to match the circumference. Textures or pictures were pressed or carved into the rectangular surface. Then they scratched around the edges of the circle with the needle as well as the bottom of the rectangular vase side. They they painted some slip on the scratches. Slip is clay that is mushy enough to be a thick liquid. Finally, they pressed the pieces together and used a wooden tool to join the edges and cover the seams. It's a project that can be done in an hour long class period for some instant gratification.


A modified version of the slab vase is a wall vase. It's just a shape cut from a slab of clay, with a pocket attached to the front after pressing stamps or objects in the front for texture. Rather than glaze the bisque-ware, my students just dry brushed it with acrylic to reveal the texture. This can be hung on a wall with a ribbon with small dried flowers tucked in the pocket.


Using the Potter's Wheel for Cups and Bowls


various shaped and glazed cups with handles

 We've already worked with clay this year, but I saved throwing pots on the wheel for the craft unit. Some students made cups and others made bowls. Some pressed texture and pattern into still wet clay, while others carved it out of leather hard clay.

Students who were waiting their turn on the wheel, created small dishes or salt cellars, using a pinch pot technique. Some made two pinch pots to enclose small dried, clay balls to make a shaker or rattle. This is a favorite object among my blind student.

In one week, some students made three to four objects, each with a different purpose. It's just the tip of the ice burg in terms of what can be done with clay.


 watermelon bowl

Wednesday, April 20, 2022

Rock and Roll Sets and Student Exhibition


 I started my Set Design class just two Fridays before the Spring Concert at school, which meant I would only have the help of four students for less than 4 hours total to create four 8 foot tall panels and a 6 foot long submarine. I'd have to do some serious prep-work and between class muscle work to get it done on time.


The theme of the concert was "Rock and Roll", so I did intercontinental themed sets, focusing on the British Invasion. It's hard to imagine how many lives were forever changed the night the Beatles appeared on the Ed Sullivan show, after all. I drew up some plans, and when the students got to class, we projected my drawings onto the Christmas snowflake backgrounds and they traced them in chalk. I painted three of the panels during the week. 

The following Friday they painted the fourth panel, traced, projected, and painted the Yellow Submarine. So we finished in time and still managed to put together the Art Exhibit for all my other students in the lobby!

On the big day, I got to participate in an aerobics themed percussion piece performed by the faculty to Tyler Swift's "Shake It Off," which made for a nice send off before Spring Break!

Wednesday, April 6, 2022

Science Museum Display & Video: The Layers of the Atmosphere

Our local Museum of Art and Science received a grant to make STEAM exhibits more accessible to people with disabilities. Who should they ask for help in creating the display? A few teachers, myself included, from the Georgia Academy for the Blind. The middle and high school science teachers (Cheryl Moore and Neel Bennet) picked the subject for our exhibit based on the standards that overlapped in their classes: The Layers of the Atmosphere. 

It was decided that science students would build a tactile display. During our discussions on including sound as a component of the display, I remembered of how School House Rock was so instrumental in my learning as a child. Why not incorporate music? I had a student who was about to turn 22, and age out of the school system. I thought one last hoorah with him improvising on his guitar would be appropriate. So I wrote lyrics to six jingles: One overview and one for each of the 5 layers of earth's atmosphere. Because Kameron is blind, I just handed him a guitar and would say the lyrics to a song multiple times and then have him start singing. It would take a couple tries to get the words right (or close enough), and then he'd try a few melodies. It ended up being about six or seven versions for each of the six songs. I weeded out the ones that were too long or incorrect before classmates voted vote between the remaining drafts for their favorite version of each song. https://www.youtube.com/watch?v=TLhj0-dXPsQ&t=12s

That's when the magic started. Students would create clay or foam visuals and move them little by little using the Stop Motion app on the school iPad. By the end of a very stressful week (since we had other projects going simultaneously), the film was finished.

The museum bought a TV just for our video. They have 80,000 visitors a year, which means almost 40,000 could see our film in person. The science classes did a great job with their wood, chickenwire, and plaster display, each layer of the atmosphere having some tactile element to show what makes it special. I added art and science student interviews into the video to document the process. 

It just goes to show that art can be used to teach any subject and that collaborations between teachers and the community build bridges in which everyone wins!

Tuesday, April 5, 2022

Weaving T-shirts into a Rug


I began my Craft Unit, by teaching students how to macrame friendship bracelets. The next week, they learned to weave. Other teachers came answered my call for old t-shirts, which were cut and torn into strips before being strung on a six foot tall loom. Technique and craftsmanship are the focus skills but there's also life lessons such as "Each time you make a mistake, nip it in the bud. Don't put off correcting it, or you'll just heap more work on yourself later." 

It's also easy to teach formal design principles. Color theory and pattern were obvious things to talk about during the creation of our two rugs. Students chose bright and cheerful yellow greens, pinks, blues and whites for the first piece. For the second, we had more serious colors left: gray, black, dark green and dusty purple. We discussed how color pallets communicate mood in advertisements, paintings, and interior designs.

While individual students took turns on the big loom, the rest of the class made their own potholder on a small loom. Students could express their own aesthetic preferences in their individual pieces and have something a little something for a Mother's Day offering.

Self contained students did a simple pre-weaving project of creating yarn god's eyes. There are so many ways to differentiate and accommodate with weaving projects.