Showing posts with label art projects for kids. Show all posts

Friday, April 25, 2025

Flying Puppets


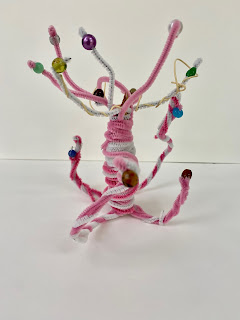
Paper, glue, wire, and a stick are all it takes to make puppets that move their wings up and down! My students loved making these magical moving animals in about an hour.  I found that a bamboo skewer and jewelry works best for an almost invisible results, but we also tried it with supplies that we had readily available such as straws and pipe cleaners. 


For a bird you need to cut out the shape of a bird body, a tale and wings from card stock. The til can slide into the back of the bird using a slit and the wings can either be added with a slit at an angle on the back of the bird, or folded and glued to the back of the bird. A small strip needs to be glued in a ring that fits snuggly around the straw (or dowel, or skewer). I found it works best if you glue two wires or piper cleaners to the strip before winding it up and gluing the end to the paper cylinder.


Then the other ends of the wire or pipe cleaners can be glued to the wings of the bird or butterfly with hot glue. This can also be done with a strip of cardstock that matches the wings and is glued on either end, so that wire can slide into it on the wing. That can be done with Elmer's so that each kid can make their own.

Most students chose to make butterflies. This only required 1/4 a piece of card stock, folded in half and then cut to make two butterfly wings (be sure to not cut on the fold side.) Some students added bodies to the center with wire antennae. At Jim Henson's funeral, there was a cathedral full of loved ones waving butterfly puppets in the air. He is the most famous puppeteer ever. We watched PBS's Jim Henson documentary that was part of the "In Their Own Words" series. This project was a perfect way to bridge our performing arts related projects and our paper toy projects for my Careers in Art Unit.


Friday, April 11, 2025

Making Pinwheels


 I consider making pinwheels as a requirement for childhood, along with making paper snowflakes and cootie catchers/ fortune tellers. It only takes a couple minutes and makes such a spring decoration or springboard for discussions about wind and weather.

To make, you just start with a square piece of paper: five or six inches seems to be a good size. Origami paper works really well. You fold a corner to it's opposite corner to make a triangle and then open it to do the same with the remaining two corners, making a folded X. Cut along each fold towards the center, stopping half way. Than take every other point and glue it to the center. Once the glue dries, use a thumbtack or hat pin and push it through the center of the paper into the eraser of a pencil, or into the end of a plastic straw. It's that easy!

Wednesday, March 2, 2022

Ruth Asawa Project


A student's peppermint tree
Ruth Asawa is an artist whom I knew almost nothing about before teaching my Wonder Women of Art unit. She was a Japanese American who was held in an Internment Camp during World War II. (Dorothea Lange and Ansel Adams from our fall Photography unity documented these camps). She was a student in the historic art hot spot: Black Mountain College where she learned form and worked beside greats such as Josef Albers and Buckminster Fuller. One day in Mexico, Ruth saw a man making wire baskets in the market place, and asked him to show her how. She'd spend the rest of her life making sculptures, many of which were made from the crocheted wire technique. She settled in San Fransisco with her architect-husband and their six children, there are many sculptures that she designed from folded paper that was later cast in bronze. I wish I had kept my eyes peeled for her sculptures when I was in San Fran last summer. I also love how Ruth was a passionate educator and community advocate for the arts.

My students had the task of using any kind of wire they wanted to use. I got bags of Twistees and rolls of copper and aluminum wire, but most students used fuzzy craft sticks (pipe cleaners). They made pumpkins, candles, stars, and water fountains by bending the wire and making something linear into three demential forms.


Thursday, September 10, 2020

Element of Art: Paper Lines


This week, strips of paper helped my students, who are blind, understand how lively and tactile the element of line can be. Fine motor skills are a major bonus with this project. Learning techniques like folding, cutting, or rolling paper on a pencil to curl it, turned my classroom into a temporary occupational therapy room. 

Curled paper strips could be glued curl side, up, down, or on it's side. There could be curls at either end going opposite directions (like an "s" shape) or the same direction (like a "c" shape).  The ends could be pulled a part and glued down like a ringlet or twisted line. And all of those options are just from the curling technique!

A zig-zag line is made by learning how to turn the paper over and under repeatedly, like making a paper fan. A short piece can be glued down to pop out from the base, or a long piece make crooked bridge. Arches could be made by gluing ends of paper to the base with or without folds for the glued down tabs. Another dab of glue could attach the center for a roller coaster like set of arches. 

I found a zipper technique online in which a long strip of paper is folded lengthwise and little notches are cut on one edge up to the fold. Each tab is pulled alternating from one side to the other, and glued to a base so that the uncut side of the strip stands up and can curve around a composition. I had wanted to make a chart of ideas, but I found that kids were inventing new techniques faster than I could keep up, tying knots, flattened twists, the possibilities are practically limitless.

Stick to one contrasting color or use a variety of widths and colors, to add whimsy and bring the piece to life. Ultimately, this assignment opened up possibilities of how we can use the element of line in tactile art.

Saturday, November 17, 2018

Casting Plaster

Plaster casting is not as hard as I thought it would be and it was a perfect tactile project for my students with low to no vision. I took them on a walk around campus to pick out leaves and berries that they might want to cast. Some chose to use tools and stamps to create texture into their slab of clay however. Once we pressed and rolled shapes and lines into the clay, we placed it in a pie tin, as though it were a crust. 

 The powder Plaster of Paris is added to water in a one to two ratio.  It gets thicker with time, so we worked pretty quickly and made sure it was about the consistency of a runny pancake batter.  I thought if it was really thick it would be stronger, but it made it crumbly and hard to manage.


Once it was poured into the "pie crust" I took a wire and bent it to make a hanging loop. This will make it easier to hang from the wall, so it is important that the loop is at the top.

After an hour or two it was set. We flipped it up side down and pealed the clay away from the plaster. Of course red Georgia clay is not the first choice for this project since it is hard to get the dirty look from the pristine clay, but we worked with what we had, and once it is painted it won't show. This project can be used for a child's hand print, rubber stamp lettered words or ways of preserving nature. It was also a perfect way for us to create relief sculpture using a new medium and technique.


Friday, September 25, 2015

Paul Klee Water Color lesson

One of my college professors described a Paul Klee watercolor as "perfect." That may have been the only time I have ever heard a work of art being described as such, and it really made an impact on me. Paul Klee was a Swiss/German artist who was part of the Blue Rider Group of painters and later became a teacher at the famous Bauhaus School. In 1937, when Hitler had his famous "Degenerate Art" exhibit, Klee was included on the list of artists to be ridiculed. He fled Nazi Germany to Switzerland where he painted the remainder of his days. He was an accomplished musician, a lover of nature, a master draftsman and teacher. His effort to reduce things to the very essence and provide balance and harmony, is something I really admire. I also have a nephew whose middle name is Klee. What's not to love?

I began Klee week in my classroom with a documentary on the life of the artist. I discussed, with my students, the various styles his work took over the years and the variety of media he used. Next we focused on a few water color paintings and looked at the things they had in common: the vertical and horizontal lines, arrows, color harmony.

Each student created their own compositions, some using grids, others using symbols, some using horizontal lines broken up by a few vertical lines, or arrows.

For those with no vision, I would follow their directions and draw lines on the watercolor paper using Elmer's glue.

For some of the low vision students, I would reinforce the lines they drew themselves with hot glue to help them stay within the shape boundaries. My low vision students tended to mix the cakes of color, muting the clean, bright colors, which turned out to be a bonus. I love the earthy tones they created. While no one will probably ever describe my students' work as "perfect," I think there is beauty in the imperfection, and I'm glad Paul Klee's work could inspire them to make something of their own.