Showing posts with label tactile art for the blind. Show all posts

Friday, December 26, 2025

2025 Winter Student Art show


Our December student art exhibit was a hands-on experience since most of the visitors were blind. It's pretty rare to to to an gallery or museum where touching the art is allowed, much less encouraged. Teaching Art at the Academy for the Blind has taught me that for these kids, "you see with your hands, not with your eyes," and so most of the assignments from this semester were relief sculptures for tactile image projects.
We had a table in the middle of the room for ceramics items and hand-bound books, just waiting to be handled. Text was often in Braille, and some of the images were pop-up.


2D images on the walls and easels were all within arm's reach.


We offered a rotating schedule for students to come and visit in their time slot during a 2 hour reception on Thursday, and then parents came on Friday after the school concert.  

Students helped curate the exhibit, deciding what pieces should go in, how they should be arranged, and making Brailled the name tags.


Although it was an exhibition and not a sale, a lot of students were able to sell their work to teachers and parents. It was so gratifying for them to know that their work had value and was appreciated by discerning adults.

Ultimately, talents are meant to be shared, and you don't have to wait until you're a master to start sharing. I love that my students can shine at their current ability level, and because shining feels so good, I have every confidence that they'll keep growing to the next level.


Wednesday, December 3, 2025

Wire Quilts


My students love to hear stories about the lives of the Quilters of Gee's Bend, Alabama. Their quilting knowlege was handed down from mothers to daughters since before the civil war. They just wanted to keep their children warm with scraps of worn out clothing, but their aesthetics were similar to those of modernist painting giants. Once someone recognized the aesthetic value, they were exhibiting their work in museums across the country. The majority of the talent in the world goes unnoticed, but it is not the fame that makes something beautiful. It's the work itself, and of course, the love that goes into it.

After talking the purpose and construction of real quilts, each student started making their own quilt squares to contribute to a class quilt, except this one would be made from metal.

How to fill a square? It was a problem to be solved, and the room was full of solutions: wire, pipe cleaners, beads, buttons, tape, upholstery swatches; if we had it, they could use it. Students chatted about their day as they twisted and taped, and strung things together. This isn't the kind of quilt you'd want to curl up in, but I hope the process gave my students a sense of how communities come together in the form of quilting bees. 

Wednesday, October 1, 2025

Plaster Cast Relief Sculptures


Casting plaster is a fun way to learn about bas relief sculptures. For this project, I took my students on a little walk around our school campus to find leaves and flowers. 
Then we rolled out a slab of clay, preferably not terracotta, arranged some plants on top of it, and rollecd it again to press the plants into the clay. The ones with needles worked best: rosemary, cyprus, etc. Picking all the little plant parts can be hard, but it's best to start with the stem and then pleal it back gently.


I made shallow boxes of mat in standard frame sizes: 5"X7", 6"X8", 8"X10". The boxes only had to be about 1/2 to 3/4 of an inch deep to allow for a 1/4" thick slab and plaster. Once I put the clay in the bottom of the box, I tapped up the corners. Students mixed plaster powder with water and once it was the consistency of pancake powder, they poured it into the box, on top of the clay. We pealed the box away from the clay/ plaster layers and then pealed the clay away from the plaster. The plaster is strong enough to rinse off some of the mis-color, and even some gentle rubbing with a paint brush under the stream of water.

For any Print or Braille words, it is important to write (carve or emboss) everything into the clay in reverse. The plaster will be a mirror image of the clay. So mind your P's and Q's. 
For students who wanted to add a little color, they could use water color pencils. Everyone was amazed at how clear and accurate the casting was. The details are wonderful and the finished product is one everyone "felt" great about.


Tuesday, September 9, 2025

Repoussé project


 The word repoussé comes from the French word, "to push" and essentially means to push the metal from the back of a piece of metal foil to create an embossed image. 
This was the first project in my class unit on relief sculpture. It is an easy way to create tactile images for my students who are blind.


Students began with sketches of ideas, one of which they chose to transfer to a thick piece of tooling foil. If the foil is set on a piece of chip board or stack of paper you can trace a drawing with a pen and it will transfer to the foil with embossed lines. But my blind students had to re-"draw" their ideas using Wiki Stix, which they could then trace to make the embossed lines.
Rubbing with a rounded plastic stick pushes the foil from back to the front to make your the front raised or budge out. Then rubbing around the form with a flat stick makes it pop out even more. Edges are re-defined and cleaned up with sharp pointed points. For large areas, we found the lids or bottoms of fat Sharpie markers worked pretty well for repoussé.

Then most students opted to color their images with Sharpies. These colors are more bright and permenant than our normal Mr. Sketch on the foil.

Then students painted the entire surface with black paint, whether they'd colored the surface or not. It's important to get into the cracks so the lines show up on the final product.

While the paint is still wet, begin wiping gently in circular motions with a paper towel. You'll go throughs several of them as they get dirty pretty quickly. You want the raised portions to really have a shine, while the cracks should be able to stay black. Reveal as many details as possible without overwiping.


Younger children can wrap boards with thick string or yarn and cover it with aluminum foil and just rub with their fingers to make an embossed foil project. This student chose to use greens and blues to fill the shapes using Sharpie markers.


Yarn Collage Images


Younger kids and multiple complex needs students make a lot of art using only lines. I started the school year teaching about vertical and horizontal lines. We then moved onto to diagonal lines, and finally curvy lines that show movement. Because my students are blind, it is always a good idea to end with a tactile image. Students chose a the color of their piece of paper, and the color of the yearn they wanted to make a curvy line from one edge of their paper to another. Then it was a matter of picking the next color of yarn to push against it. The end results are soft, fuzzy Op Art. 


Sunday, October 1, 2023

Pencil Cup Project from Recycled Materials


My Elementary School and Middle School students have been learning how something as flat as a piece of paper can be turned into something 3D by looping strips into links of a chain or folding pages of a book to make a sculpture, or quilling folded paper to make framed images. Making pencil cups is another project that teaches a one more technique of making flat magazine pages into a tactile exterior to a pencil cup. It is an easy, fun project that can be used for years, rather than tossed after a month of hanging on the fridge.

Students found magazine pages which they rolled into a tube, using a pencil, drizzling a strip of Elmer's glue to secure the edge. For stiff covers, rubber bands would hold it the tube in place until the glue dried, and with tight rolls a second pencil would be used to scoot the first pencil out of the tube. The each rolled tube was hot glued to a clean tin can, transforming waste from the recycled bin to something you can use to organize pens, pencils, markers, scissors, and paint brushes. Children can learn to think through the side and direction they want to roll their pages to get the nicest edge, and how to organize their colors and patterns on the can. The next rainy day at home with a bored child, consider having them make one of these to spruce up their bedroom.

Monday, August 21, 2023

Symmetrical and Bisymmetrical Art project


I'm starting this school year by teaching the Principles of Design. These are the ideas and beliefs guide us in our art-making, much like grammar is used to organize the parts of speech (nouns, verbs, adjectives, etc.) in written language, the principles of design are the way we organize the elements of of art (lines, shapes, colors, etc.) in art. We're communicating visually. Do we want to communicate a sense of stability and equalibrium? Then we'd better know ways to balance our composition. Do we want to communicate a sense of order and unity? Repeating an element to create a pattern might do the trick.

Why do we see to balance our lives? Our governments? our diets? Our budgets? More importantly, why would we want to balance those things?  Because everything works better and feels better when it's balanced.  

We made symmetrical balance by slowly laying paint-soaked string on one side of a paper and folding it over to print a mirrored image on the opposite side of the fold, or line of symmetry.
Some of these papers were folded both vertically and horizontally to create bilateral symmetry. And some were folded diagonally as well as vertically and horizontally (like a plus sign and multiplication sign in folds) to create radial symmetry.  

My students who are totally blind kept it simple and sprinkled sand onto wet paint to make tactile images. 
These don't take long, so we can cover multiple types of balance in a class period or two. It's nice for students to be able to learn the types of balance by creating them and within an hour have several visual examples of the definitions they're studying.

Monday, January 30, 2023

Synthetic Cubism Art Project


Picasso and Braque were friends in Paris who had similar ideas about art in the early 1900's. The idea of showing multiple points of view of a still life at the same time somehow seemed more honest or interesting than just one perspective at a time. A cup may be a circle if you trace the bottom onto a piece of paper, or a rectangle if you trace it on it's side. Why not tell the whole store by showing both the rectangle and circle simultaneously?
Another thing the Picasso and Braque did was to introduce collage to their paintings. pieces of newspaper or table cloth along with parts of a guitar and cup may add up to equal the ambiance of a Parisian cafe with someone playing music while you take a sip and read the paper. This synthesis with collaged materials were what made for Synthetic Cubism.

It's hard enough for those of us with sight to understand how cubism used fragmented planes, but for my students with no vision, it was very confusing. They grasped the concept of collaged materials very quickly, however. Wall paper of various textures, and thick to thin cardboard pieces helped students differentiate between and arrange shapes.
 

Students were asked to leave little clues for the viewer: a hint of a fruit bowl, parts of a table, some wood grain or table cloth pattern.

As an art movement, Cubism didn't last very long, just six years, ending with Braque leaving Paris tin 1914 to go fight in World War I, but the little clues about what was happening in the lives of the artists are still there for us to see.


Friday, September 23, 2022

Relief Sculpture with Found Objects


Playing with blocks is one of the first ways a child learns to play and create. Architects and artists never outgrow the activity.  For our study of Louise Nevelson, I had my students create assemblage sculptures using found objects. Each student went "shopping" at my table full of wooden blocks, stretcher bars, popsicle sticks, and etc. They arranged their items in three different ways, documenting each one with a photograph so that they can discuss the strongest parts of each one and be more intentional with their arrangement before gluing it together.
Then they painted their sculpture a solid color. Some students chose one of Nevelson's preferences of either white or black, but others choose orange, purple, or blue.

A handful of students donated their piece to be part of a large collaborative sculpture. Arranging each individual relief sculpture into a larger structure and filling in the gaps in a way that created a unified piece was a lot of fun. We used wood glue for the small pieces and screwed large boards together. The finished piece was spray painted black, with some turquoise highlights to accentuate the shadows. It's nice to have a 4 foot sculpture that my blind students can experience through touch, that teaches about form, the use of tools (as part of our larger unit on building) and iconic sculptor, Louise Nevelson.


Friday, September 9, 2022

String Art

My students love string art. Stitching yarn in a board is therapeutic and the end product is a tactile image, something that they appreciate, since they are visually impaired.


Students place shapes on the back of a piece of matboard, and then went around the shapes using a thumb tack. The wholes were too small for our big plastic needles, so they placed the mat on a wooden bored and punched each hole with a hammer and nail. This was a great chance to practice using the world's favorite building tool.

Even elementary school students, or students with cognitive disabilities, who were totally blind, enjoyed stitching yarn into cardboard. They each picked a stencil of a simple shape, and we poked holes within the stencil. Once the needle was threaded and the end of the yarn taped to the back, they were happy to find the holes and push or pull the needle through each one.  


Friday, August 5, 2022

Touchable Perception Field Trip

 A field trip on the second day of school? Yep, because I don't mess around when it comes to using every school day for instruction. I took my new high school students just a few miles down the road to Macon Art Alliance, so they could experience an exhibit that was made just for them.

Touchable Perception, was a collection of masterpieces from art history, recreated in tactile form by local high school and college art students who wanted to make visual art more accessible for the Blind. 

My friend Jenny made the Braille labels on clear sticky plastic, for me to put next to each piece, while artists, Sophia Tang (Stratford Academy student) and Esha Panse (Georgia Tech student) about how they made their decisions from choosing a masterpiece, to figuring out which materials would best tactilely represent a 2D piece of art.
Students with low vision were also able to enjoy a show in the main gallery of black and white, high value contrast portrait painting by Caleb Brown.
As a bonus we're going to be gifted the artwork for the school's permanent collection, that I can use in my art history lessons. And of course the bonus bonus is building community relationships with Macon Art Alliance and young aspiring artists. We like to support anyone who cares enough to support us.

Friday, December 10, 2021

Bottle Cap Mosaics & 3X5 Card Mobiles

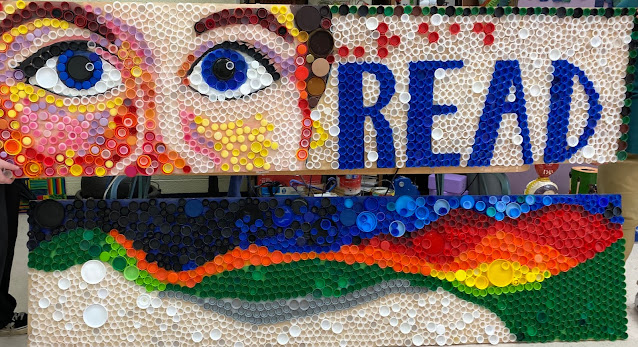
 Our school's Media Center had a major face lift at the beginning of the year with book shelves rearranged, new flooring and new furniture. I figured it needed some new art too.

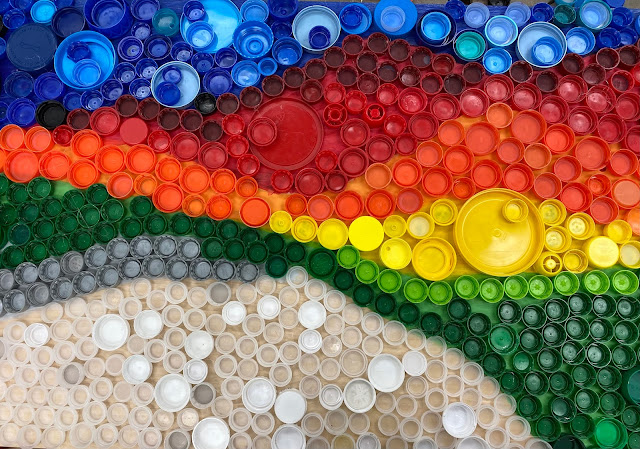
People from the school and community donated thousands of bottle caps for the project. We're using more water bottles since the water fountains are shut down during COVID,  and this creates a lot of waste. Our Art class wanted to make use of some of that plastic. Students submitted ideas.  

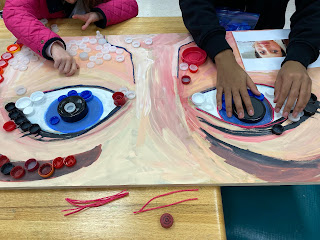
One new student, on his first day at our school, made a drawing of a face. He's totally blind, so I have him a a Tactile Doodle and we ended up using his idea to do part of a face, at least a set of eyes. A couple of other students made marker drawings of sunsets, so that's the idea we used for our second.


We spent a day playing with the caps on the board to make pictures and see how much of each color we had to work with. Later, most of the two boards were painted in the colors of the caps so we would know where to put them. Then the caps were hot glued to the surface.

I was given the 3D letters GAB to represent Georgia Academy for the Blind. We painted them before attaching the bottle caps.