You don't have to break the bank to show someone that you love and appreciate them. Gifts of the heart are far more meaningful than gift cards. Here are some ideas I've used in years past.

Paper Ornaments
I made a jar of paper Moravian Stars for a friend when I was in high school. I'd used a kit, which was just strips of paper and instructions. After I had grown and had dozens of nieces and nephews, I created kits for them to learn. Of course a finished star was included and could be a little gift on their own. Four 1"X16" strips of paper makes a 4" star.
The paper 3D snowflakes require 6 squares of paper. I used 4 inch squares, which means that it takes 1 1/2 pieces of card stock per star. Scissors and glue are the the only other materials needed for this project, which means my kids could make gifts for their teachers for about 10 cents each. Middle School teachers know that each student has half a dozen teachers so they don't expect expensive gifts, and something homemade to use in their room or house is a nice reminder of the student.

One inch strips of paper stapled in the center, bent back and glued at the bottom make beautiful paper flower ornaments.
Mugs
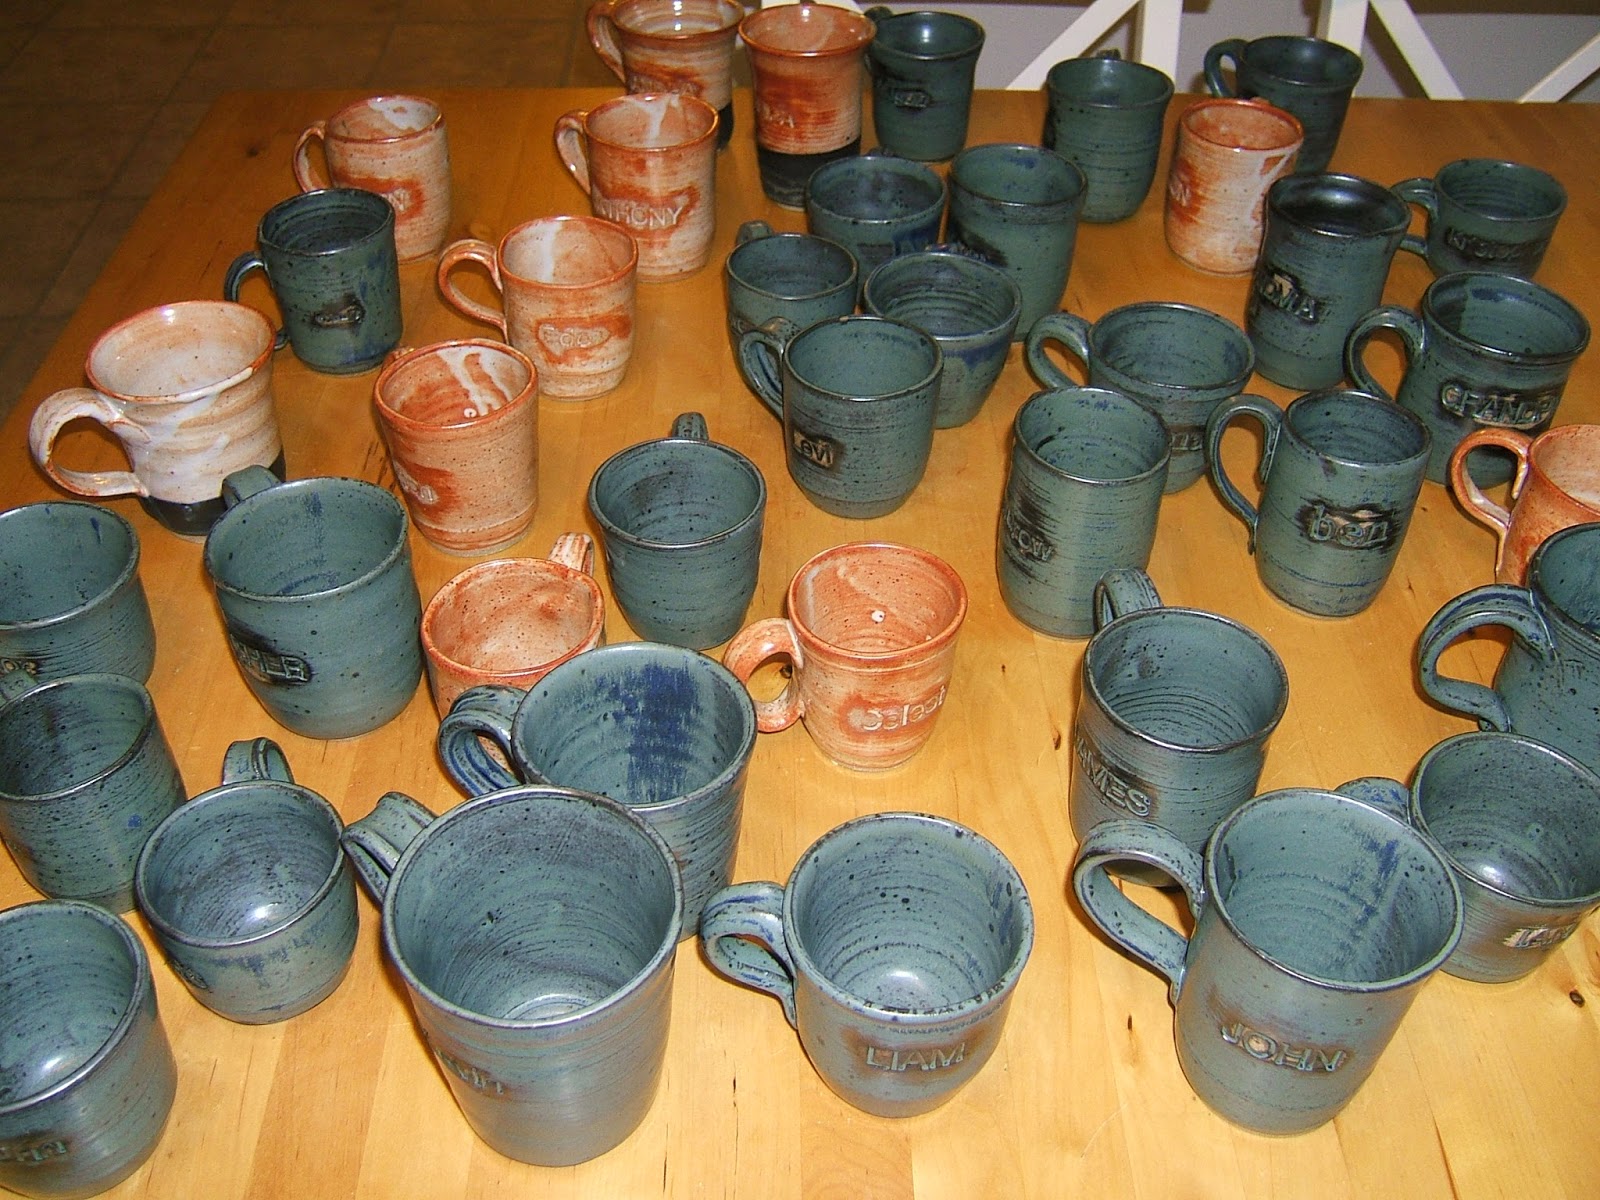
I grew up using a mug that my Aunt Janet had made me. She made one for each member of our family. Anything with a name on it makes it extra personal. I decided to make personalized mugs for the next generation. This ended up costing almost nothing (clay can be dirt cheap) as I had access to the college ceramics studio, but it was very time consuming project, and for awhile I thought of it as a part time job.
Sign Posts
One year I cut wooden 1X4s into arrows, painted them with white latex, and then painted the city names of loved ones and the miles from my house to theirs. I did this for each of my siblings who owned a home and added the city of my parents as well as my in-law's parents. I included the hardware, but not the poles (for obvious reasons).


Here is mine, in the backyard, with my folks, brother, and two of my sisters, all of who have home towns listed on my sign post. Wish they lived closer, but at least I can find the way to them.
Name Paintings
This is my favorite thing to give at baby showers, and kid birthdays, but I've given more than a few away at Christmas too. This is another gift of time and talent, as the frames are $10-$20, but if they were to have their own name painted it would cost about $40-$50.
Graham Cracker Houses
My family made graham cracker houses every year when I was growing up. I probably only missed one year in the last 35 from this tradition (when I was in Japan and couldn't find graham crackers). Each of my kids make their own and then we have carried on the tradition of Christmas caroling and delivering either a house or cookies to our neighbors. Here I am, building 25 houses in advanced for my daughter's kindergarten class to decorate. The icing is made from 1 lb of powdered sugar and 2 egg whites (or pasteurized egg whites), mixed 20 minutes on a mixer. I place a scoop into zip lock plastic snack bags for kids to use pipe.
Goodies
Homemade cookies and candy are a treat for everyone who isn't diabetic. I have used inexpensive boxes, tins, paper plates and paper bags with ribbon to keep costs down and let me share with more people. Small loaves of pumpkin bread or banana bread look adorable with a ribbon and small card, and fit nicely into teacher's boxes. Consumables are the best gifts for people who already have everything they need and who want to avoid clutter in their lives.


 I find it funny how slowly and painstakingly some remove pretty wrapping paper from a package, I find it funny that some people slowly and painstakingly remove pretty wrapping paper from a gift, only to throw away a few days later. If you have a favorite paper and want to preserve it in a fun way, why not cut it into squares and make ornaments from it during the Christmas break "Lord of the Rings" marathon (or whatever binge watching you do while on break).

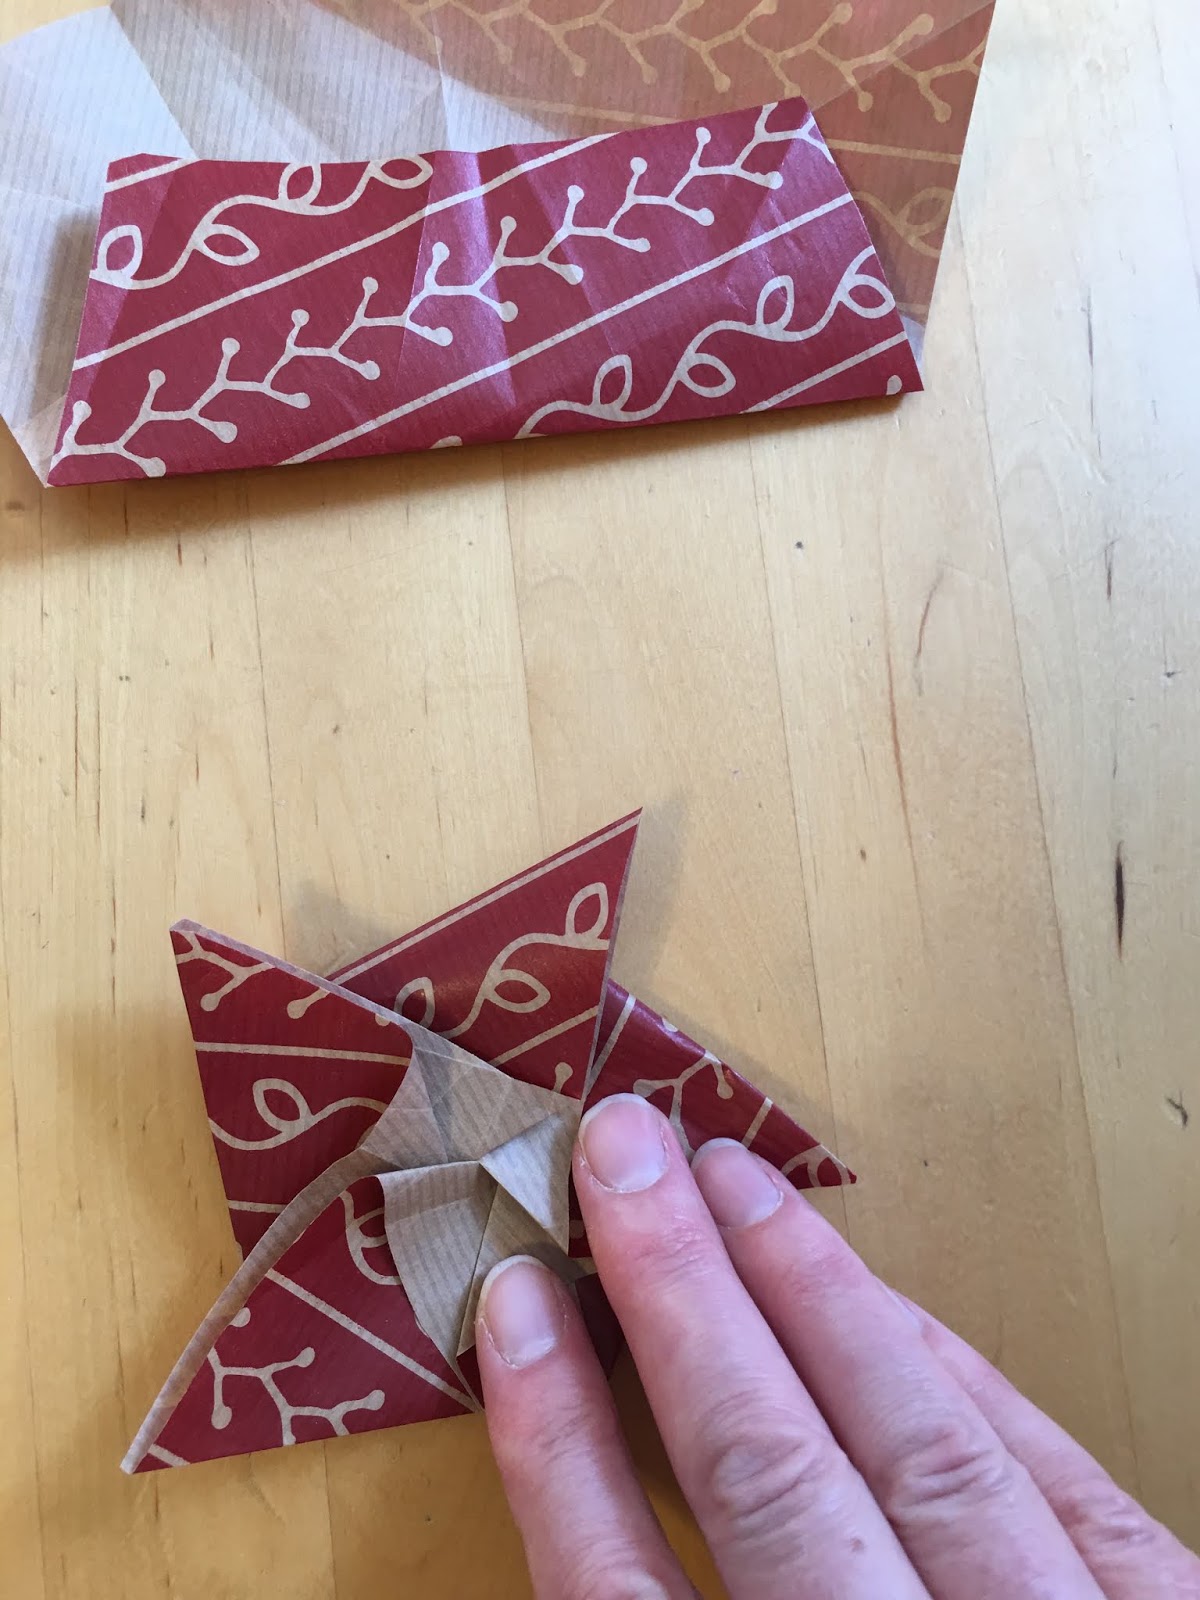
 They're not hard to make once you learn the steps, which begins with cutting a square of paper, I think I used 7 inches and it worked well. You fold the piece of paper in half, and then take a corner (starting with the folded side) and line the top up with the side, making a little triangle at the top. Unfold and do it with the open side.


 Then try to fold two sides that are next to each other at the same time, along the pre-folded creases. Where they overlap, there should be a little corner that sticks out the side.