Showing posts with label Alice in Wonderland decorations. Show all posts

Wednesday, June 15, 2022

Prom: A Night in Wonderland

All the Wonderland decorations came together for one truly magical and wonderful evening of prom. We used the cafeteria, which was not a fancy venue, but it was free and easy to transport the decorations (except for the heavy wooden panels, which my paraprofessional and I moved three times this week, leaving bruises up and down my forearms.) Worth it. Here's how it all turned out.

Having a a second photo area away from the dance floor made it easy for couples to leave the crowd and have a private photo shoot.

Giant Chess pieces and an optional Wonderland sign helped bring the spirit of the theme into the photo backdrop.

More photo options: The Cheshire cat can either be used to show off your beautiful prom clothes, or hide it depending on which spot you choose.


One of our graduating seniors showed me his pocket watch which displays time in Braille, before I handed him one of our big pocket watch decorations to feel.


Draped table cloths and rose topiaries helped to hide the cafeteria food line.

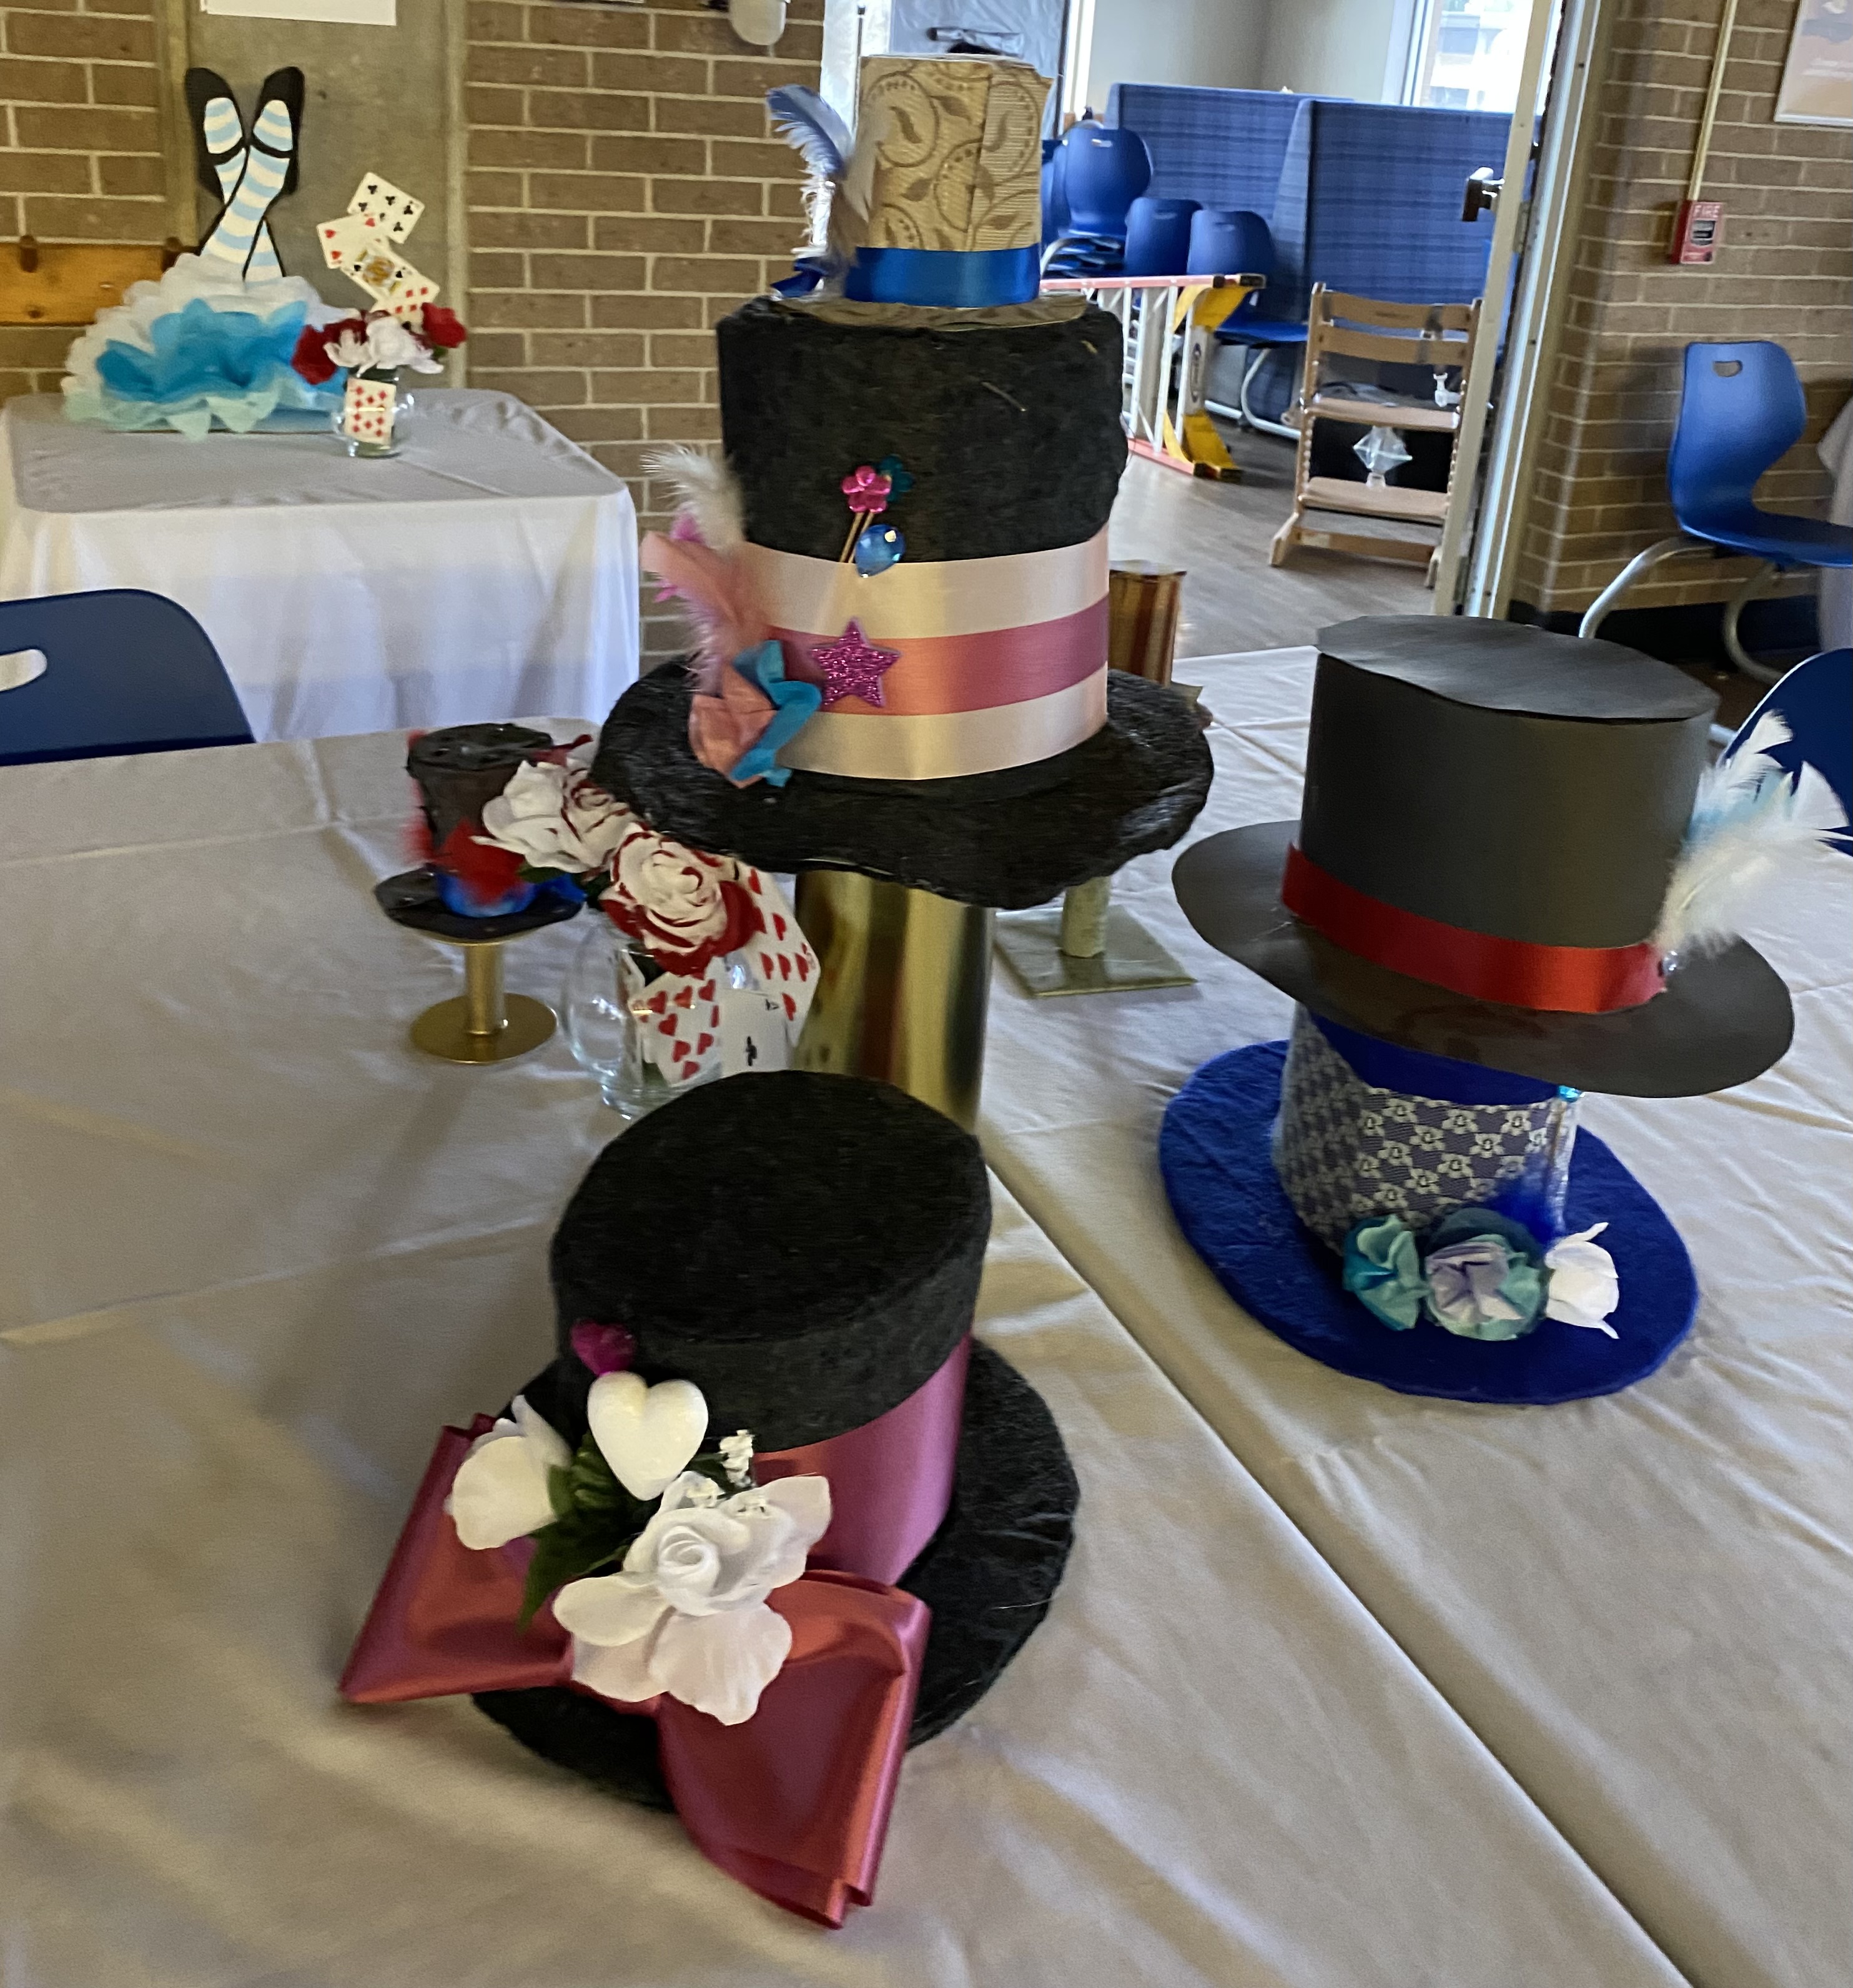
We had about 5 to 7 student-made hats serve as the centerpieces for each table grouping of 8 seats. It fit with the Mad Hatter Tea Party. You can see Alice's legs in the background.

 There were also vases of half painted roses and playing cards "flying out" of the top.


Keys and doorknob decorations were practically free to make. If students don't get the reference, they can read the book. Let our prom open the door, to your heart.


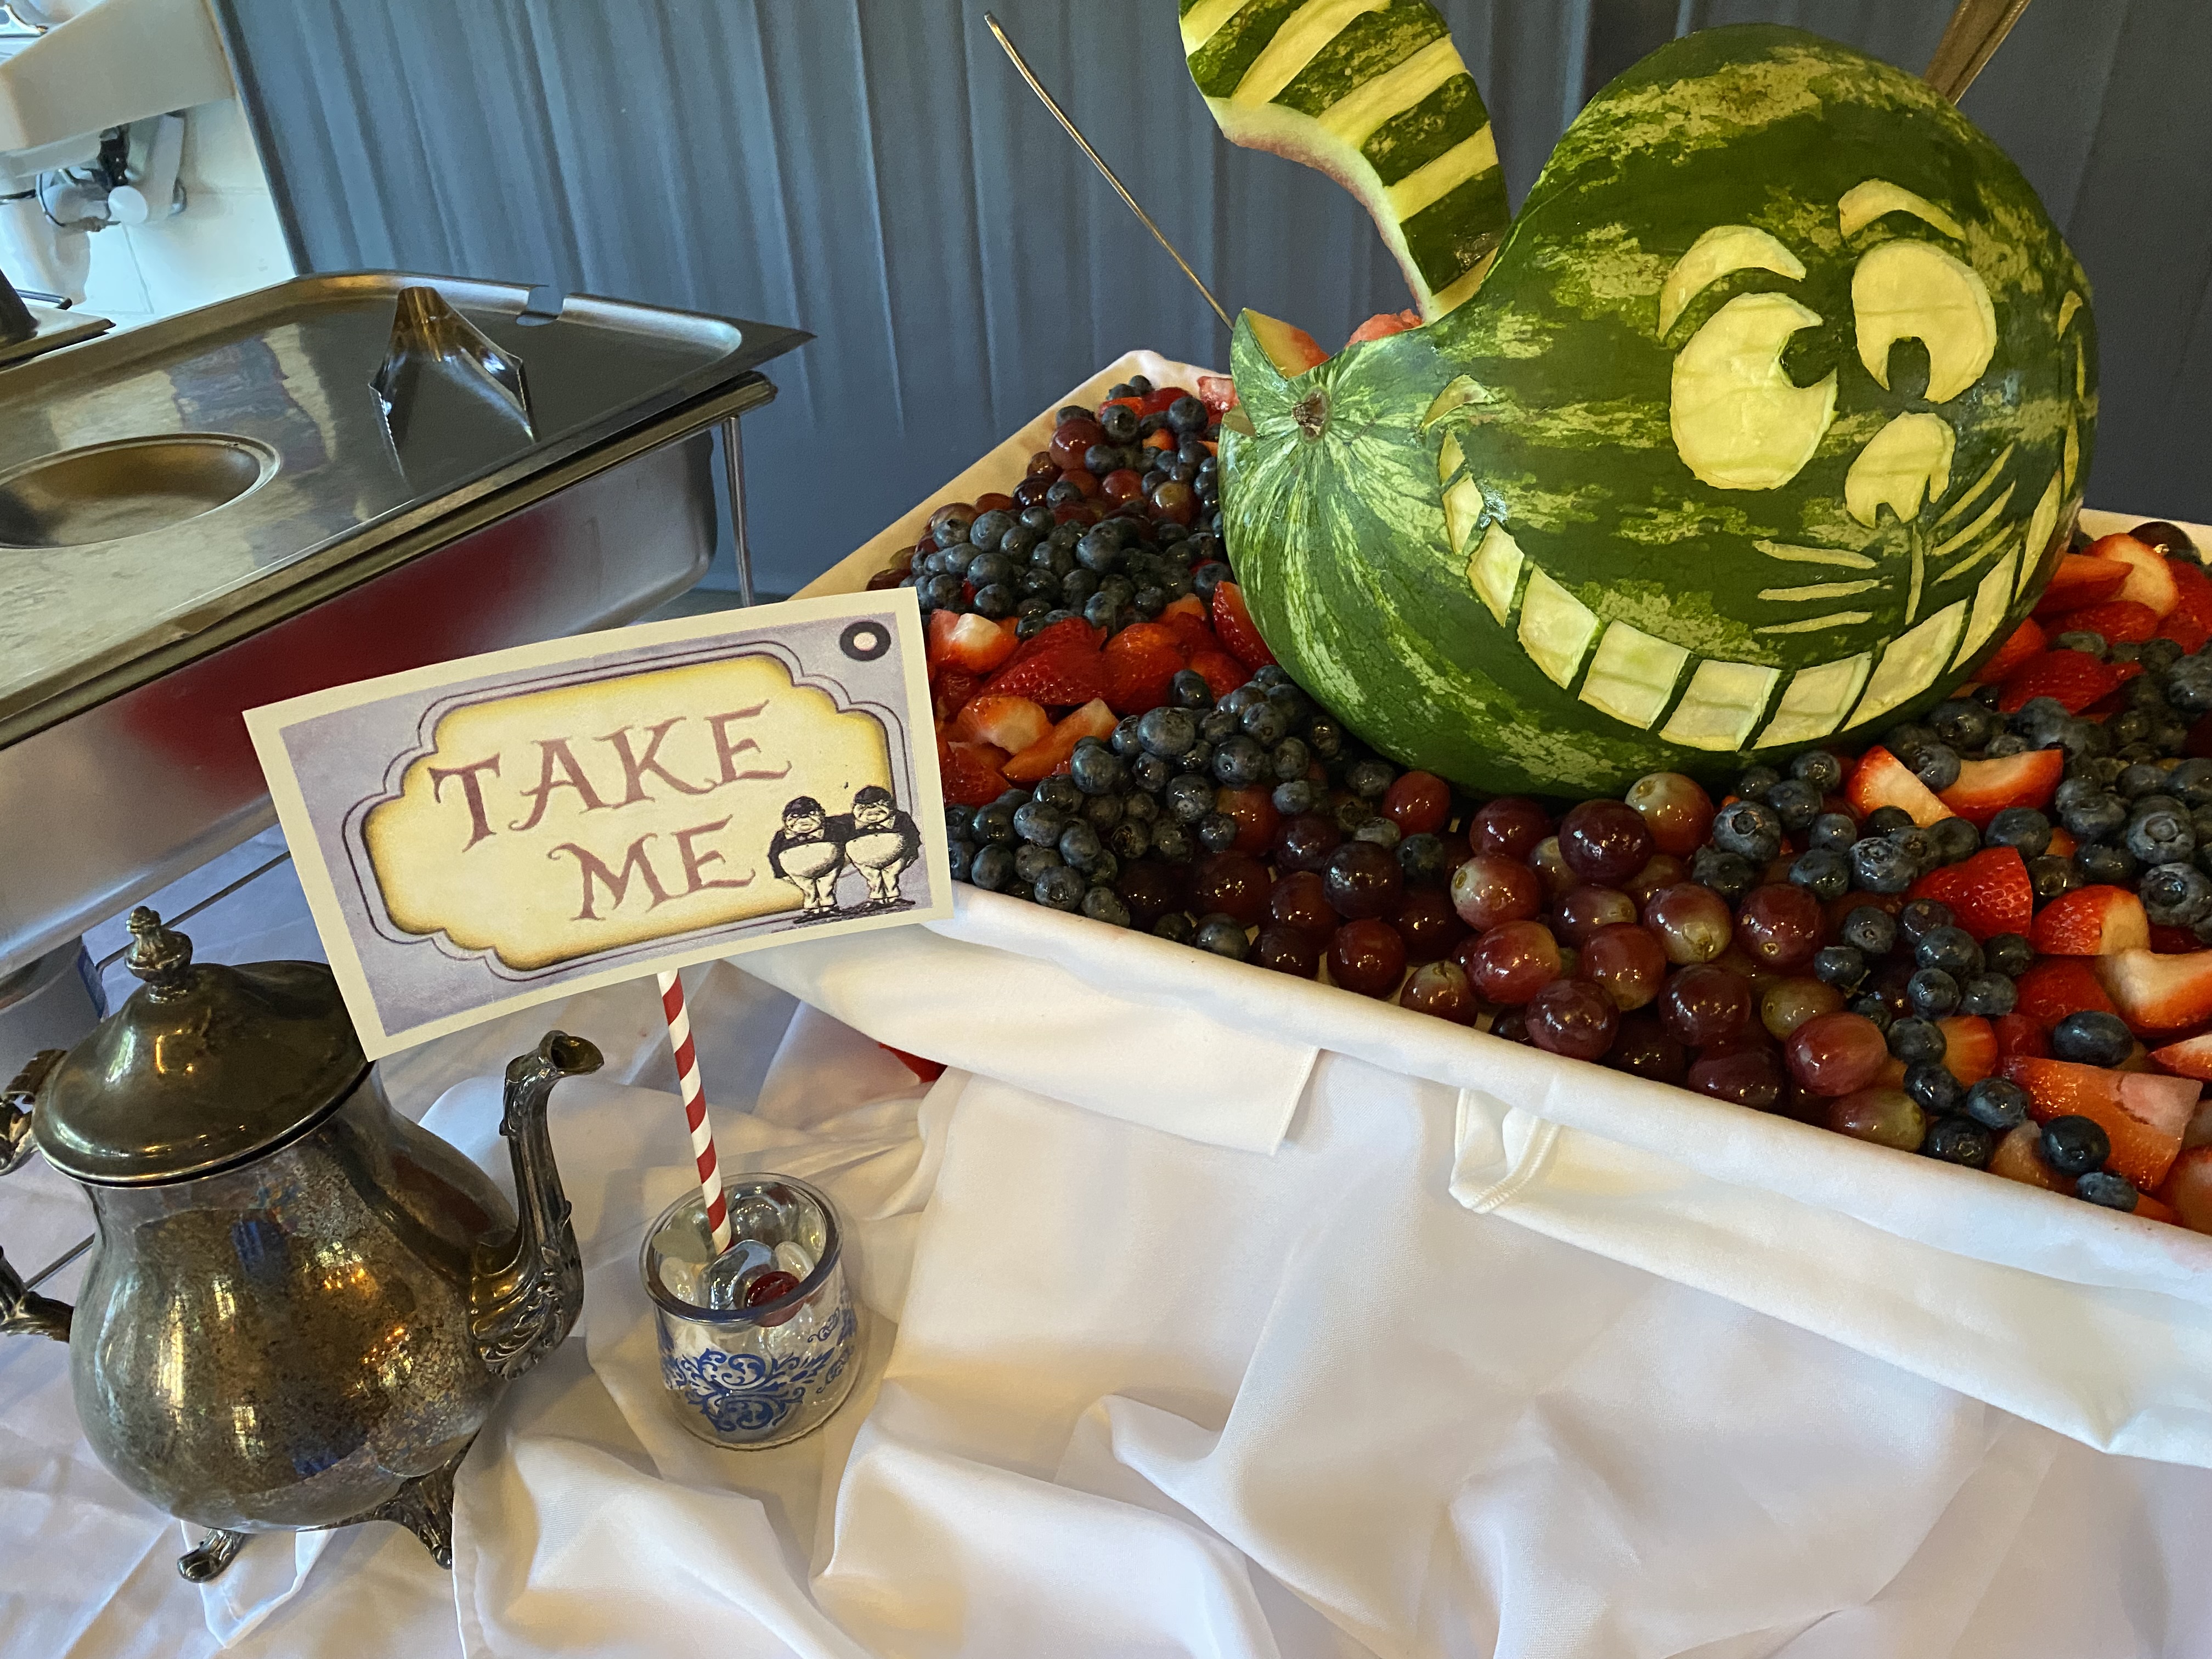
Kristie, our amazing food lady knows what our kids will eat and still managed to dress it up and keep with the theme!
The local news station sent a camera man who is shown here shooting our decorations hanging over the dance floor.

We had the movie that inspired the prom, playing silently in the corner during the dance.


Saturday, May 14, 2022

Alice in the Rabbit Hole decoration

It's easy to make a pair of Alice legs out of cardboard and tissue paper. I used the white cardboard from a trifold board. I just cut the calves and feet, leaving enough cardboard at the top to fold into a stand.


You'll want to cut an extra triangle to hold up the back so it stands on it's own, if you plan on putting it against a wall or in a corner. 

Stack tissue paper. I put white on the top and blue on the bottom. Then you fold it accordion, cut notches in the middle and tie it with a string or wire. Cut the corners off the ends to round them out.

Open the folds and gently pull the tissues apart to fluff up the skirt. You can do the entire thing and glue it to the front, since you have that triangle cardboard stand on the back, or you can cut a slit through the middle (between the knees) and pull half the tissue paper through to the back so that the fluffy skirt will hold up the legs, in which case you can lose the triangle stand. The project only took one class period with a couple students working.


Friday, May 13, 2022

Doorknob and Key decorations for a Wonderland Prom


The thing with Alice in Wonderland, is that you don't want to leave anything out or someone will say, "What about the Queen of Hearts? Why didn't you use any chess pieces? Where are the hats and tea cups?" So I started with a list and came up with ideas could include each part of the book.

I had collected a bunch of free mat board and frames from a frame store that was going out of business, so when my coworker said she bought some keys to go with the theme, I hot glued them to the board and frames and more mat board. This was displayed on an eisel.

Bigger is better however when it comes to big spaces and visually impaired students, so I made a giant doorknob. This was also almost free. Glue sticks and spray paint do cost money, but the four foot chip board, the cardboard boxes, that I cut up and large cardboard cylinders from empty packing tape rolls were salvaged garbage. I used the same clear plastic plate, I used to make the pocket watches last month, and decorated the cardboard and plate door knob with caulk before hot gluing it all together and spray painting it gold.  The red roses and leaves are from the last bits of bulletin board paper on large rolls. These are the same roses made for the school Christmas tree a year and a half ago. This picture doesn't show the finished piece but we were getting there at this point.


Thursday, April 28, 2022

Hat Stands

 My students made hats as part of a Careers in Art: Costume Design assignment that also served as a "Let's make hats to use for our Wonderland Prom!" project.  That was a couple of years ago, and now that we're finally going to use the hats as table center pieces, I thought hat stands were in order. You don't want to just have a few hats of the same height sitting next to each other, you want to create some negative spaces and differing heights for visual interest.

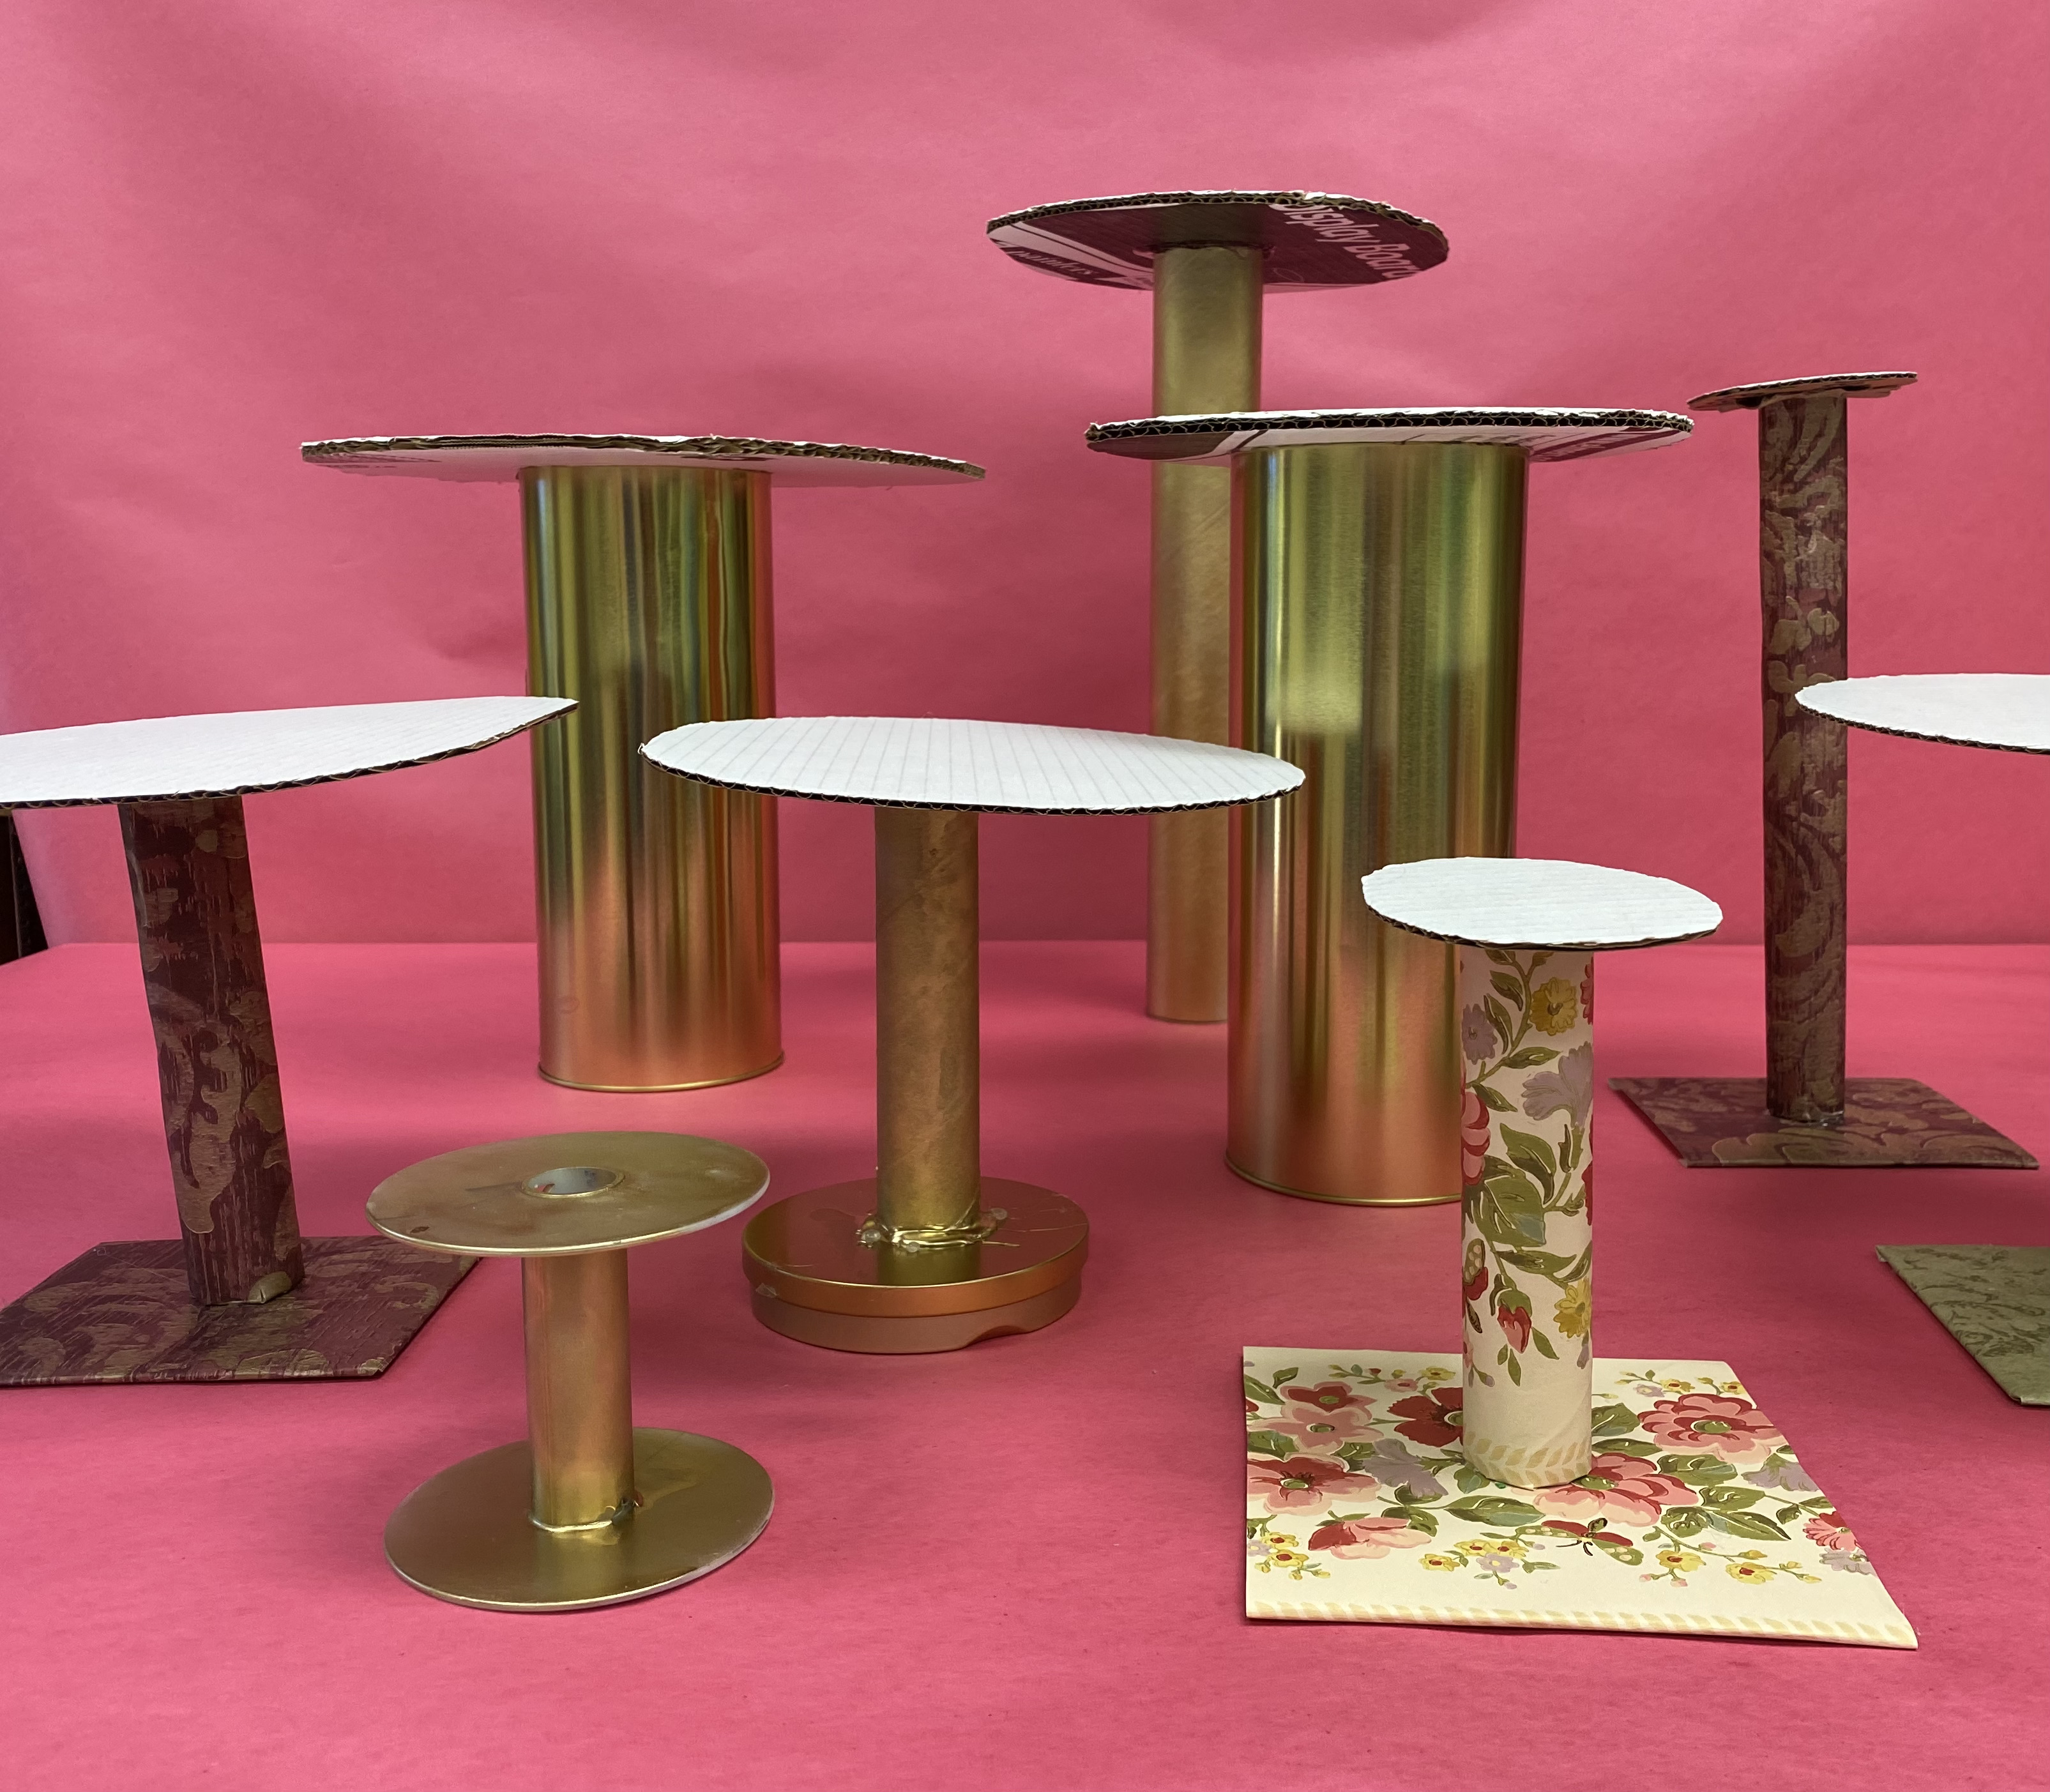
I used some dove candy canisters, which were already gold (under the paper wrapping), and a poster canister, which I painted gold, and glued a cardboard top to each. Done. I also found a little wire spool, which was an easy, mini hat stand once it was painted. 

For the rest, I wrapped paper towel tubes (cut to various lengths) with vintage looking wall paper. Wall paper was also wrapped around square pieces of cardboard for the base. These are a little wimpy, and so you need to be sure the paper is securely glued to the top of the cardboard base, so the tube is more secure. I also filled the tubes with sand to give it some weight and stability. The trick then is to put the glue on the top of the tube and attach the cardboard top without lifting the tube upside down to attach it, or you'll have a big, sandy mess. Another tip is to cut vertical slits in the top of the tube, and fan out the tabs like flower petals so the hot glue has more area to stick to the top. I didn't worry about  decorating the top since they'll all be covered with hats, but a little lace around the edges might be a nice touch.

Tuesday, April 26, 2022

Make Time for Time: Pocket Watch Decorations

 My set design class has been very busy the last few Fridays since the Spring Concert, making prom decorations. The theme is: A Night in Wonderland!  The class of 2020 picked the Alice in Wonderland Theme, but COVID canceled that dance, and we've had giant chess backgrounds and chess pieces waiting in storage since then. (You can go back and see my blog posts about how to make those things.)

In the meantime, I'll fill you in on some of the new decorations, starting with the famous pocket watch that the white rabbit was obsessed with looking at.

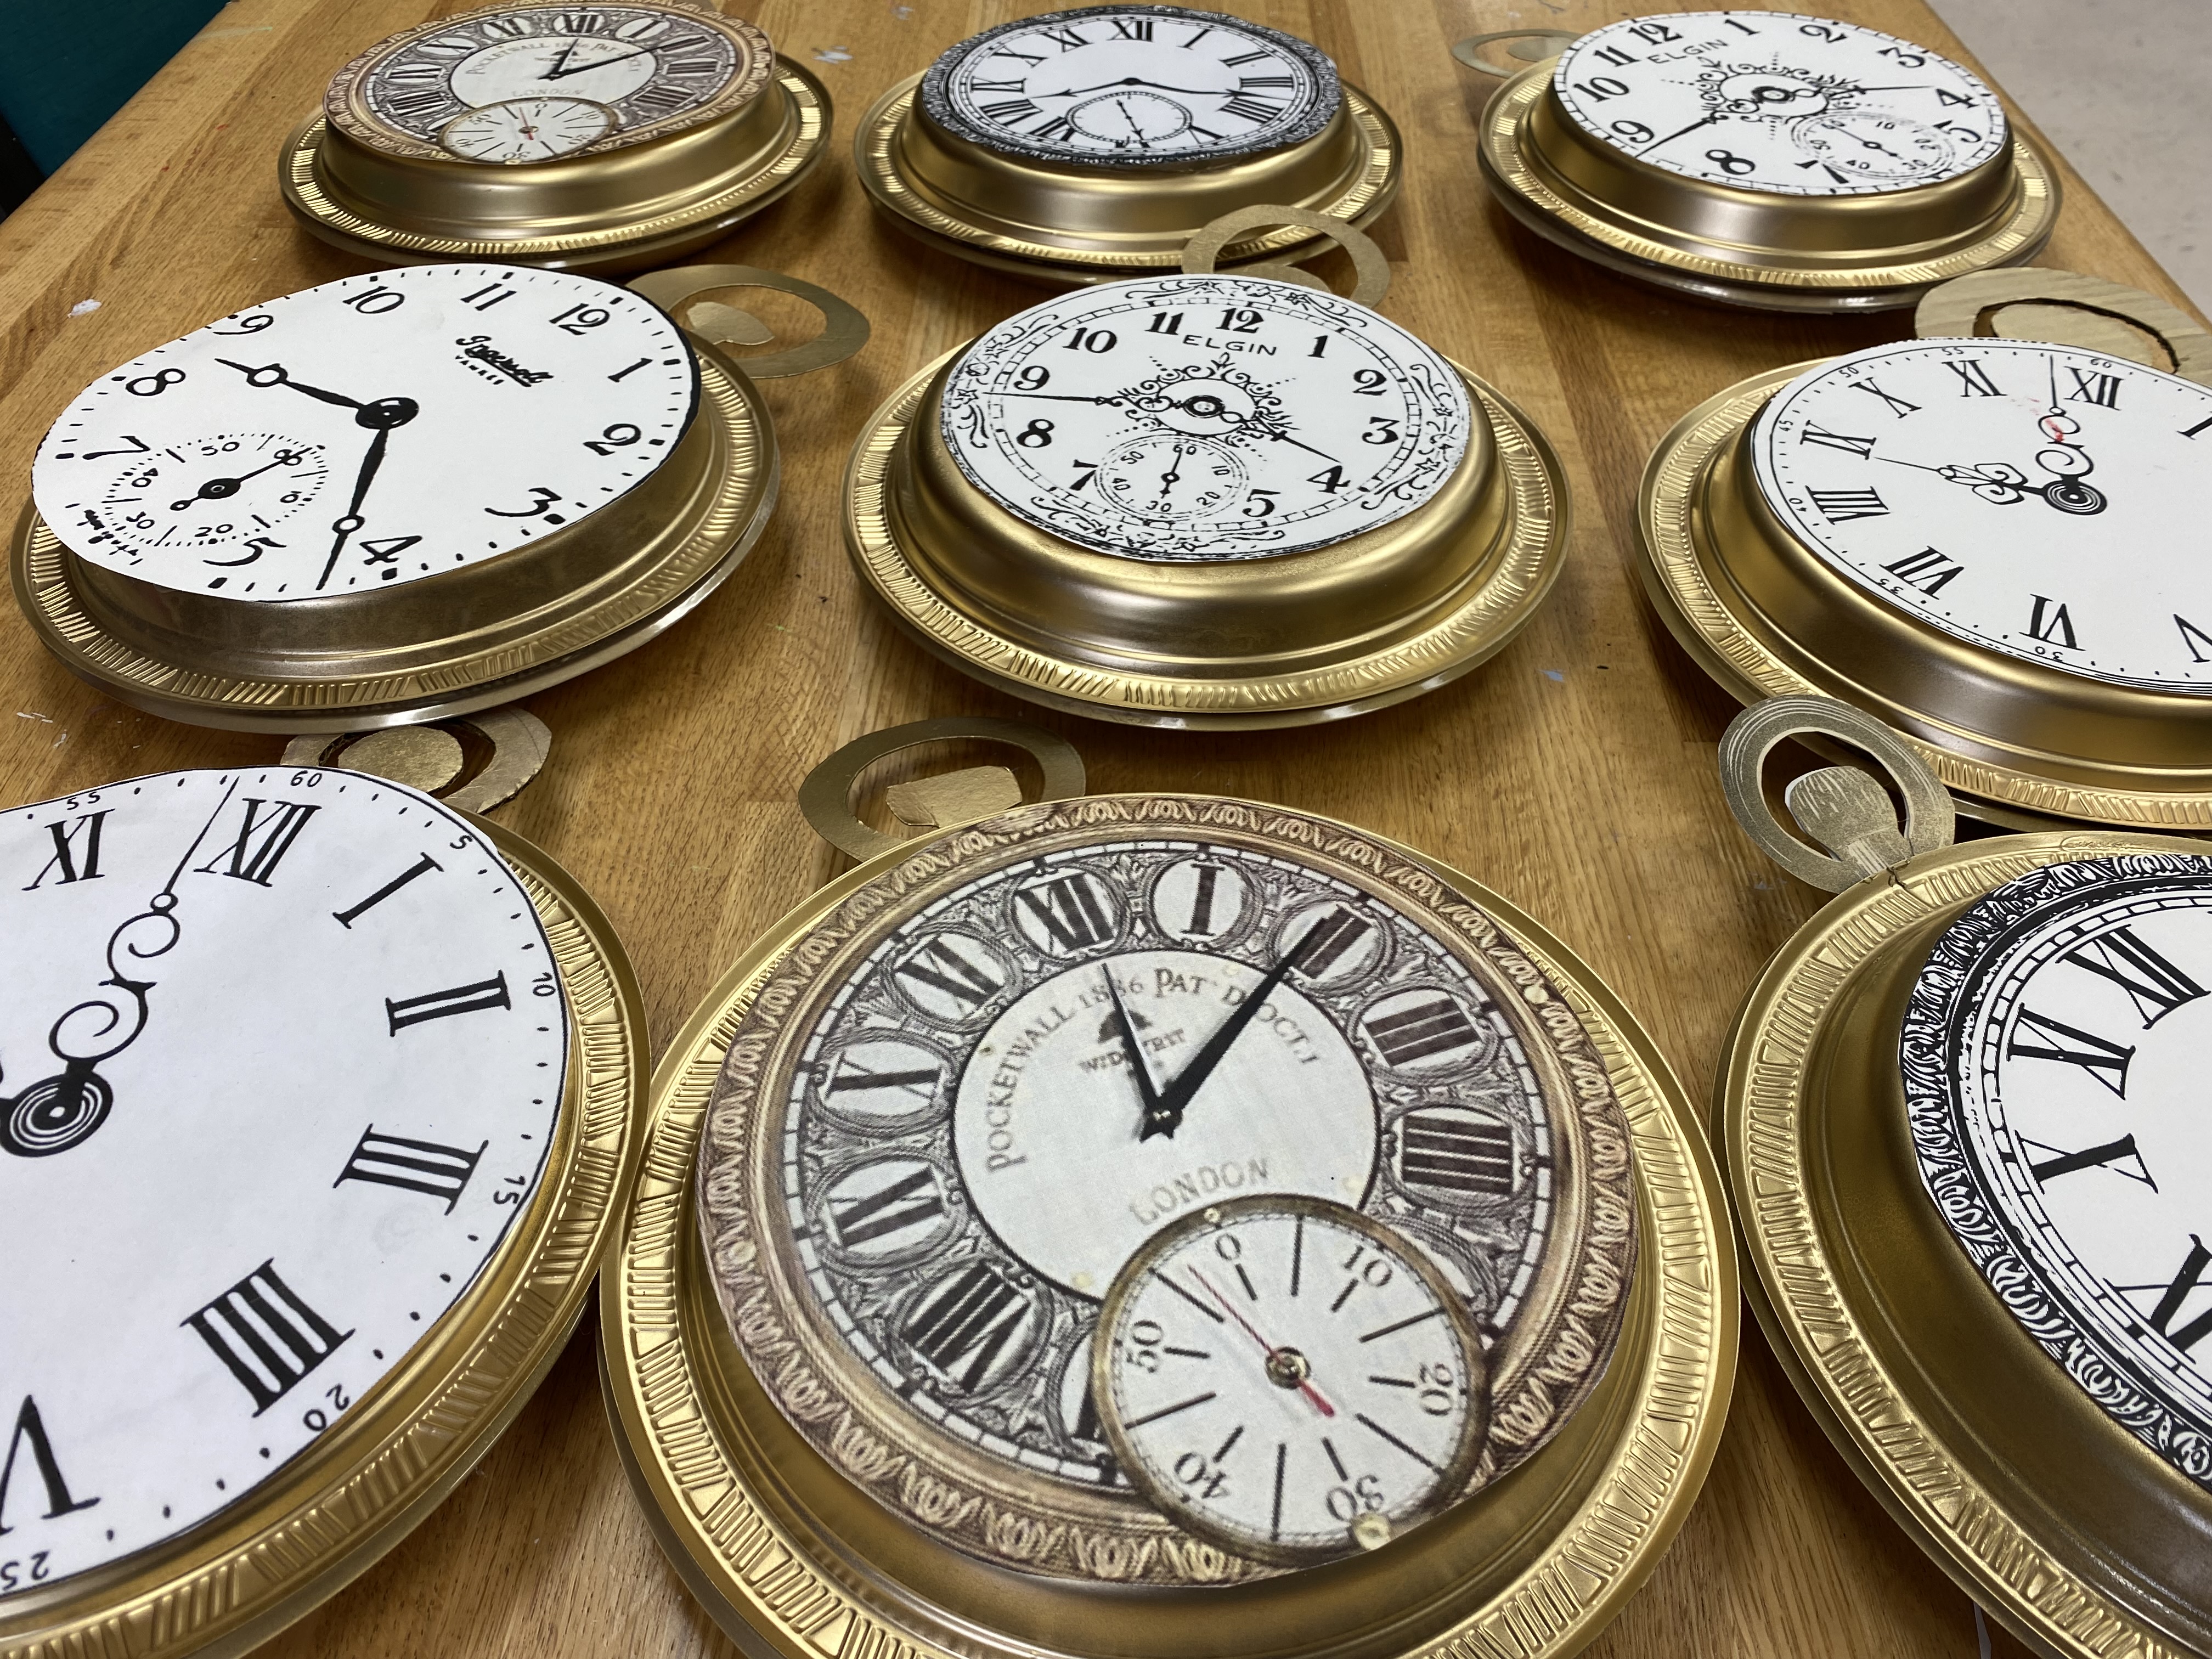
I kept large white cardboard scraps to cut out watch shapes and paint with gold spray paint. I figured it would be easier to glue a white watch face on top, rather than try to keep the white part white safe from the paint to draw or paint the numbers and hands on after the paint. Then I realized that printing out various watch faces from clip art, would be easier yet. And FINALLY, it hit me that using gluing two plates is the most easy solution yet!  It also gives the illusion of being a real, 3D pocket watch. I found 20 clear plates in my cupboard,  so I painted them all, hot glued them together with a little loop and windy thing (that I did cut out of cardboard), and I glued the watch faces to the front. It took mea little over an hour to do it alone. Print, plates, paint, and glue-it's that easy!


Thursday, March 19, 2020

Giant Doorknob and Topiaries: Wonderland Style

Please universe, don't let prom be canceled this year. This week and next we were supposed classroom instruction, then a week of spring break. The week we got back was going to be our school's prom. I had a huge list of things I wanted to have students work on, to prepare, these next couple of weeks, but last Friday, (just before we put our students on the bus) it was announced that the next two weeks we would do our part to slow down the spread of Covid-19 by working from home. I handed each student a package or markers, a set of watercolors, paper and watched them leave before scrambling to gather my own supplies before campus closed.
I said goodbye to the unfinished topiaries that we made with long cardboard tubes, foam balls, and squares of tissue paper. This was the 3rd prom we used those free #10 cans. Once to hold branches, adorned with origami cranes, once to hold New York Street Signs, and now to hold the rose bushes of white (and red?) in reference to the part in Alice in Wonderland when the playing cards were painting the roses red.

The school supplies guy was getting rid of a large chipboard panel which is solid as can be, but had 6 holes in it, the size of paper punched holes in notebook paper.  I found some very long, prong fasteners to poke through cardboard and out the back of the wood. Then I glued other cardboard on top of back cardboard, so that I can reuse the board without any risk of messing up the surface.  One student used a plastic hoop topped with a cardboard circle and paper mache for the knob, which I glued onto a very wide cardboard cylinder. (Don't ask where I get this stuff, I don't remember). I cut a key hole (the board underneath was painted black), decorated it all with calk, and had another student spray paint it gold.  Remember when Alice slipped through the key hole?
I had planned on taping a ton of paper flowers on the remainder of the about 4'X4' board, but I'm not sure now. That scrambling Friday, I had made my second trip, in two days, to the frame shop across the street. It is closing and the owners let me haul of piles of mat board and boxes of small frames.  As everyone else was getting in their cars and driving home, I was cutting out light mat to fit into the frames and trying to figure out how to make keys for each frame.  That might be adornment for our doorknob decoration. Or maybe they could go on tables? Or maybe they could hang from above? Or maybe we won't have prom. The senior trip to Pigeon Forge was canceled. Our trip to New York City was canceled. 

One thing that will never be canceled is a chance to enjoy the creative process; so even if there's never a reason to use these decorations, at least my students and I had a chance to look at cans, tubes, cardboard scraps and styrofoam spheres and see them for what they could become. I always take great pleasure in the process of making, and the satisfaction of knowing that if I didn't exist, that thing I made wouldn't exist either.


Monday, March 16, 2020

Giant Chess Piece Decorations


 I thought it would be fun to include some really big chess pieces for our Wonderland themed prom, but when I looked at the prices online, I knew we'd have to find a way to make theme ourselves. I kept it simple and practically free by drawing a knight and queen silhouette onto a large appliance box. (I think it was an oven box.) Once I cut one side out, I traced it and cut a second to match identically. I flipped the right sides together to trace so the best cardboard would be on the out side of the finished piece.


Then I cut up another box into strips that were 5.5 inches wide, making sure that the corrugation was perpendicular to the length of the strips. Students rolled these up so they could bend around the contour of the horse shape. I used hot glue to trace the edge of the horse, standing the cardboard strips, piece by piece until the contour was complete. Then two students, also with hot glue guns, helped get all of the edges of the strips covered with glue at the same time so we could lay the 2nd horse shape on top while the glue was still hot. It wasn't perfect. We had to trim and caulk to smooth out the edges, before students painted the knight black, and later, the queen white. I love to think of students posing beside or behind these 4.5 foot game pieces.


Tuesday, February 25, 2020

Umbrella Mushrooms & Eight Foot Checkerboards


We are thinking big in my art room these days. My set design class has been making the backdrops for our "Alice in Wonderland" themed prom. We went through a lot of painter's tape to make a checkerboard pattern on two white and two black 8'X4' pieces of birch.

Then, some of my daily art students and I took a couple of broken umbrellas and turned them into giant mushrooms. For the base, we poured cement into coffee cans and stood giant cardboard tubes in them. The umbrellas were inserted into the tops of tubes and from the bottom of the cans to the top of the umbrella handles were wrapped in big cardboard to give it the shape of a mushroom stem.


In order to change the shape of the umbrella top, we kept taping mounds of newspaper to the top, and trying to add poster board to the edges.

 Then we spent a couple of days with papier-mâché. Using strips of newspaper dipped in either fabric starch or a flour-water mixture.  We painted the mushrooms  tan with house paint and finally, we dusted with pink (or blue) and gold spray paint. Prom is still more than a month away, but we've got more ideas and projects to do.