Showing posts with label prom decorations. Show all posts

Wednesday, May 21, 2025

Enchanted Forrest Prom


This year our school prom had an Enchanted Forrest theme, so the first thing I did was find last year's beach themed paintings to repurpose. I did a sketch on copy paper to trace onto plastic and then projected it onto the the old paintings for students to trace with chalk. I love the fact that a $5 roll of vynal wall paper could be used to decorate three proms. (If you were to flip it over, you'd see large black and white movie stars from our Hollywood prom.)


Next we did the underpainting. I have some students who can be trusted to paint large areas even with their visual impairments. And then came layers of bark, grass, and details like pink in the skies.


I freshened up the underside of the paper maché mushrooms from our Alice in Wonderland prom. The packing tape was hot glued along the stem and outter rim of the umbrella to look more fungal.


Our high school social studies teacher painted glasses and vases for stems, and hot glued class beads to bowls for mushroom tops.


And then I put battery operated candles inside the stems and viola! You have a mushroom lantern.

Woodland flower center pieces were made with details such as small animals, butterflies, pebble paths, and moss. When they were surrounded by tea lights, they felt even more enchanting.

Then came the big event, which for the first time in years, was off campus. The venue was beautiful and the senior lead out made me cry. Some of my students who are graduating high school have been my students since first grade. It is going to be extra hard to say goodbye to them.


Sunday, June 11, 2023

The Stars Come Out for our Hollywood Themed Prom


It is no small task trying to convert your school cafeteria into a prom venue. Students had just eaten lunch there hours earlier and wanted to go some place special. In shopping around for a local venue I was finding that $4,000 was the average price for a space that wasn't much better than the one we had for free on campus...other than the fact that I was left with the task of trying to essentially make a wall to hide the 40 foot lunch line...all for about $250.00.  Here's how I did it.
I started with a large roll of vinyl that I bought at the local Rebuilding Macon store. People donate old home building supplies for resale and the proceeds go to Habitat for Humanity. I got a giant role of wall-paper like/ canvas like vinyl for $5.00 (normally it's $10.00). 

One roll was enough to paint a 12-foot long Hollywood sign, a 10-foot long Marquee, and 4 8-foot high paintings of stars. These were stapled to large boards. I taped dowels on the tops of the corners and hung black table cloths between two pairs to provide a background for the film decorations I made of laminated bulletin board paper and pictures of stars and students. 


I used about $22 worth of black and gold balloons to hang from the lights and make center pieces. These balloon towers were just wooden dowels wrapped in paper towels and black felt and to hold it vertically in some glass vases I had in my room. Two black balloons were tied together and the tie straddled the dowel, and then two more black balloons stacked perpendicularly on top. Then four gold, alternating black and gold until it reached the top with about 32 balloons per tower.

Gold fringe hung along the windows on either side of the room. Clapboards and gold stars were placed on tables and hung from the ceiling along with the 10 red and and 10 gold table runners which were $1.00 each. 
Of course food plays a starring role in keeping with the theme. Bags of popcorn,  chocolate covered strawberries that look like tuxedos, and "Hollywood" carved into a watermelon, all added to the festive feel. The marquee sign I painted, "Now Showing: Prom Starring: The Class of 2023" covered the try-drop window into the dish room

Buying photo props were worth the $12, because it served as an activity. Anything that helps people come together and be silly is going to make it feel more like a party. And of course our beloved AJ the DJ keeps everyone moving with his great play lists and personal touches. It really did feel like everyone was having fun!
Most of my $250 budget was taken up with our big Oscar cut-out, the red carpet, red curtain, gold fringe, balloons, and table runners.  Last year's Alice in Wonderland themed prom didn't cost nearly that much, because I had two years to do things like bring in broken umbrellas and newspaper to transform into mushrooms. Plus,This year I felt like I had a month to paint and glue. Thank goodness for online shopping, and a big shout out to the the maintenance guys who built the panels in two days!


As I was setting up I walked into the building, past this year's long wall mural, into the cafeteria lobby where my first mural remains, and peered into my latest "installation" a prom that would be dissembled that night, and realized that even though some of these visual moments are fleeting, I hope I helped make our school a more positive environment for years to come.


Wednesday, June 15, 2022

Prom: A Night in Wonderland

All the Wonderland decorations came together for one truly magical and wonderful evening of prom. We used the cafeteria, which was not a fancy venue, but it was free and easy to transport the decorations (except for the heavy wooden panels, which my paraprofessional and I moved three times this week, leaving bruises up and down my forearms.) Worth it. Here's how it all turned out.

Having a a second photo area away from the dance floor made it easy for couples to leave the crowd and have a private photo shoot.

Giant Chess pieces and an optional Wonderland sign helped bring the spirit of the theme into the photo backdrop.

More photo options: The Cheshire cat can either be used to show off your beautiful prom clothes, or hide it depending on which spot you choose.


One of our graduating seniors showed me his pocket watch which displays time in Braille, before I handed him one of our big pocket watch decorations to feel.


Draped table cloths and rose topiaries helped to hide the cafeteria food line.

We had about 5 to 7 student-made hats serve as the centerpieces for each table grouping of 8 seats. It fit with the Mad Hatter Tea Party. You can see Alice's legs in the background.

 There were also vases of half painted roses and playing cards "flying out" of the top.


Keys and doorknob decorations were practically free to make. If students don't get the reference, they can read the book. Let our prom open the door, to your heart.


Kristie, our amazing food lady knows what our kids will eat and still managed to dress it up and keep with the theme!
The local news station sent a camera man who is shown here shooting our decorations hanging over the dance floor.

We had the movie that inspired the prom, playing silently in the corner during the dance.


Thursday, April 28, 2022

Hat Stands

 My students made hats as part of a Careers in Art: Costume Design assignment that also served as a "Let's make hats to use for our Wonderland Prom!" project.  That was a couple of years ago, and now that we're finally going to use the hats as table center pieces, I thought hat stands were in order. You don't want to just have a few hats of the same height sitting next to each other, you want to create some negative spaces and differing heights for visual interest.

I used some dove candy canisters, which were already gold (under the paper wrapping), and a poster canister, which I painted gold, and glued a cardboard top to each. Done. I also found a little wire spool, which was an easy, mini hat stand once it was painted. 

For the rest, I wrapped paper towel tubes (cut to various lengths) with vintage looking wall paper. Wall paper was also wrapped around square pieces of cardboard for the base. These are a little wimpy, and so you need to be sure the paper is securely glued to the top of the cardboard base, so the tube is more secure. I also filled the tubes with sand to give it some weight and stability. The trick then is to put the glue on the top of the tube and attach the cardboard top without lifting the tube upside down to attach it, or you'll have a big, sandy mess. Another tip is to cut vertical slits in the top of the tube, and fan out the tabs like flower petals so the hot glue has more area to stick to the top. I didn't worry about  decorating the top since they'll all be covered with hats, but a little lace around the edges might be a nice touch.

Tuesday, February 25, 2020

Umbrella Mushrooms & Eight Foot Checkerboards


We are thinking big in my art room these days. My set design class has been making the backdrops for our "Alice in Wonderland" themed prom. We went through a lot of painter's tape to make a checkerboard pattern on two white and two black 8'X4' pieces of birch.

Then, some of my daily art students and I took a couple of broken umbrellas and turned them into giant mushrooms. For the base, we poured cement into coffee cans and stood giant cardboard tubes in them. The umbrellas were inserted into the tops of tubes and from the bottom of the cans to the top of the umbrella handles were wrapped in big cardboard to give it the shape of a mushroom stem.


In order to change the shape of the umbrella top, we kept taping mounds of newspaper to the top, and trying to add poster board to the edges.

 Then we spent a couple of days with papier-mâché. Using strips of newspaper dipped in either fabric starch or a flour-water mixture.  We painted the mushrooms  tan with house paint and finally, we dusted with pink (or blue) and gold spray paint. Prom is still more than a month away, but we've got more ideas and projects to do.


Thursday, January 23, 2020

Hats Off to my Art Students!

We all became mad hatters in my classroom this week in conjunction with a unit on how visual arts applies to performing arts, and in preparation for our Alice in Wonderland themed prom. It was easier and more fun than I had thought it would be, and I'm tickled with the results.  I'll share the steps to make your own below.
Students had the choice between doing a regular sized top hat or a mini top hat that can be attached to a headband and worn off to the side. Most students were able to do both by the time the week was over. 
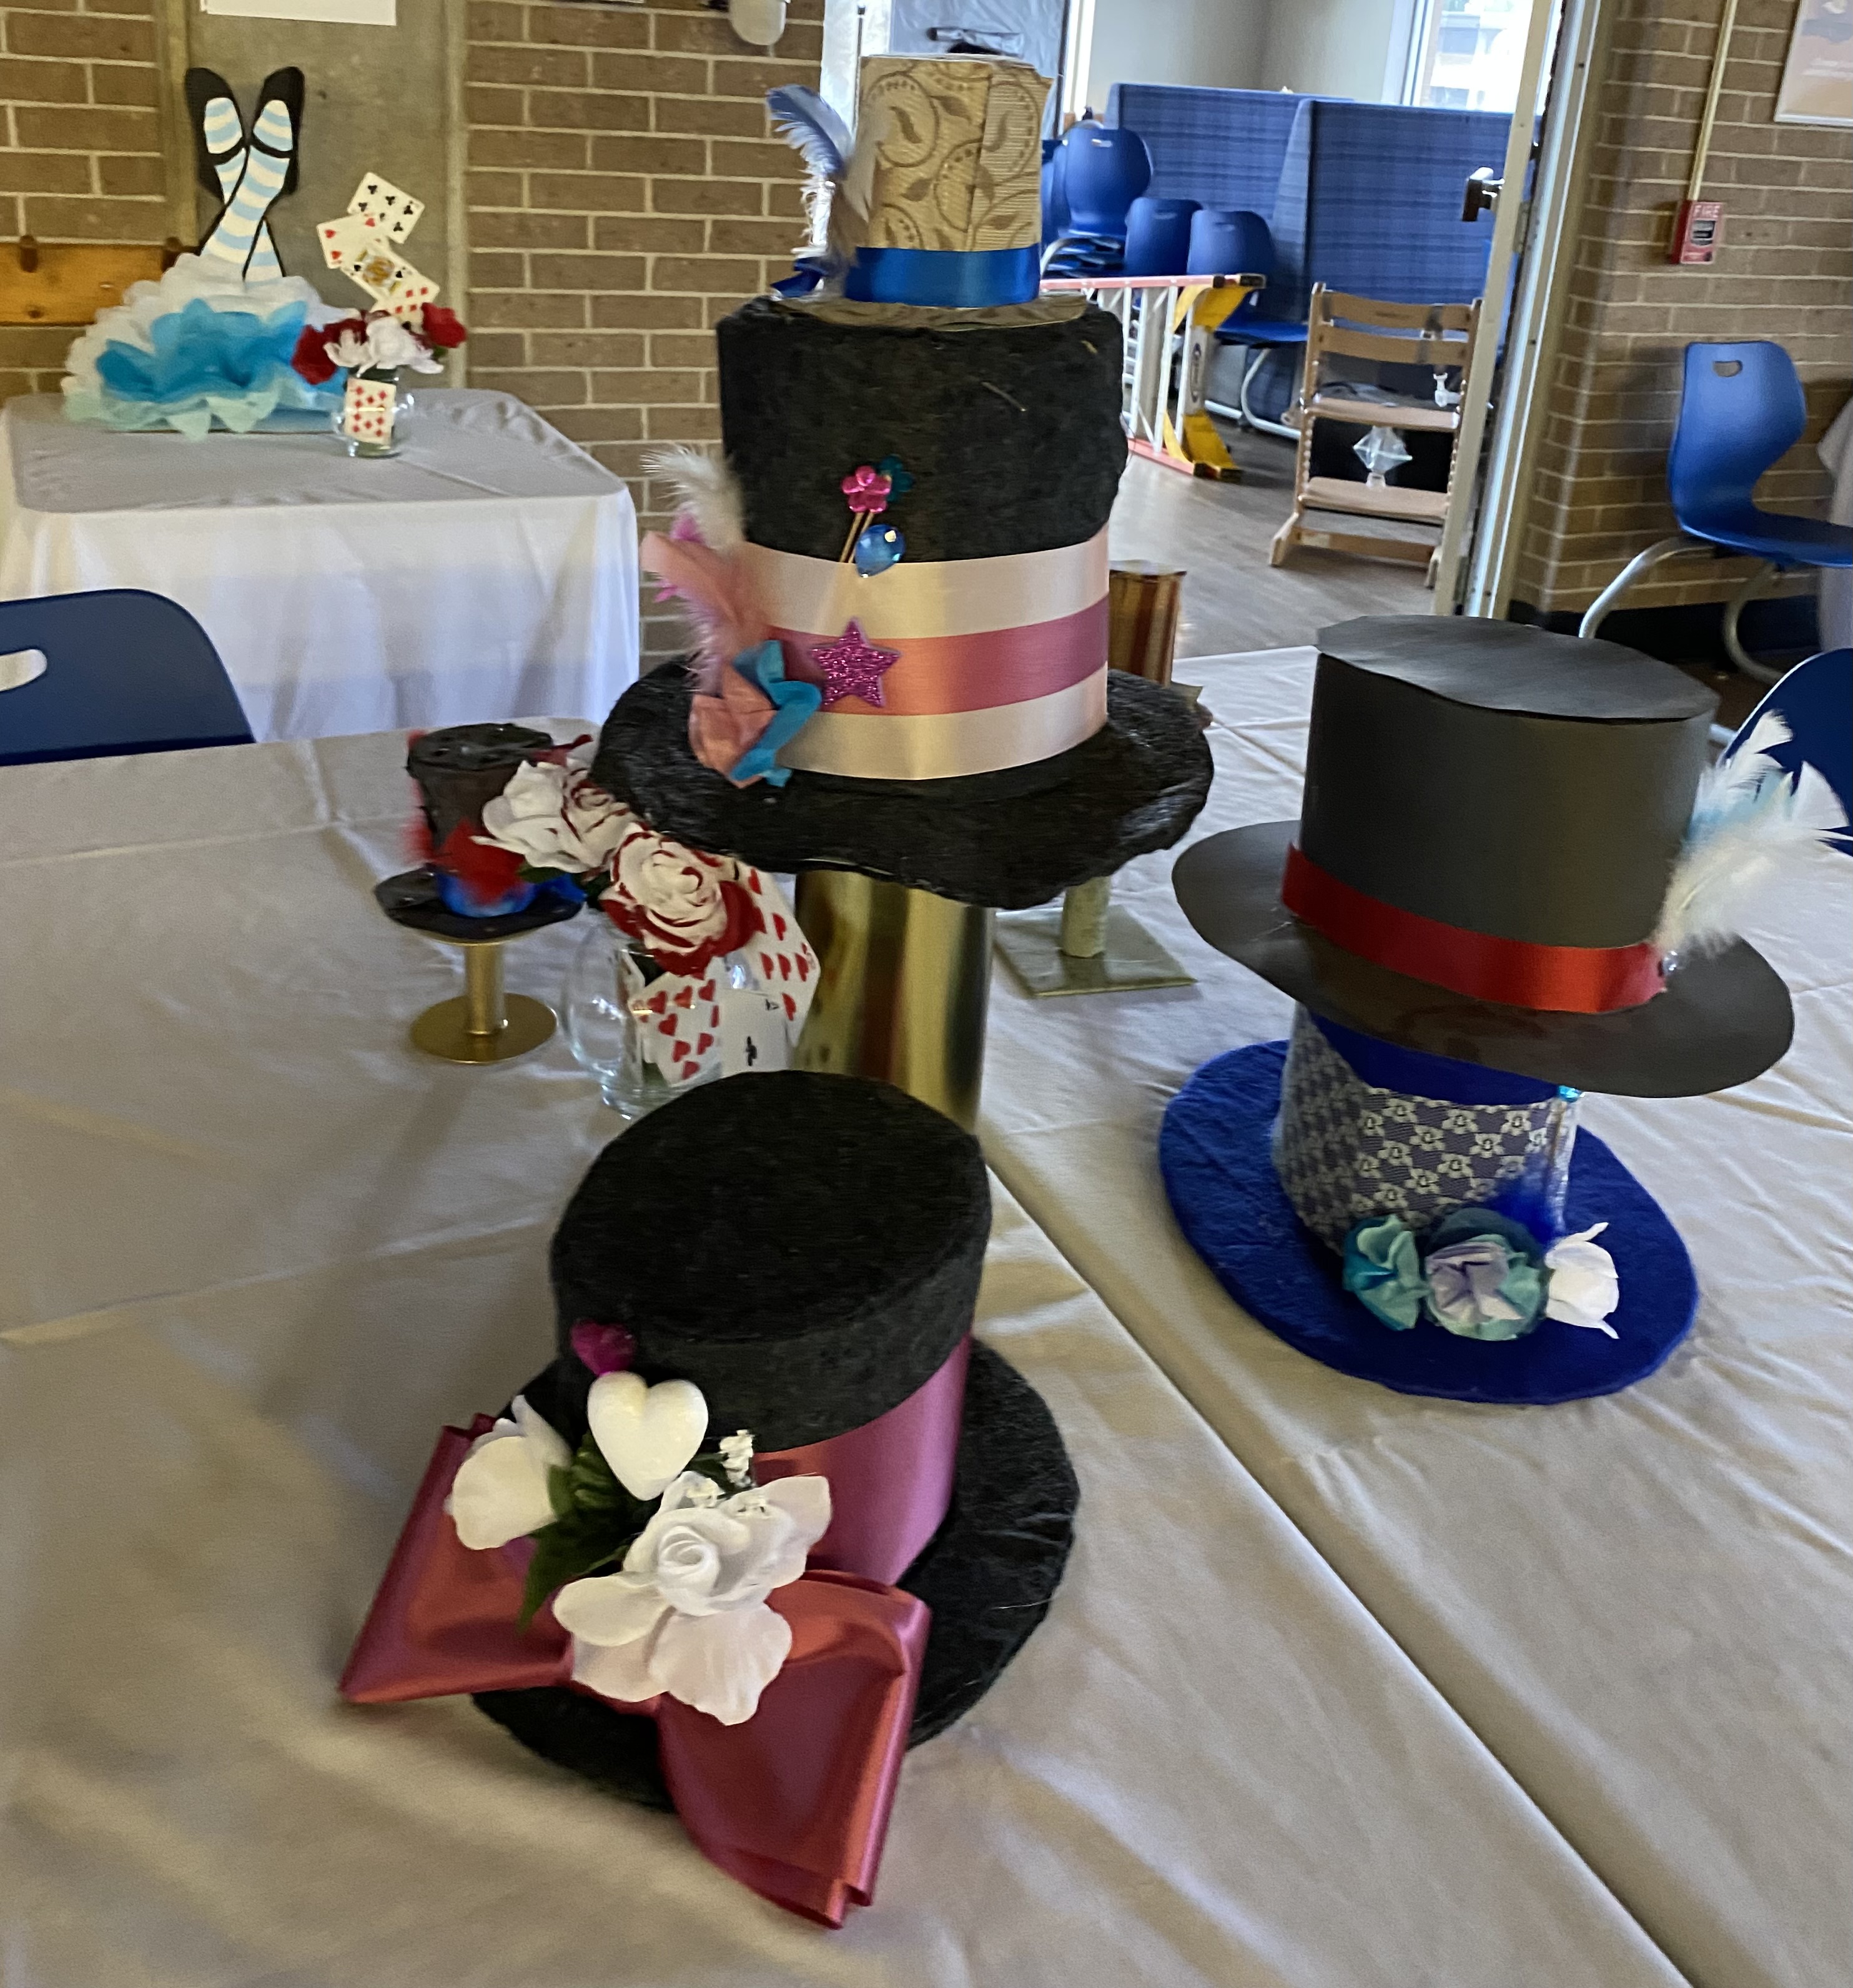
mini hats look adorable worn at an angle with a ribbon or headband to secure them

The mini top hats used card stock (half a piece cut lengthwise would be the sides, and then the brim and top were made by tracing circles on another piece of card stock. Tracing the inside and outside of a roll of new duct tape seemed to work pretty well for the top and brim.  Two 8.5"X 11" pieces of heavy paper make 2 little hats! Upholstery fabric swatches were used to cover the little hats. Because it took two or three swatches for a little hat, some times these were mismatched, adding to the charm and whimsy.


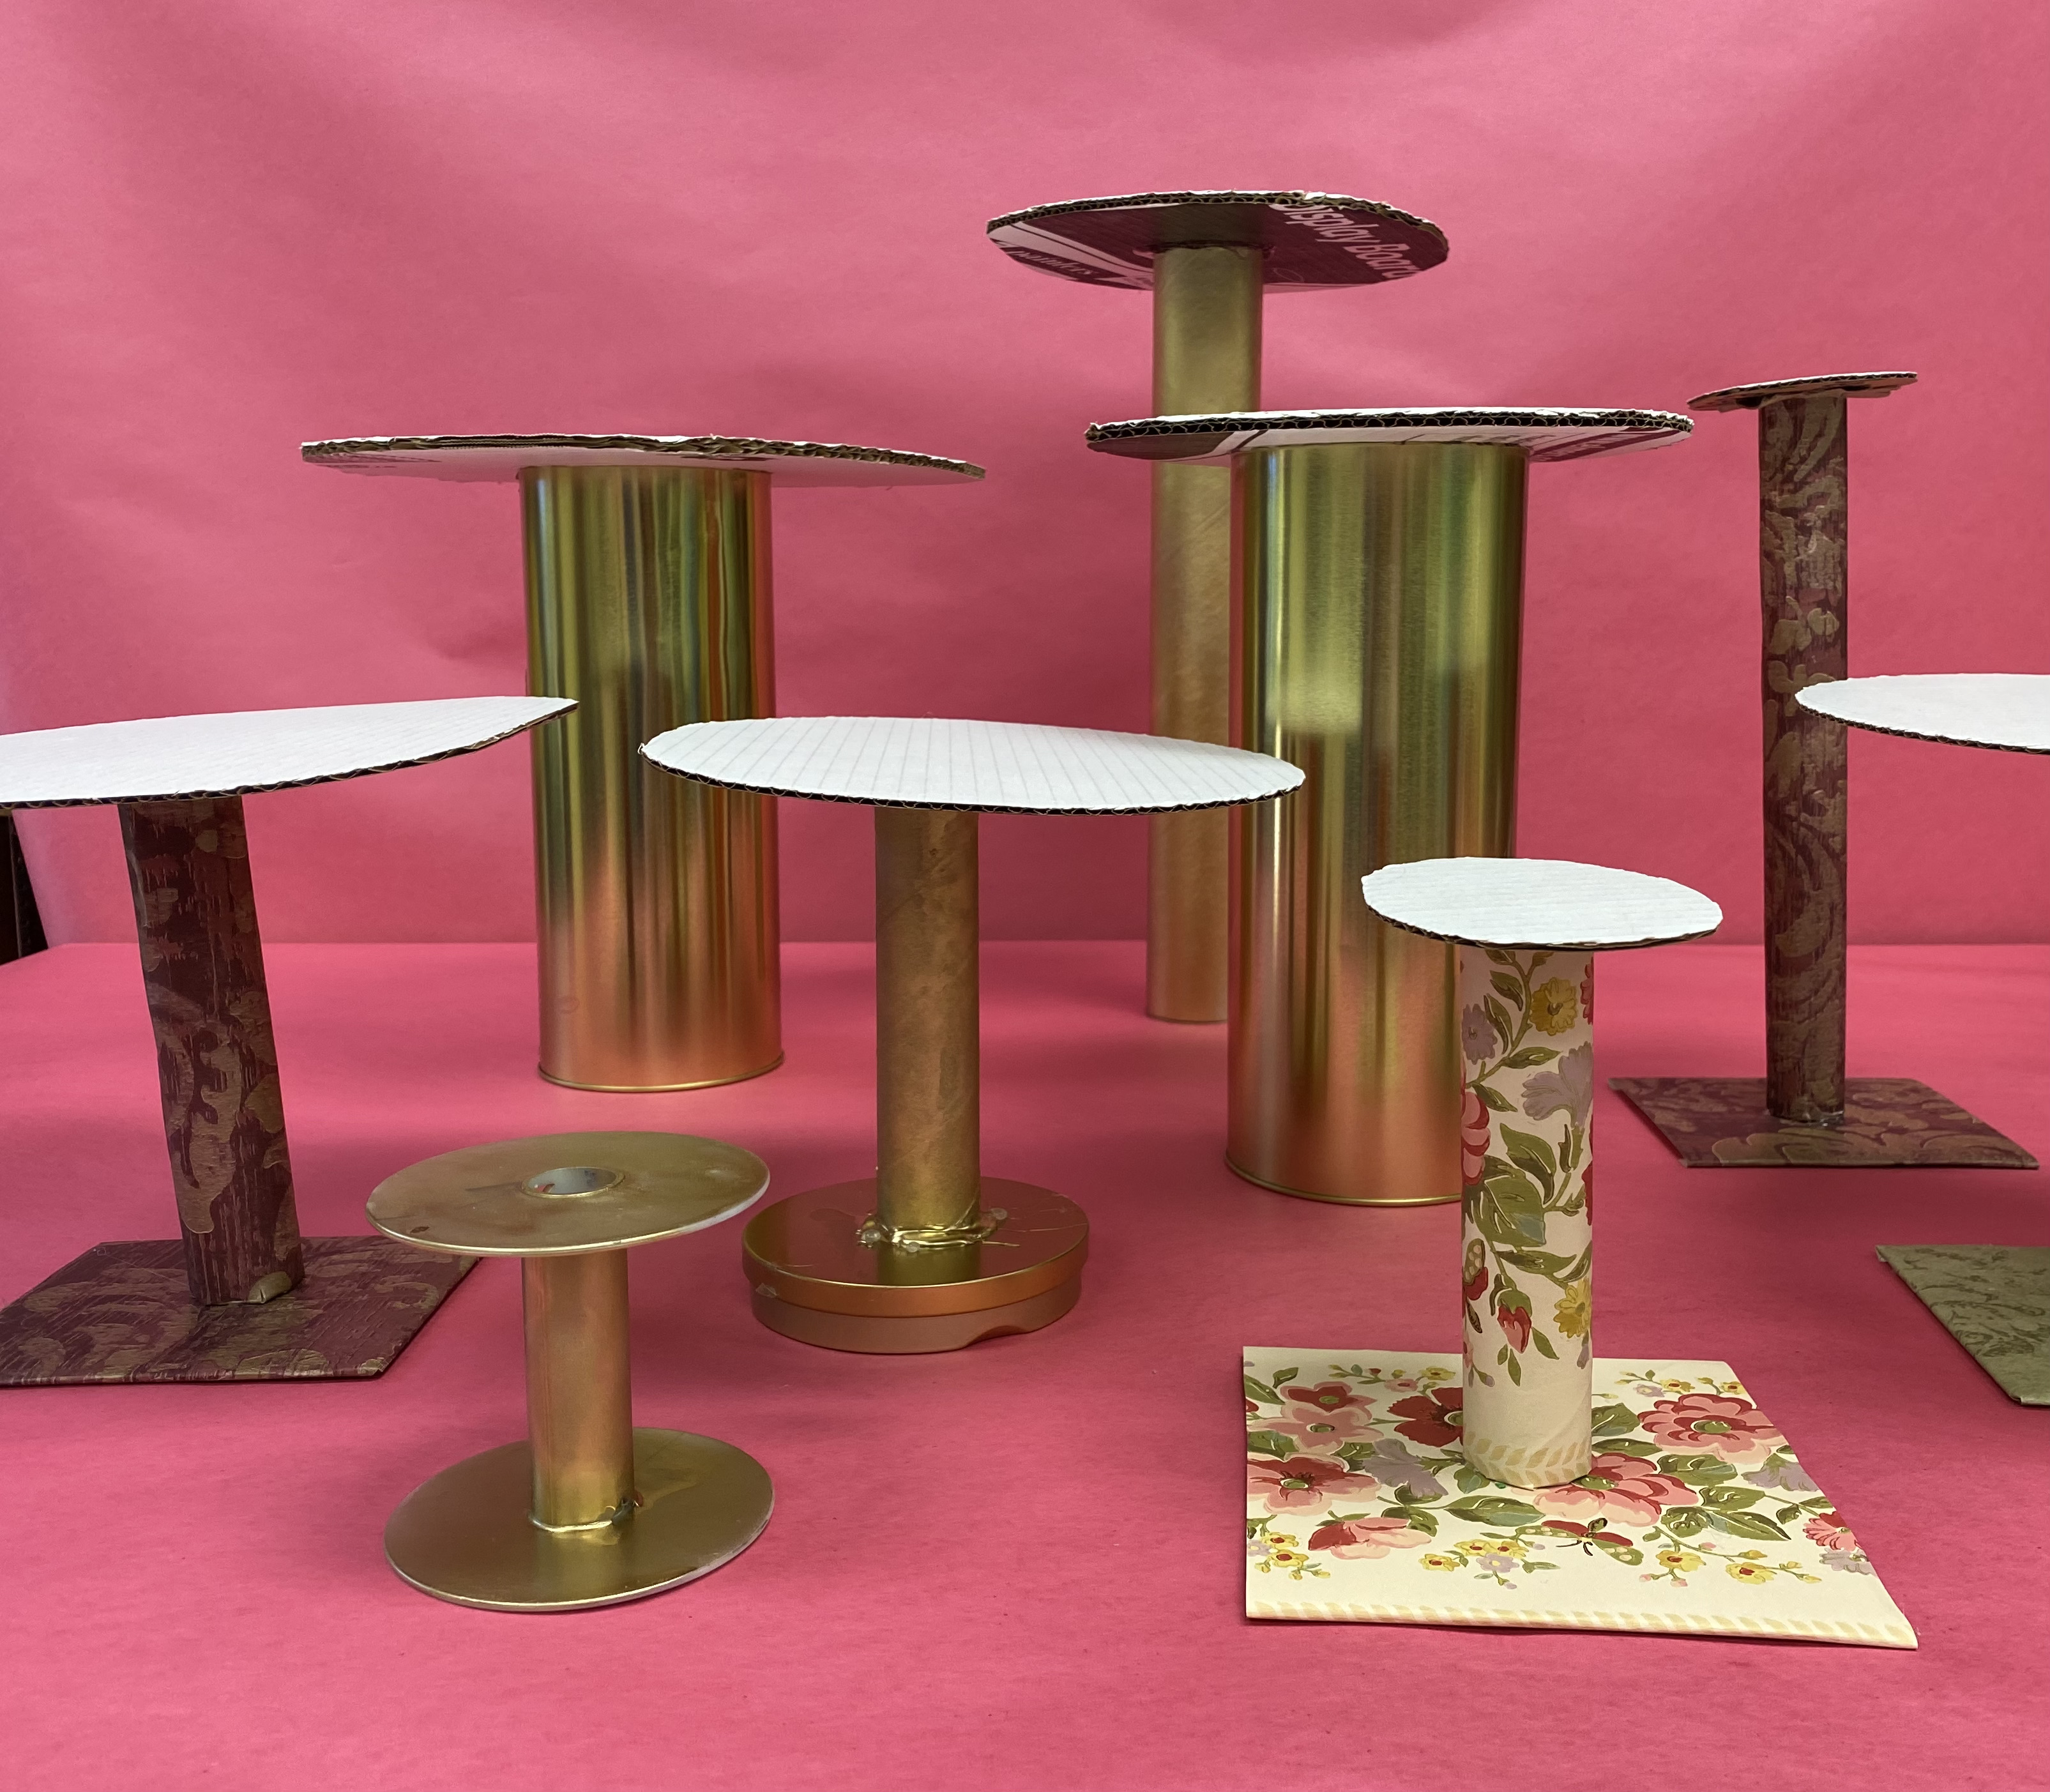
To make a large top hat , I cut a rectangle the length piece (24"-30") of poster board, eight or nine inches wide.  I wrapped it around my head to get the circumference, then traced the oval at the end of the tube onto the remaining poster board. This is definitely not perfect and needs a little tweaking to make it an clean oval.

Then I add 2.5"-3" around the oval to make the rim.  This can be done with cardboard and an X-acto knife, but posterboard is much easier to cut with scissors.  I like to keep the brim as a solid letter "O" shape, but if you need to cut a slit to get to the inner circle (for the brim of the hat) then just tape it back together.
I scored the two long sides of the rectangle so that they would fold about 3/4"-1" and then cut slits perpendicular to the fold to create little tabs.

Now if you use black poster board, you can get away with a paper hat, but most of the hats were covered with fabric, and it makes sense to use your flat hat pieces as patterns for the felt before gluing the paper together. So go ahead and do that. You'll need 2 brims, one top, and one rectangle for the side. We used felt so we didn't need to worry about the edges fraying.
To make the fit accurate, I rolled the rectangle into a tube and let it expand into the brim.  I used hot glue around the inside of the brim and pushed the tabs down on top. Once that was finished, I flipped it right side up and pushed the other tabs in, to attach the top of the hat.


When cutting the felt, some students made the top of the hat a little bigger so the edges could be pushed down to overlap with the sides.  Others made the side (rectangle) a little taller so it could fold over the top and have a perfectly fitted oval be glued to the top of that.  Both ways worked just fine. It's probably a good idea to cut little slits or triangles out of the extra felt to have it fold down more neatly, if you are doing the top part first, however.


The brim of the hat just slides down and is hot glued to the top before flipping it over and doing the same for the bottom of the brim.  Again, if the fabric on the top of the brim is a little wider, it can have little triangles cut around the extra 3/4" or so and tucked under. Then the bottom of the brim can be slightly more narrow than the brim, just to cover the overlap and leave no poster board showing. Some students made the top and bottom fabrics a little larger than the poster board or card stock, glued the edges of the fabric together, and then trimmed the edges.


The genius is in the details.  Most of the hats looked pretty shabby until they were dressed up with ribbon, buttons, feathers, flowers, and hat pins made from painted Q-tips and fake jewels. This is when the student got a chance to show off their creativity and ability to create visual unity.


A couple of students made steam-punk hats based on a video they saw. For this kind of leathery or metallic looking hat, a foam cup, painted black. was used as the base. A black piece of card stock was cut into two circles, one for the top of the cup (hat) and one for the brim. Students used Elmer's glue to attach small overlapping squares of black construction paper and then placed dots of hot glue in the center of some of the squares like the nails or rivets seeming to hold it all together.


Metallic colored paint was dry brushed onto the surface to finish off the steam punk feel.


 So for a a couple of hours and a few dollars, students not only learned to make a hat, but were able to explore the career of costume design, gain a new appreciation for what goes on behind the scenes for movies and plays, and help decorate for prom.