Friday, January 31, 2025

Analogous Watercolor Assignment


For a quick and easy color theory project, I had my students choose three neighboring colors on the color wheel to make an analogous watercolor painting. Students began by using masking/painter's tape to break up the picture plane into small, medium, and large, shapes. I like it when the strips of paint go off the edges of the paper, but smaller pieces can work too, as long as there is overlap of tape.

blind student uses fingers to navigate what parts of the paper still need painted.


blind student adding value to tape edges
Then the students wet their entire piece of paper with by brushing or spraying water on their watercolor paper. Next, they painted one color at one end, and then overlap a second color blending along the way. It could be two secondary, such as a blue at one end and red at another to make a purple in the middle, or they could use a primary in the middle like a blue with a blue-purple on one side and a green-blue on the other. 

That could be the end of the assignment, but I found everyone was able to take their painting to a next level but tracing their tape with a pencil and smudging it with their finger or gradually adding lighter value to fade it out, to create a shadow once the tape was pealed off.

By continuing to peal off one piece of tape at a time and shading around the intersections, a sense of layers and depth is created. For those with vision, they could even activate the background by creating even more layers. This was done by laying the tape done again in different positions and retracing/blending, and pealing off. What could have been a five minute exercise in mixing two or three colors to create a color harmony, now becomes an interesting composition using not only color, but line, shape, and value! That's a lot of ground being covered for a two day project.


Complementary Color Op Art Assignment

Once you have a color wheel made, you can begin to discuss the relationships and positions of colors on the wheel to form color harmonies. A complementary color scheme consists of two colors that are opposite on the color wheel. They have nothing in common, but that's OK-opposites attract! The contrast in these combos pop in a way that make them perfect for sports teams like the Florida Gators or New Orleans Saints.

yellow-orange/blue-purple compliments

I teach complements by setting three bottles primary colored paint on a table: red, yellow, and blue. These are the first and most essential colors that you need to make all of the other colors (secondary, tertiary and beyond). Two primaries make a secondary. I ask, "What do yellow and blue make?" "Green!" they answer. "And what is left over?" "Red." ":What is the opposite of green?" "Red!"  A primary color's complement is the secondary color that is a combination of the remaining primaries. So in a pair of complementary colors, you get all three primaries. The root of the word complement means "to complete." I continue to hold up a primary colored bottle of paint while students look at the remaining two colors to figure the secondary color that would make up the opposite until the concept is solidified.

Students can also look at their color wheel to find compliments other than the primaries and secondary three combos: red and green, blue and orange, yellow and purple. These tertiary colors are just shifted slightly to be a yellow-orange and blue-purple. or a blue-green and a red-orange.  When naming the tertiary colors the primary color always comes first and secondary color second. The name is the recipe for mixing. You would never have an orange-yellow, because orange can't describe a yellow. yellow is yellow. Once you mix in a little orange it is no longer yellow, it is orange.

Some students chose to work markers. Scented markers can be useful for my students who are blind. Others worked in colored pencil. Some were able to shade and highlight their shapes to make the optical illusion a little more effective. 

I outlined in hot glue the Wiki Stix drawings of students who are totally blind. Then I placed tiny pieces of Wiki Stix in every other space to make a checker board. The students could color each space without the tactile "dot" in one color, then use the complementary color to color each space with a dot, one by one, removing the dots along the way.  Student with very little vision used a VisioBook magnifier to zoom in on his shapes, which were also outlined in hot glue. It had been a dozen years since I assigned this color project, but I think the students were pretty pleased with their final pieces.


Tuesday, January 21, 2025

Color Wheel Lesson Plan


The color wheel is the foundation of color theory, but creating a color wheel mandala teaches so much more than primary, secondary and tertiary colors. They are also learning about social studies: culture and history of rose windows and sand mandalas. Math: division and angles. Science: how rainbows are made through refracted light and the psychology of how certain colors can evoke emotions. Art: radial balance, repetition, value, unity, and color harmonies. Careers: interior and fashion design, graphic design, photography, floral design, landscaping and wedding planning all require a basic use of how to use color effectively.

In this lesson we watched videos of Buddhist monks making Sand Mandalas with colored sand. Students learned about the concepts of impermanence and change are basic principles of some philosophies, as the monks can sweep away a masterpiece that took a hundred plus man hours to create. There may be some wisdom in not being too attached to things. We also listened to an hour long Radiolab podcast on the science of color, which included musical chords to help us hear the range of most non-color blind people see compared to butterflies or prawn shrimp. We learned about the research of genetically rare tetrachrome people. They discussed how the color blue is not in ancient literature from the Bible to the Iliad and the Odyssey. Egypt being the one exception as they actually had a pigment for blue. Then came the project.
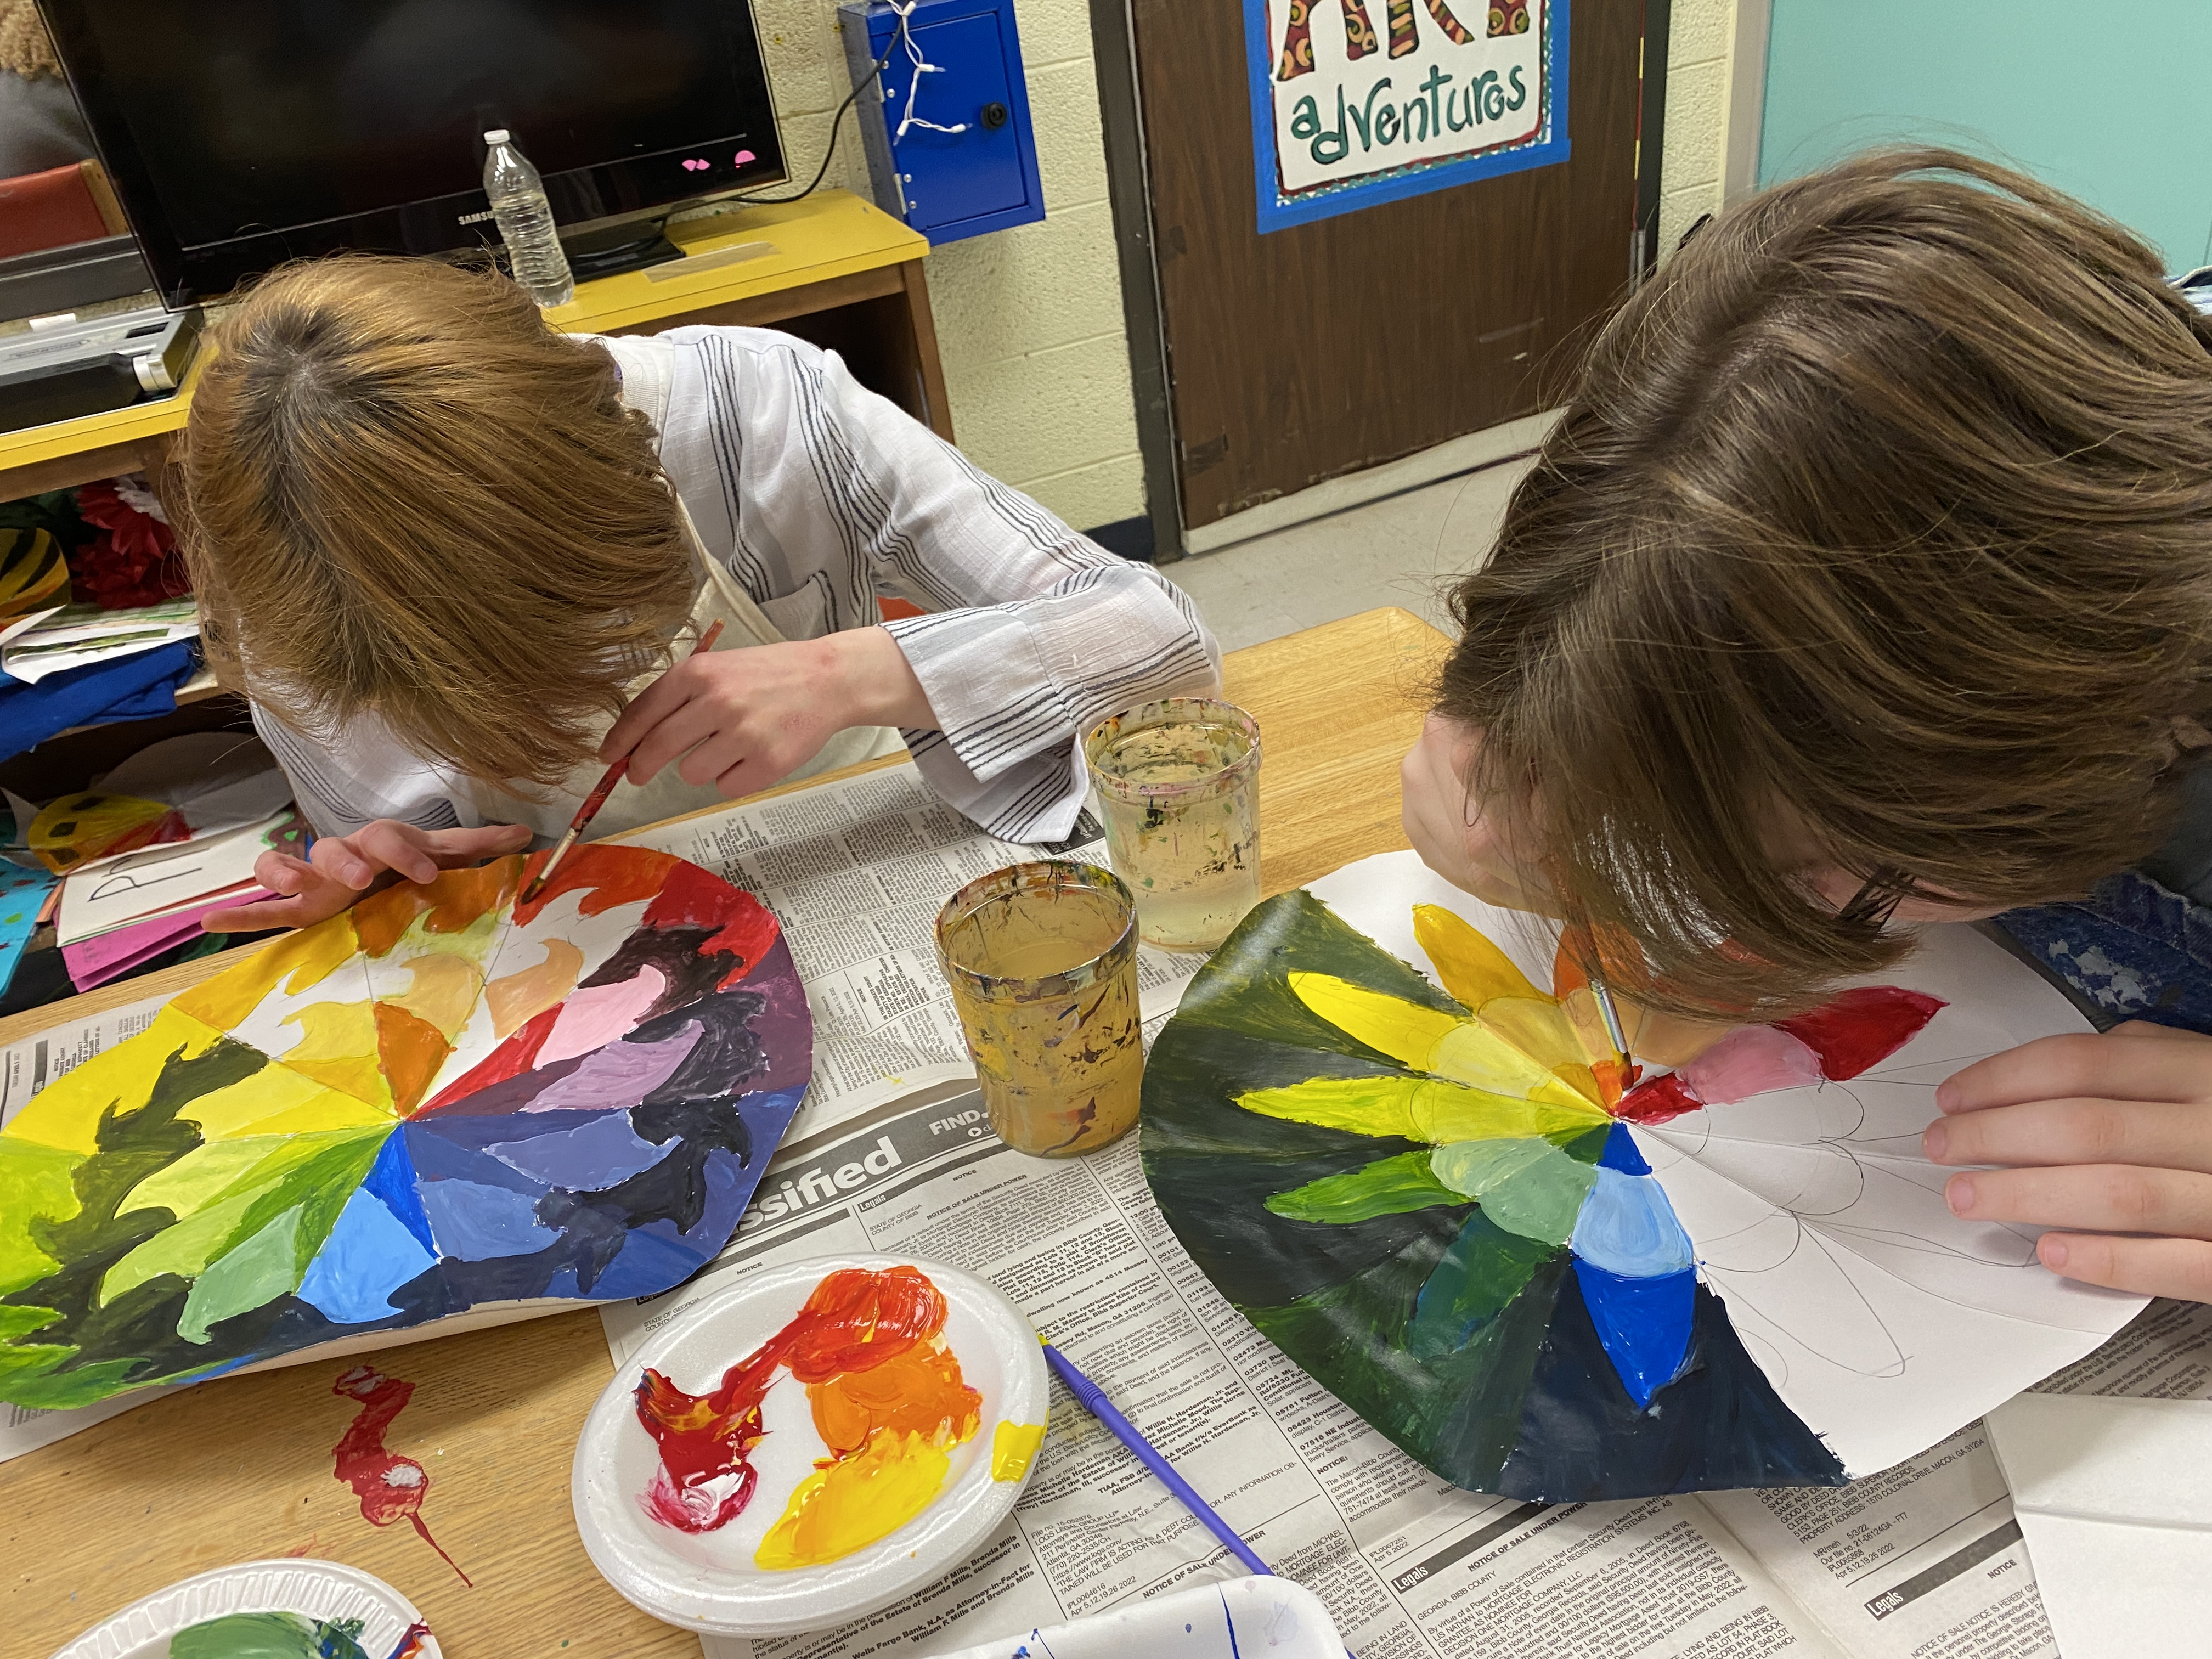
Students cut out 14 inch circles and did the math to figure out that the 12 sections would require 30 degree angles. They folded their circle into fourths and then each fourth into 3rds to get those 30 degree angles. They then used a compass and ruler to make designs. Some used a piece shaped piece of paper to create a design, which they then traced twelve times onto their wheel with the use of a light box. Students charted out where to put their primary colors of red, yellow and blue (with three spaces between each), and their secondary colors of orange, green, and purple. The six tertiary were the ones that were left, and each of their names consisted of the primary and secondary colors they were touching. The name is the recipe: yellow-green, blue-green, blue-purple, red-purple, red-orange, yellow-orange.  With a few markings students could keep track of where they wanted their lights and darks to go.

When mixing a color it is best to start with the lighter color and add a tiny bit of dark at a time until you get a mix that is visually even. If you mix equal parts of red (naturally dark color) and yellow (naturally light color) it will be a very red orange and you'll end up wasting gobs of yellow to get a middle orange color. The same works with tinting and shading colors. To make a color lighter, you tint it by adding a little of the color to white. But to make a color darker, you start with the color and shade it by adding a tiny bit of black at a time. Those dark paints are powerful.
By the time the color wheel is created, they've learned how to mix paint properly to create secondary and tertiary colors from the three basic primary colors. They've also learned to tint and shade each color. Once it's completed, real discussions can be had by using the wheel as a reference. What's the complement of red? look directly across the color wheel to find the green. Want to a nice analogous color pallet? point to any four neighboring colors on the wheel. Want to see what a monochromatic color scheme might look like? Look at any little pie piece on your wheel and you'll find darks and lights of the same hue. I feel so strongly about everyone learning their colorwheel, that I teach it to my blind students. 
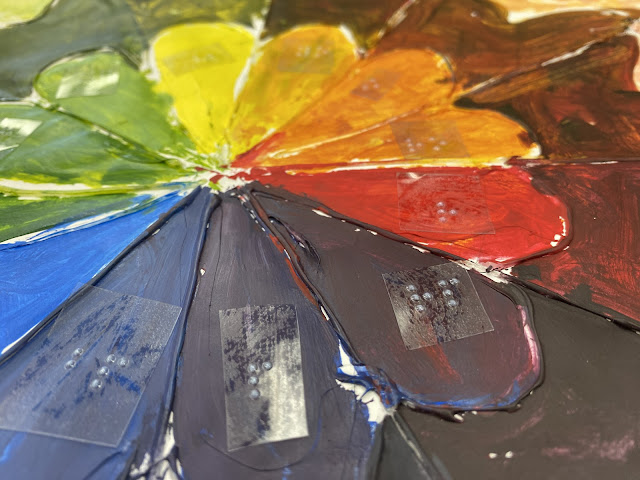
Braille labels with color initials help students understand upcoming lessons on color harmonies