Saturday, December 30, 2017

Christmas Gifts to Make

You don't have to break the bank to show someone that you love and appreciate them. Gifts of the heart are far more meaningful than gift cards.  Here are some ideas I've used in years past.


Paper Ornaments

I made a jar of paper Moravian Stars for a friend when I was in high school. I'd used a kit, which was just strips of paper and instructions. After I had grown and had dozens of nieces and nephews, I created kits for them to learn. Of course a finished star was included and could be a little gift on their own.  Four 1"X16" strips of paper makes a 4" star.

The paper 3D snowflakes require 6 squares of paper. I used 4 inch squares, which means that it takes 1 1/2 pieces of card stock per star. Scissors and glue are the the only other materials needed for this project, which means my kids could make gifts for their teachers for about 10 cents each. Middle School teachers know that each student has half a dozen teachers so they don't expect expensive gifts, and something homemade to use in their room or house is a nice reminder of the student.

One inch strips of paper stapled in the center, bent back and glued at the bottom make beautiful paper flower ornaments.


Mugs

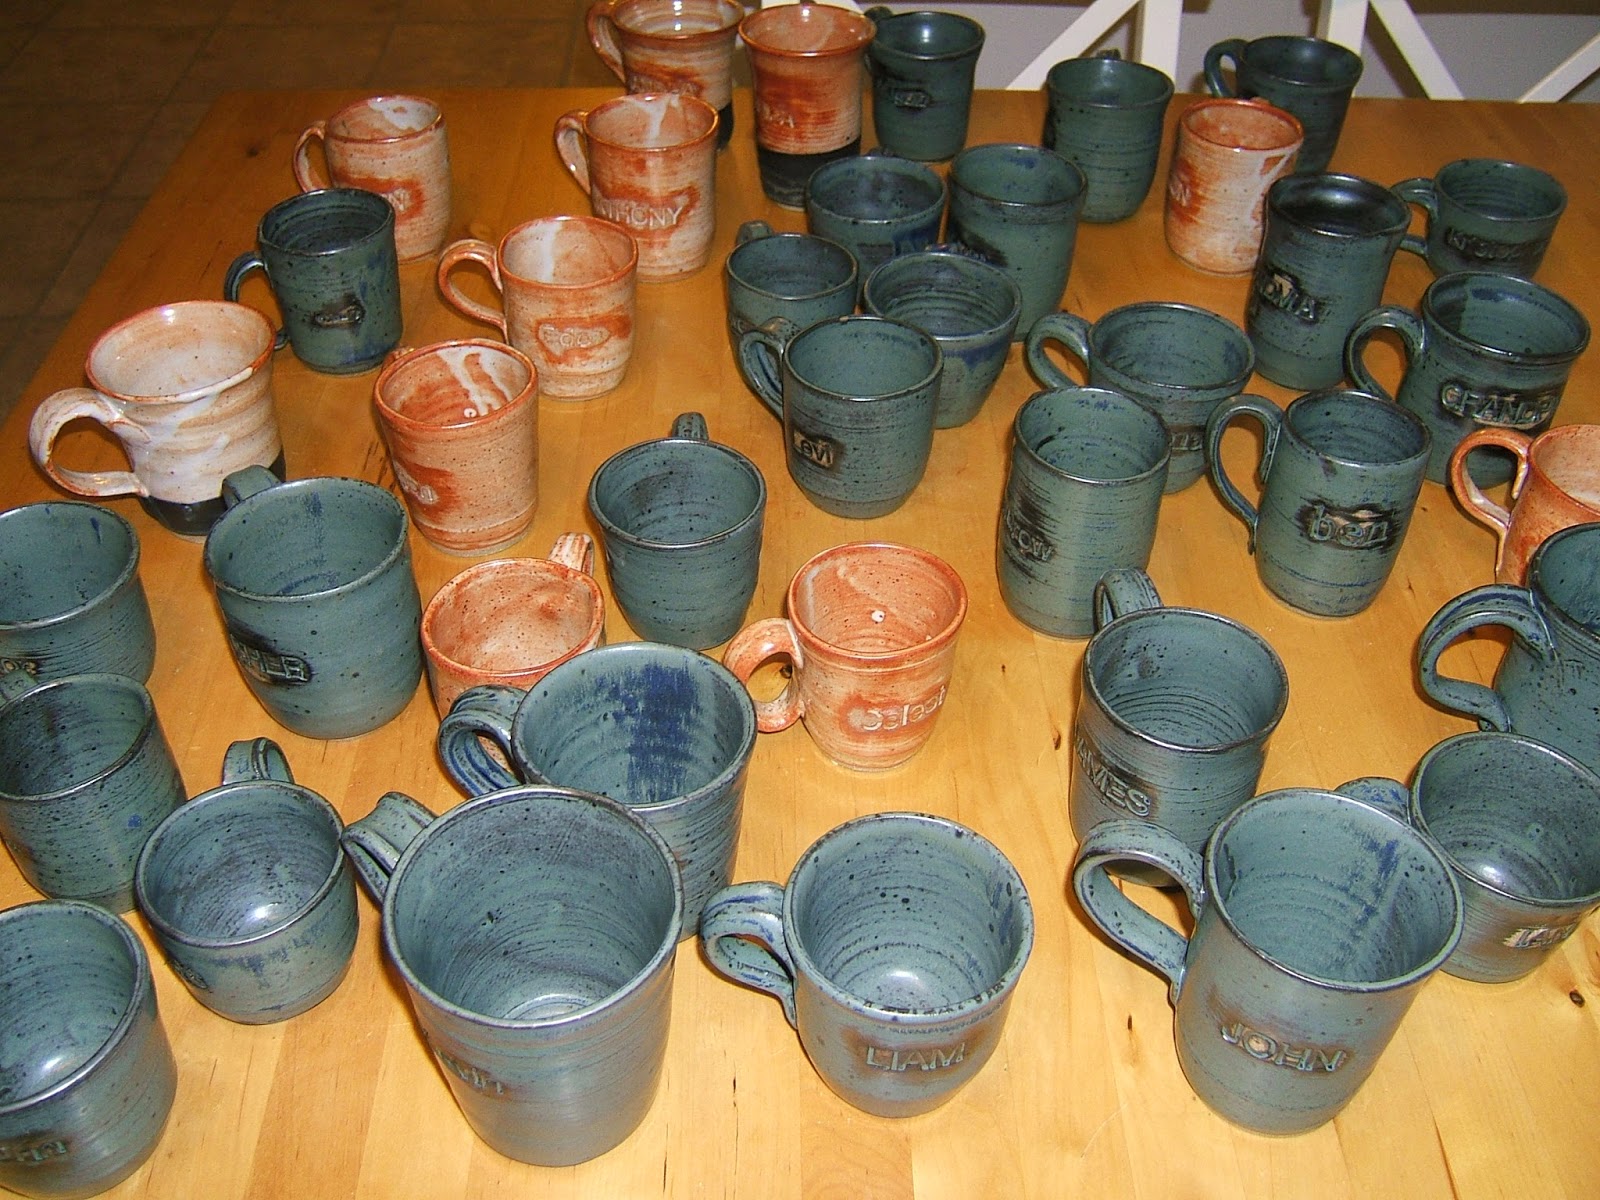
I grew up using a mug that my Aunt Janet had made me. She made one for each member of our family. Anything with a name on it makes it extra personal. I decided to make personalized mugs for the next generation. This ended up costing almost nothing (clay can be dirt cheap) as I had access to the college ceramics studio, but it was very time consuming project, and for awhile I thought of it as a part time job. 

Sign Posts

One year I cut wooden 1X4s into arrows, painted them with white latex, and then painted the city names of loved ones and the miles from my house to theirs. I did this for each of my siblings who owned a home and added the city of my parents as well as my in-law's parents. I included the hardware, but not the poles (for obvious reasons). 


 Here is mine, in the backyard, with my folks, brother, and two of my sisters, all of who have home towns listed on my sign post. Wish they lived closer, but at least I can find the way to them.


Name Paintings
This is my favorite thing to give at baby showers, and kid birthdays, but I've given more than a few away at Christmas too. This is another gift of time and talent, as the frames are $10-$20, but if they were to have their own name painted it would cost about $40-$50.

Graham Cracker Houses

My family made graham cracker houses every year when I was growing up. I probably only missed one year in the last 35 from this tradition (when I was in Japan and couldn't find graham crackers). Each of my kids make their own and then we have carried on the tradition of Christmas caroling and delivering either a house or cookies to our neighbors.  Here I am, building 25 houses in advanced for my daughter's kindergarten class to decorate. The icing is made from 1 lb of powdered sugar and 2 egg whites (or pasteurized egg whites), mixed 20 minutes on a mixer. I place a scoop into zip lock plastic snack bags for kids to use pipe.

Goodies

Homemade cookies and candy are a treat for everyone who isn't diabetic. I have used inexpensive boxes, tins, paper plates and paper bags with ribbon to keep costs down and let me share with more people. Small loaves of pumpkin bread or banana bread look adorable with a ribbon and small card, and fit nicely into teacher's boxes. Consumables are the best gifts for people who already have everything they need and who want to avoid clutter in their lives.




Monday, December 18, 2017

Mexican Culture and Art Lesson for Kids


As my high school students were making paper mache totem poles, I had my younger students paper mache balloons to make piñatas. They used tissue paper to decorate the dried spheres.  Piñata are though to originate in China as part of a Chinese new year celebration in which a ceramic ox full of seeds is broken in hopes of bringing good crops.  But the Aztecs had a similar ceremony in which a clay pot was broken to release things like nuts and colorful feathers as an offering to one of their gods. Once Christianity came to Mexico, the piñata tradition was continued, but as an object lesson. Seven cones on the piñata represented the seven deadly sins, and the blindfolded person with a stick represented the faith needed to overcome sin, and eventually release the blessings (prizes inside the piñata).
Our fun continued in a lesson about traditional Mexican toys including wooden tops, noise makers, and boleros, or the cup and ball games.  I hadstudents tie a jingle bell to one end of a string, and the end of a popsicle stick to the other. (A wooden bead is great too, but my students are all visually impaired so the sound of the bell is helpful). They used a little piece of tape to put a Dixie cup to the top of the string end of the stick. Then they used more tape to strengthen and decorate the stick and cup.  The goal of the game is to try to swing the ball/ bell out and catch it in the cup. One of my blind students had to work at it for about five minutes before getting it the first time, but he was so thrilled when he did.

One group had an extra class period with me and so we played mariachi music, which they interpreted visually. One student made a representational image of a horn, maraca, sunshine and flowers.


But most students took a more abstract approach, and used color and shape to convey the feel of the sounds.

Then they used the same types of cups, tape, and popsicle sticks that they used to make their ball and cup toys, to design their own maracas, filled with rice or dried beans of their choice.  These instruments were then used to play along to "Feliz Navidad."  I gave a brief language lesson so they ended up with some important phrases, making this a Social Studies, Foreign Language, Music and Art lesson. Four subjects in a couple of fun hours.  Yo soy una maestra feliz.


Monday, December 11, 2017

Paper Mache Totem Pole

"Lowest man on the totem pole" is a phrase that implies that the most important symbols are placed at the top of the totem pole, but this is not always the case. In fact, if you have a tall totem pole (which can be 30 feet tall) than the "lowest man" may get the most attention as it is at eye level and may be wider to support what's on top.

Nine of my high school students made an couple of equal opportunity totem poles out of paper mache a few weeks ago.

They had completed their ceramic totem poles using several  different animals the previous week, so they were familiar with the symbols. This assignment required them each to choose an animal to represent him or herself.


We started by building 6'-7' poles of cardboard, taping cereal boxes, pie tins and parts of bottles to form beaks, eyes, noses and fins.

Paper mache was added to the under structure. We dipped strips of newspaper into a bowl of fabric starch to layer onto the surface. I taught my students to pull the paper strips through two straight fingers to "squeegee" the excess liquid.

At least five layers (probably 6-7 large bottles of starch) later, we were ready to paint the surface with black latex.  Students used chalk to draw the designs on their animal on the dry underpainting. Then the poles came to life as colors were added. We stayed with the primary colors plus white and brown to keep it traditional and visually unified.
It was well worth the two weeks to turn reusable "trash" into large collaborate art pieces, which will last for years.


Saturday, December 9, 2017

Ceramic Totem Poles (Part 2)


Totem poles are not idols nor objects to ward off evil spirits. They are stories told with symbols. They may honor a family, commemorate a life, or,  they are may be used to shame someone (say a CEO or ambassador) for wrong doing.  The poles are carved from tall cedar trees from the Oregon and Washington all the way through British Columbia to Alaska.

To read a totem pole, one must know the meaning behind each animal.  A wolf is a symbol of loyalty and intelligence, a frog represents wealth and good health. Salmon symbolize determination and perseverance. Killer whales are powerful and can offer food and help to tribe leaders. An owl is wise and may symbolize a deceased family member. A bear is strong and was believed to teach people how to fish and gather berries.

My high school students used slabs of clay to wrap around cardboard rolls and create their own totem poles. I encouraged a lot wiggle room for the shrinkage that comes from drying, so the tube could be removed. After a bisque firing, they each glazed their animals.  For the students who did every animal separately, we hot glued the pieces together afterwards, and it seemed to work pretty well. (Time will tell how long it will hold).  These ended up being a little over a foot in height, which was about twice as tall as the mini poles that the younger students made. We were so excited to pull them out of the kiln yesterday it was fun to see them standing side by side.

Thursday, December 7, 2017

mini totem poles


 November became the month of the totem pole in my art room. Thanksgiving doesn't have much to do with the indigenous people of North-Western U.S., but it is a nice time to remember that there were people living in this country before Europeans settled here. Plus it's an important part of the 3rd grade school social studies curriculum.

We discussed the purposes and types of totem poles and the people who made/make them. Then each elementary school student made his or her own, by making small animals and shapes and poking a pencil through them.  Dick Blick has a lesson plan with air dry clay and dowels which I'm sure would have worked better, but we had a lot of regular clay and so that's what we used. The problem is to remember that clay shrinks and when the hole shrinks it will be nearly impossible to get it off your dowel or pencil before firing in the kiln. So we removed the pieces before they hardened (after having let a few dry and breaking them off), but then it was a matter of finding a small enough dowel to stack them on after the kiln firing.  It was a pain trying to get each student their own pieces (hundreds of tiny animals in the kiln), but it helped that there was a name on each one and that I took a picture of each finished pole before disassembling it for the drying and firing. Again, the air dry clay on dowels would have been much easier, but I think they still learned what I'd hoped they would learn, and the products turned out to be pretty cute.

Sunday, December 3, 2017

Sock Puppets


Sometimes, as teachers and parents, we are so busy searching for new ideas to keep our kids engaged that we forget the old standbys, like making sock puppets.

For our sock puppet project, each student created a character, complete with gender, age, name, and personality traits. They chose from stacks of felt, feathers, plastic eyes, foam shapes, pompoms, and pipe cleaners to make the face and hair of their character. I stood by with a hot glue gun awaiting their orders on what to glue where.

Then they wrote short skits with a dialogue between two characters, which they later performed for the class. We made a quick theater by cutting a hole in a cardboard box and taping fabric to the top of the hole. My classroom became a safe place for students to be silly while learning about puppetry arts, character development, dialogue and script writing. Play is the work of childhood after all.

Sunday, November 19, 2017

Wreath Ornaments

String buttons, beads or bells on wire; close the circle, add a bow, and you've got yourself a wreath ornament for the Christmas tree.  It's the holiday craft that even small children can do.

Other versions of the craft open up once you are old enough to work a glue gun. When my kids were little and I didn't have much money for decorations, I made wreath picture frame ornaments of far flung family so my children would remember their aunts, uncles, and cousins. I started with clean concentrated orange juice can lids. Construction paper on the back, and front (minus a hole for the picture), and red ribbon around the sides to cover the metal and disguise the metal base. Then I hot glued buttons around the edge.  For some other family members, I cut a back and front out of felt, glued it down and stitched the edges with red embroidery floss. Red buttons looked like big berries and red bows and loops finished it off. It was a weekend project that has brought 16 Decembers of enjoyment since. Simple or elaborate, wreath ornaments are gifts, gift toppers, or memory keepers.


Thursday, November 16, 2017

Wire and Bead Ornaments

It is almost December, which is the time of year for ornament making and for fundraising. Last year my students and I made wire ornaments to sell.  I made the basic shapes (star, heart, Christmas tree, dove) from 18-gauge wire, and then offered them beads, pipe cleaners and plastic coated wires called Twisteez,  to twist and zig-zag across the base structure. The more they made, the easier it became for them. I sold them at a community market for $2 each, sent some to Atlanta for another sale, and kept some to sell during our student show. We threw ourselves a pizza party with the profits which made the whole process twice as fun. Try making some yourself. After all,  a little craft and whimsy make for great therapy during this hurried season.

Monday, November 6, 2017

Whirligig Interdisciplinary Lesson

When I asked elementary students at the beginning of the year what kind of things they wanted to make, the most common answer was,  "Fidget Spinners!" Long before the current toy sensation, though there were other kinds of spinners, toys like tops yo-yos, and and whirligigs, so I decided to do a history lesson that included the original Fidget Spinner, as part of our color theory unit.

I began by talking about pioneers crossing the country in their covered wagons or handcarts. Can you imagine moving and having to fit all of your family's possessions in to one car? What if you could only take one thing, what would it be? I shared my childhood road trip game: If I Were Going Across the Plains" We went around the class, and each person filled in the blank, "If I were going across the plains, I would take a......"   I explain that the word they chose is a direct object. The first person then tells what they would do with their object. "I would eat my food." Then we we go around the group with each person using the same verb as the first person, but keeping their original direct object. "I would eat my hat....I would eat my book.....I would eat my sleeping bag" The second person then chooses the verb that makes sense for their object, "I would put my hat on my head." and continues, "I would put my book on my head...." This lead into a discussion about how few toys would be allowed to travel, and what kind of toys the pioneer children actually had.

The type of whirligig, that pioneers used,  is a small, wooden disc with two holes on either side of the center point. and a piece of twine. This is threaded through both holes like a button and tied together at the other end. By holding the ends of the twine loop in two hands and moving the hands in small circles like you would jumping rope, the twine becomes twisted to the point that the hands move closer to the disc. Once the hands are slowly pulled apart, the disc spins and as the hands relax, the disc winds itself up in the opposite direction. So by pulling and relaxing, the whirligig can spin for minutes, or until the string starts cutting off the circulation in your fingers. I used a role of masking tape as a template to trace the circles--wood is much easier to spin, but a couple cardboard circles hot-glued together can work too. The holes are about a thumbs width apart and the string should be about a yard long (18" after it's folded it in half).

Since we've been studying the primary colors (red, yellow, and blue), and the fact that two primaries mixed together make a secondary (orange, green, purple), the students were to pick to primaries for each side of their whirligig. They could do spirals, dots, stripes, star bursts etc. as long as the colors remained separated but close together. The two primary colors visually mix into a secondary color once the whirligig gets spinning.  Playing my childhood game, sharing my pioneer ancestor stories, painting, and spinning whirligigs--there are days my job is so enjoyable that I can hardly believe I get paid.

Friday, November 3, 2017

Zentagle Portraits


My friend, Matt Forrest, who volunteers at my school, got a grant to buy frames and easels for my students to have an exhibit in the community. We sat down with my high school students to brainstorm and vote on a project that interested them. They decided to make portraits that used various patterns.

Once their drawings were done in marker (any color as long as it was dark), I emailed pictures to Matt, who produced the images on plastic and then used photo emulsion and the images on plastic to produce silk screens.  When he came back to the school, my students printed their images with black ink, on to high quality printmaking paper.  The wet ink can be flocked with a powdered plastic that melts when met with a heat gun, making the image tactile. Finally, students colored their prints with water color. I try to have my all my art projects for the year on the calendar before the first day of school, but sometimes, unexpected opportunities and the group decisions make for some nice side trails and beautiful vistas.


Wednesday, November 1, 2017

Instant Ancient Pottery Lesson Plan


In art class we have been studying ancient Egypt and talking about how archeologists dig and discover pottery from lots of civilizations. Unless someone grinds them up, ceramic items last thousands of years. They may crack or break into pieces but the pieces and be put back together for a better understanding of how vessels were used and how people lived.

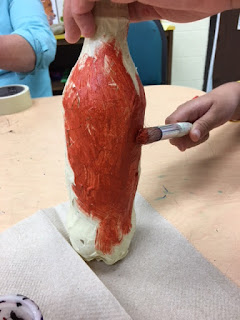
To make pseudo-ancient vases, my students tore hundreds of pieces of masking tape, stuck them onto empty plastic bottles, painted them with a terra-cotta colored paint, and then wiped off the extra with a damp paper towel to expose texture. This was one of the only projects I remember doing in the craft class I took when I was four. Super easy...


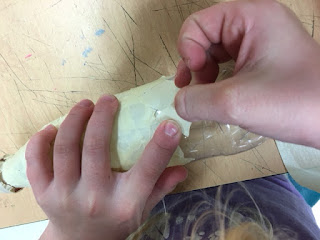
...unless you can't tear tape. Those who are born without vision aren't able to learn through observation, an advantage that most of us take for granted. If they are not taught these skills explicitly, they won't learn them, which is why I know adults with visual impairments, who don't know how to tear a piece of masking tape off the roll. When I realized this was an issue, I decided to start  teaching the skill to younger students. We practiced pinching thumb and forefinger, placing two pinching hands together, side by side, and twisting one towards the body. Students felt my hand position, and practiced on paper a few times before getting a piece of large masking tape to tear down into hundreds of smaller pieces. Repetitive tasks are always less tedious when  paired with purpose. In this case, the finished product and sense of pride was a great reward for a polishing a skill.

Monday, October 23, 2017

Toy Design Project for Kids


For the few elementary students who don't understand how art relates to their lives, I walked them through the process of toy making. Toys don't just appear on store shelves or in the bedroom toy box. Someone had to come up with the idea, make a preliminary sketches, present the sketches, rework the sketches, make pattern, choose the fabric (color and texture), or make a 3D model for hard plastic toys. I showed (and described) a few youtube videos that go through the elaborate process it takes to make a single toy for a kiddie meal.


I required my students to start with a sketch to be used as a pattern, and for those who needed something tactile, Wiki Sticks did the trick . They cut it out of paper first, and then  two layers of fabric.


They ran fabric glue around the edge of one piece of fabric, leaving a few inches without glue. They added the second layer and once the glue was dry, they stuffed the opening with stuffing.


The openings were glued  and clothes pins helped keep edges together until dry. Students used foam pieces, puffy paint, googly eyes, and buttons to decorate their toys. The project only takes an hour, but the knowledge that every toy they ever see was made by someone who went through a similar creative process, will hopefully last a life time.


Sunday, October 15, 2017

Crazy for Carle


Months ago, my friends and I went to see the Eric Carle Exhibition at the High Museum of Art in Atlanta, and we were charmed. His process of children's book illustrating is unique in that he paints tissue paper and then cuts the paper and collages the shapes to make images. His work includes classic books such as "The Very Hungry Caterpillar" (my school has a braille version of this one complete with tactile illustrations) and "Brown Bear, Brown Bear" (for which we have finger puppets).


After reading the books to my elementary students, one girl said, "White chicken, white chicken, what do you like? My favorite thing is riding a bike." She inspired me to ask each child to come up with an adjective and noun (usually a color and an animal use as a subject for their question. Then they changed the verb from the original, "Brown Bear, Brown Bear, What do you see?" They had to answer with a word that rhymes with the verb.  This teaches parts of speech and word families. And before you know it, we had completed a classroom book, or at least a bulletin board for now.


One class, in which most of the students are non-verbal, helped paint the boarder. This is still a good way to teach color mixing, and basic paint strokes.  Everyone gets a chance to contribute and take ownership in the final product. Thank you Eric Carle, for the inspiration!