May 1st is May Day is International Workers Day to celebrate rights of
laborers, but it is also an a spring celebration dating back at least
four hundred years, complete with music and May Poles. The May basket
tradition that I remember as a child, is one in which a paper basket is
made, filled with treats and/ or flowers, and then left anonymously on
someone's door. My students spent last week making paper flowers for
May baskets.

One day they made lilies, which required them
to trace a circle inside a circle and divide it into 8 sections like
pizza slices. A dot in the center of each section on the outer ring
would be the point of each petal and then where the straight line (slice
edge) intersected with the smaller circle would be where the petal
ended. Templates were drawn and cut. One of the petals was removed
completely down to the center point of the circle (an entire pizza slice
removed.) The template allowed students to trace and cut several more
matching lilies. Dots were drawn towards the center of one side, then
the flower was flipped and the petals were curled with a pencil. A cone
is made with the dots on the inside, and glue used for overlapping
petals. A pipe cleaner with a little roll on the top is placed on the
center just before gluing.


For hyacinth, half a sheet of construction paper (lengthwise),
gets folded up 1/2-3/4" before cutting slits down to the fold. Each
slit (about 1/3" apart) is curled. Some of my students used a toothpick for a nice tight
curl. We ran a bead of glue on the edge and used that to wrap down the
stem. Stems were made from green paper rolled tightly. I started
cutting the paper in half diagonally and rolling from the right angle
corner towards the longest side of the triangle, and then twisting to
tighten before gluing the last little flap in place. We even taped our
shortened lily pipe cleaners to the top of the paper stems because they
looked better and were easier to bundle or stand in a vase. Basically 2
half sheets of paper and a few drops of glue will get you a beautiful
hyacinth!

Tulips were easier than I thought they would be and ended up looking
almost real! To make, we cut 4 rectangles of the same color, each 2 inches wide
and 5 or 6 inches long. The center was pinched like a bow tie and then
twisted twice and folded back on itself. We placed our thumbs in the
center to pull the tissue around like a little spoon and then pinched
the bottom before gluing each petal to the stem. First two are across
from each other (like a clam top and bottom) and then the next two
filled in the sides. These look best with long thing green leaves glued
to the stem.


Day four, we made carnation or chrysanthemum type flowers
with tissue paper. See last year's Cinco de Mayo decorations for
instructions.
May baskets are made by forming a cone of
paper and stapling and gluing before trimming the pointy edges on top.
We stapled ribbon to hang on a door, and lined each cone basket with a
larger piece of tissue paper before placing 5 or 6 flowers in each. My
students are not as stealthy as I'd hoped but they still had fun
pretending no one saw them as they knocked on the doors of our
administrators and scurrying away. And they have enough left over for a
Mother's Day surprise. Happy May Day!


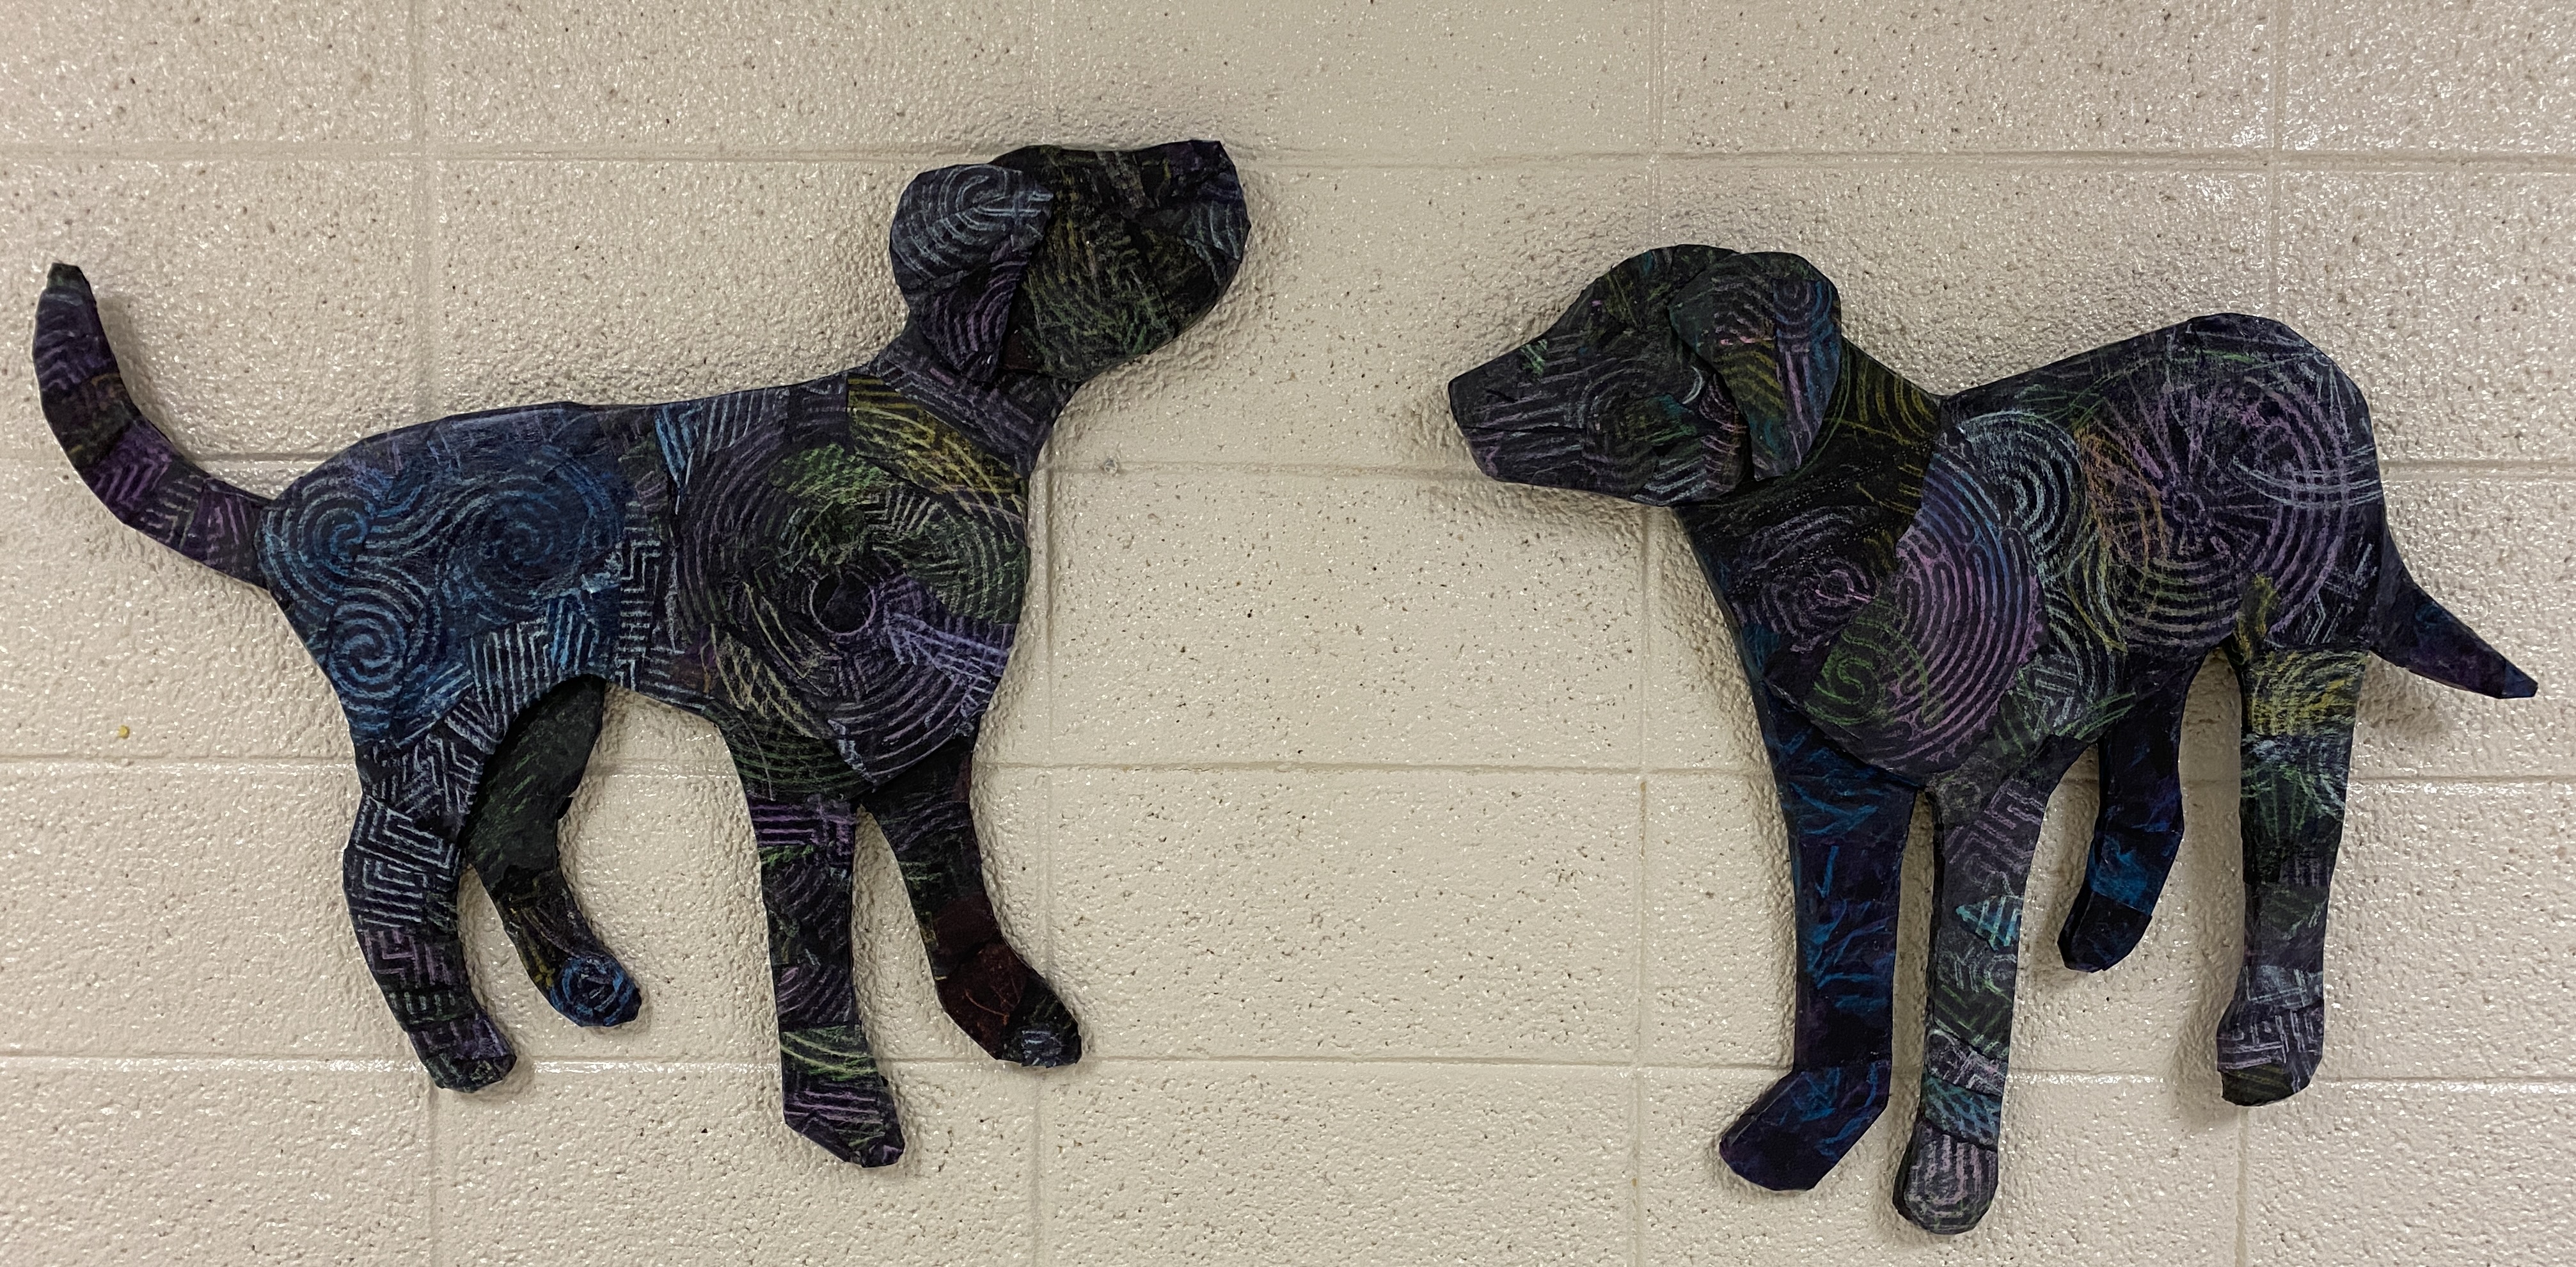
 Two Middle School students made more rubbings with oil pastels on black paper, based on the past assignment, which they decoupaged onto the structures. To make the relief structures into something that could be hung on the wall, I had made two holes through two layers of cardboard to thread wire through before adding a top layer of the body.