Saturday, April 12, 2025

Folded Paper Slinky Snakes


As a kid I used to fold metallic gum wrappers into chains for fun, and it seemed like a perfect hour long activity to include in our toy making mini-unit for my Art class. These paper slinkies can be scrunched up to let boing along the table or straight up and down. Children may glue paper shake heads to wiggle around. Four of them can be used as arms and legs for a puppet or paper monster. They can be used to make bracelets, or decorations. Small versions make perfect mechanism in pop up cards. Kids can come with with more ideas, so it's good to leave the purpose of these paper slinkies opened ended. 

To make, cut long strips of paper. I cut 18" X 12" paper lengthwise into 12-one inch strips. I limited the colors to primary colors and each student chose two of those colors. The ends of two contrasting strips were glued together at a right angle. One color should face up and one to the left. If the blue is facing up and the yellow on the side start with the one on the bottom. If the yellow is on the bottom that you'd fold it over to the left like you're turning the pages of a book and crease lightly before turning the top strip down to cover that color. The pattern is: side-down-side-up-side-down-side, etc. When you get to the end of the strip glue another one of the same color to extend the length of each. You can make it as long or short as you'd like. 

All of my totally-blind students figured it out enough to work independently, which meant I could read my class a chapter or two from a fun book. One student said, "I finally found something I'm good at!"


Friday, April 11, 2025

Making Pinwheels


 I consider making pinwheels as a requirement for childhood, along with making paper snowflakes and cootie catchers/ fortune tellers. It only takes a couple minutes and makes such a spring decoration or springboard for discussions about wind and weather.

To make, you just start with a square piece of paper: five or six inches seems to be a good size. Origami paper works really well. You fold a corner to it's opposite corner to make a triangle and then open it to do the same with the remaining two corners, making a folded X. Cut along each fold towards the center, stopping half way. Than take every other point and glue it to the center. Once the glue dries, use a thumbtack or hat pin and push it through the center of the paper into the eraser of a pencil, or into the end of a plastic straw. It's that easy!

Thursday, April 10, 2025

Paper Spinners


While studying Art related careers such as fashion, costume design, and set design, I decided that toy design would be something my students could actually use or give to a sibling or younger student to use for play. Toy making is much like learning to cook, you start with learning recipes that you can use as a springboard for creativity. You alter things until after time you come up with something totally unique. 


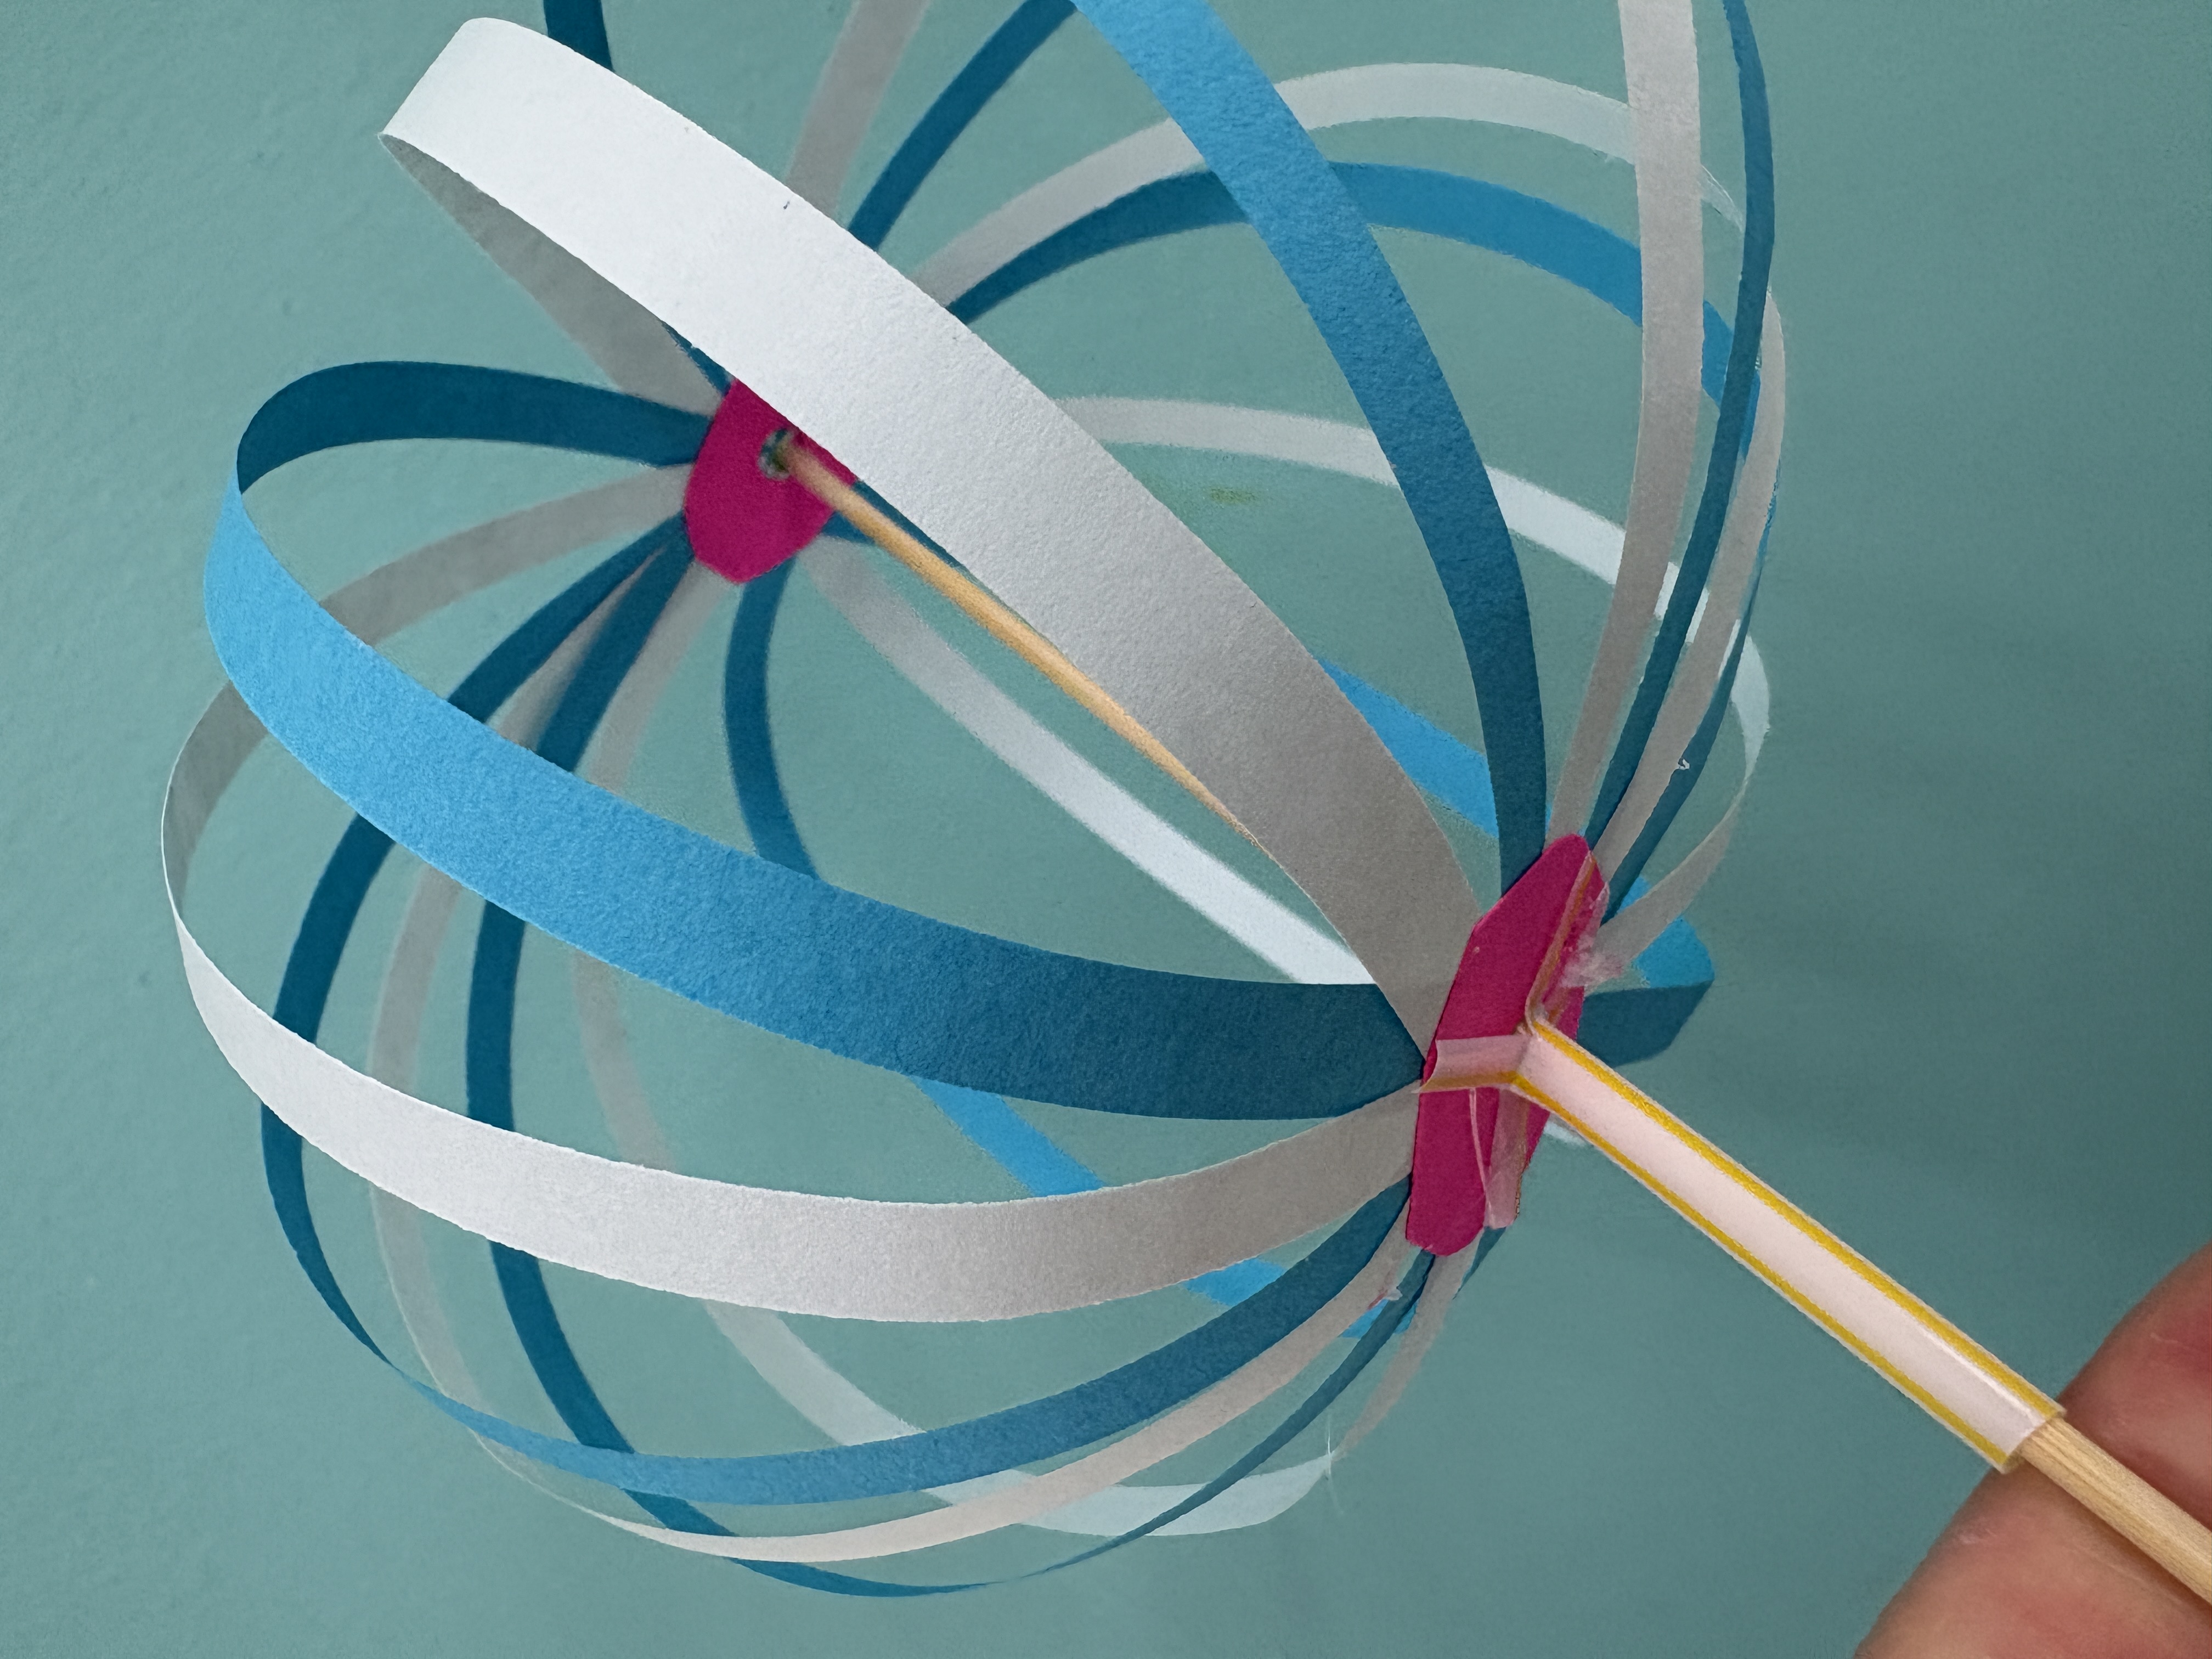
This spinning toy, I saw online and felt it was a perfect craft for my students who bring figits to class every day to deal with their stimming behavior. To make this, you will need: 16 strips of paper that were 8.5 inches by 1/4 inches. 4- 1 inch paper circles with a hole in the middle made with a hole punch, a bamboo skewer, a bead, and 1.5 inch piece of straw.  You'll also need liquid glue and maybe hot glue for the finishing touches. 


Start by putting glue on one of your donut shaped circles of paper and attaching the strips of 4 strips to make a plus sign, and then four more to make a multiplication sign. Then you can fill in every other space, to ensure that all 16 strips of paper are evenly distributed. Glue another "donut" to the top of the ends of the strips so that they are covered and more secure. Then put glue on a 3rd "donut" and turn the ends of each strip like the page of a book to glue it one by one to the top of  the "donut" near the hole. Top with the last paper donut shape.


Slide the skewer through the bottom and top holes like you are stringing a bead. Then glue a bead or two to the top with hot glue. Be sure it attaches to the paper "donut" and doesn't spin around.

The piece of plastic straw should have four slits made with a pair of scissors at the top and then spread out each prong like petals of a flower opening or a banana being pealed. Slide the straw, spread out but at the top, and glue each prong with hot glue to the bottom "donut" on the sphere. Careful! use the small glue gun with low heat so as not to melt the straw or burn yourself!


Once the glue is dry and cool you can spin the skewer between your fingers or hands. You can also spin the skewer between a finger and thumb of one hand while holing the straw with your other hand and twist the strips in both directions. Students found ways to play with these that I hadn't imagined, and loved hearing their laughter as they figured out new ideas.


Spring Art Show Color and Fashion


The last quarter has flown by, but we managed to fit our Spring Art Exhibition be March . Everyone who entered the room commented on how colorful the student work was, which means our color theory unit was a success. 


The exhibit was a nice way to wrap up our fashion unit as well. It's hard for blind students to enjoy arts shows, when so much of the work is two-dimensional, but we made sure the hats and masks were out for students to feel and try on. High Schoolers always show up to support each other at art show openings.


I love involving students in the selection process. I used to pick one maybe two pieces from each child to put on a couple 6 foot tables, but now that I found a room to use for a gallery, I can have class critiques that allow students to pick the best four pieces from each portfolio. We tried  to get a smattering from each project and then worked together during the hanging to arrange things in a way that would give a sense of balance over-all.

When placing the colorwheels on the way, we turned them to create hidden squares of color. Only a few people saw how all the yellows or all the blues for example faced in towards each other in a group of four circles. It's always nice to have "easter eggs" for people who take the time to find them.


Our primary and secondary relief sculptures hung on opposite walls. 


And the costume designs were a big hit as students explained their concepts to teachers and peers at the show.  It's so important for students to learn the curating process and help with hanging a show. They do better work when they know that their assignments aren't just made for a grade, but made to share.