 |
| A student uses a dot maker to decorate his kite in the early stages of construction |
Kites originated in ancient China for military purposes (measuring distances and wind patterns). I like to remind my students who are blind, that Braille was originally used as a code to read at night without enemy armies being able to see lanterns and detect the location French troops. As we enter March and learn about Chinese history, kite making and flying makes for some fun memories.
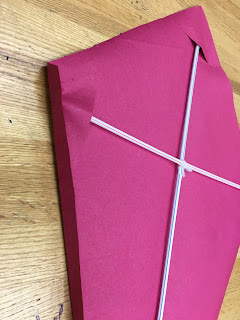
My students in class use bamboo for the skeleton for their kite shape, but those at home used straws, one end inserted into another until they are several straw lengths. A small kite can use 3 straws vertically and 2 straws for the cross section and tape may be used to reinforce these. The two straw sticks" should be tied at the cross section for strength.For my simple demo, I cut a large diamond shape from piece of thin paper, such as bulletin board paper, using the straws as a pattern by cutting an inch or two longer and wider the straw lengths. I actually started with half a diamond, folding it in half and matching the second half. Next, I used paper scraps to make small triangles to hold the ends of the straws in place. I just glued along the outside of two sides, leaving the inside of the triangle open so that straws could be removed. Then, I folded and glued the edges of the kite in for strength and tidiness, like a hem.
Finally, I tied a ribbon coming from the bottom straw. I made bows from rectangles of matching paper scraps, pinched and tied in the middle, but fabric or ribbon. Long strips of crepe paper or plastic table strips can work as well for a tail. All that is left is testing it out in the great outdoors. Let's go fly a kite!


No comments:
Post a Comment