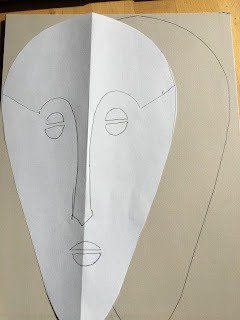
After studying various purposes and types of masks found in West Africa, my art students were given the assignment to make a mask of their own. All of my classes were online this week, so students used the mat board and cardboard that I sent them, but cardboard from a cereal box would have worked fine too.
The first step is to make three sketches of masks. These should play with shapes and proportions. Once the student chooses their favorite idea, they reproduce it on a piece of paper. Symmetry is of the requirements of the assignment and so starting with a piece of paper folded in half helps achieve that purpose. Half the mask shape is drawn and cut from the non-fold side of the paper, and then this shape can be used to redraw the facial features before using it as a pattern to cut out cardboard.Facial features such as eyes, eyebrows, nose, and mouth can then be cut from cardboard and arranged on the face shape. It's a good idea to try out different shapes to see if you can't improve on your original design. Large almond shaped eyes and long noses are typical of African masks.Above you can see a screen shot of a student and I painting our masks in tandem via video and talking through our color and value choices.
Most African masks are earth tones: black and browns, but there are some that have colorful beads or painted patterns. Start with a base coat, then add pattern with thinly painted lines and dots. Markers, especially Sharpies might be easier for this kind of mark making if the base is a light value. Any other embellishments such as feathers, beads, or yarn can be added for extra texture and color.
Here is a student waits for her mask to dry before adding pattern.Whether you decide to make a wall mask or wearable mask, enjoy the process. Ending up with a product that you love for just pennies worth of glue and paint is worth a little effort.


No comments:
Post a Comment