Sunday, November 6, 2016

High Contrast Compositions

Value subtleties are often lost for people who are visually impaired. The higher the contrast, the easier it is to discern shapes. I thought it would be good to teach about contrast in art by having students limit themselves to white paper and black or a dark color. I had them draw or trace shapes that overlapped. X's were drawn on every other shape to give the composition a checkerboard affect. This process only works as long as 3 lines don't intersect (as in the letter "Y").  It has to be an even number of lines coming together at intersections. Then the students were asked to paint or color the shapes with the X's.

A Visio Book (closed circuit TV) was used by some students to magnify their drawings so they could color in the lines. One of my students sees better when the Visio Book reverses the values so that the dark lines he colors look white on the screen.

Students with almost no vision, used Wikisticks to trace stencils. The student who made the piece to the right, chose water color as his medium.


Tuesday, November 1, 2016

Wire Elephant Wall Art

I was recently commissioned to make a wire wall hanging, and my wonderful client was very specific. She wanted an elephant with the trunk raised. And a baby elephant. Three Greek letters. And lots of color. 

I am always nervous about doing commissioned work because I can't see the imagine in the patron's head and I don't want to disappoint him or her. But when I repress fear, do my own thing, and try to have fun while doing it (which was pretty easy in this case) things usually work out.


I started out with a large drawing (3 foot X 4 foot) and bent the wire to follow the lines. I held the wire in place with tape, until I could use more wire, fabric, and mesh to hold it in place. thinner, plastic coated wire and copper wire worked well to hold glass beads and curls. I used upholstery fabric samples, fabric glue or hot glue to create large areas of color, tissue paper, yarn, pipe cleaners, tiny pieces of painted cardboard, buttons, and foam, add a little variety and activate quieter spaces. A couple hooks on the wall will hold the wooden dowel from which the piece hangs. 

It is always gratifying to finish a piece and see a smile on a patron's face.


Monday, October 24, 2016

Assemblage Project


A few weeks ago, my class studied the amazing artist, Louise Nevelson, and each student created their own, Nevelson-inspired, assemblage sculpture. 


Nevelson offers a great lesson in art history and moving forward in life with confidence and work habits. She built large sculptures using wooden objects in boxes and painting them one color, black, white, or gold. It was fun to watch students search through piles of materials and find something that was meaningful to them. I offered my students pieces of cardboard and wood, used water bottles, wire, and small, used toys.


 Art classrooms often becomes the garbage cans of the school, as people show up with paper towel tubes , bubble wrap, and a "Can you use this?" But that's a good thing when teaching students environmental concepts such as reducing and reusing, as well as art concepts such as "found objects" and assemblage. Conversations can go back to Duchamps "ready-mades" and the big question, "What is art?"  Bliss for me as a teacher, is the spot right between the profound and the whimsical.

Saturday, October 15, 2016

Ceramic Lanterns from Slabs

Every time I think I'm going to run out of ideas for ceramic lesson plans, another idea pops up like a light bulb over my head. Only instead of a light bulb this time, it was a candle light, shining from inside a clay lantern. I recently dusted off the slab roller and students got busy rolling out slabs of clay.


Some of my students created cylinders, in which a candle can be placed underneath a covering or inside a little doorway.


Others created boxes with opened tops, or in the shapes of houses in which the roof could be removed to place a candle inside.

This lesson is a great way to teach about form and function, as well as negative shape and the technique of slip and score. I just got these babies out of the kiln, but I can hardly wait to see them painted or glazed, and lit up from within.

Tuesday, October 11, 2016

Foil Paper Art

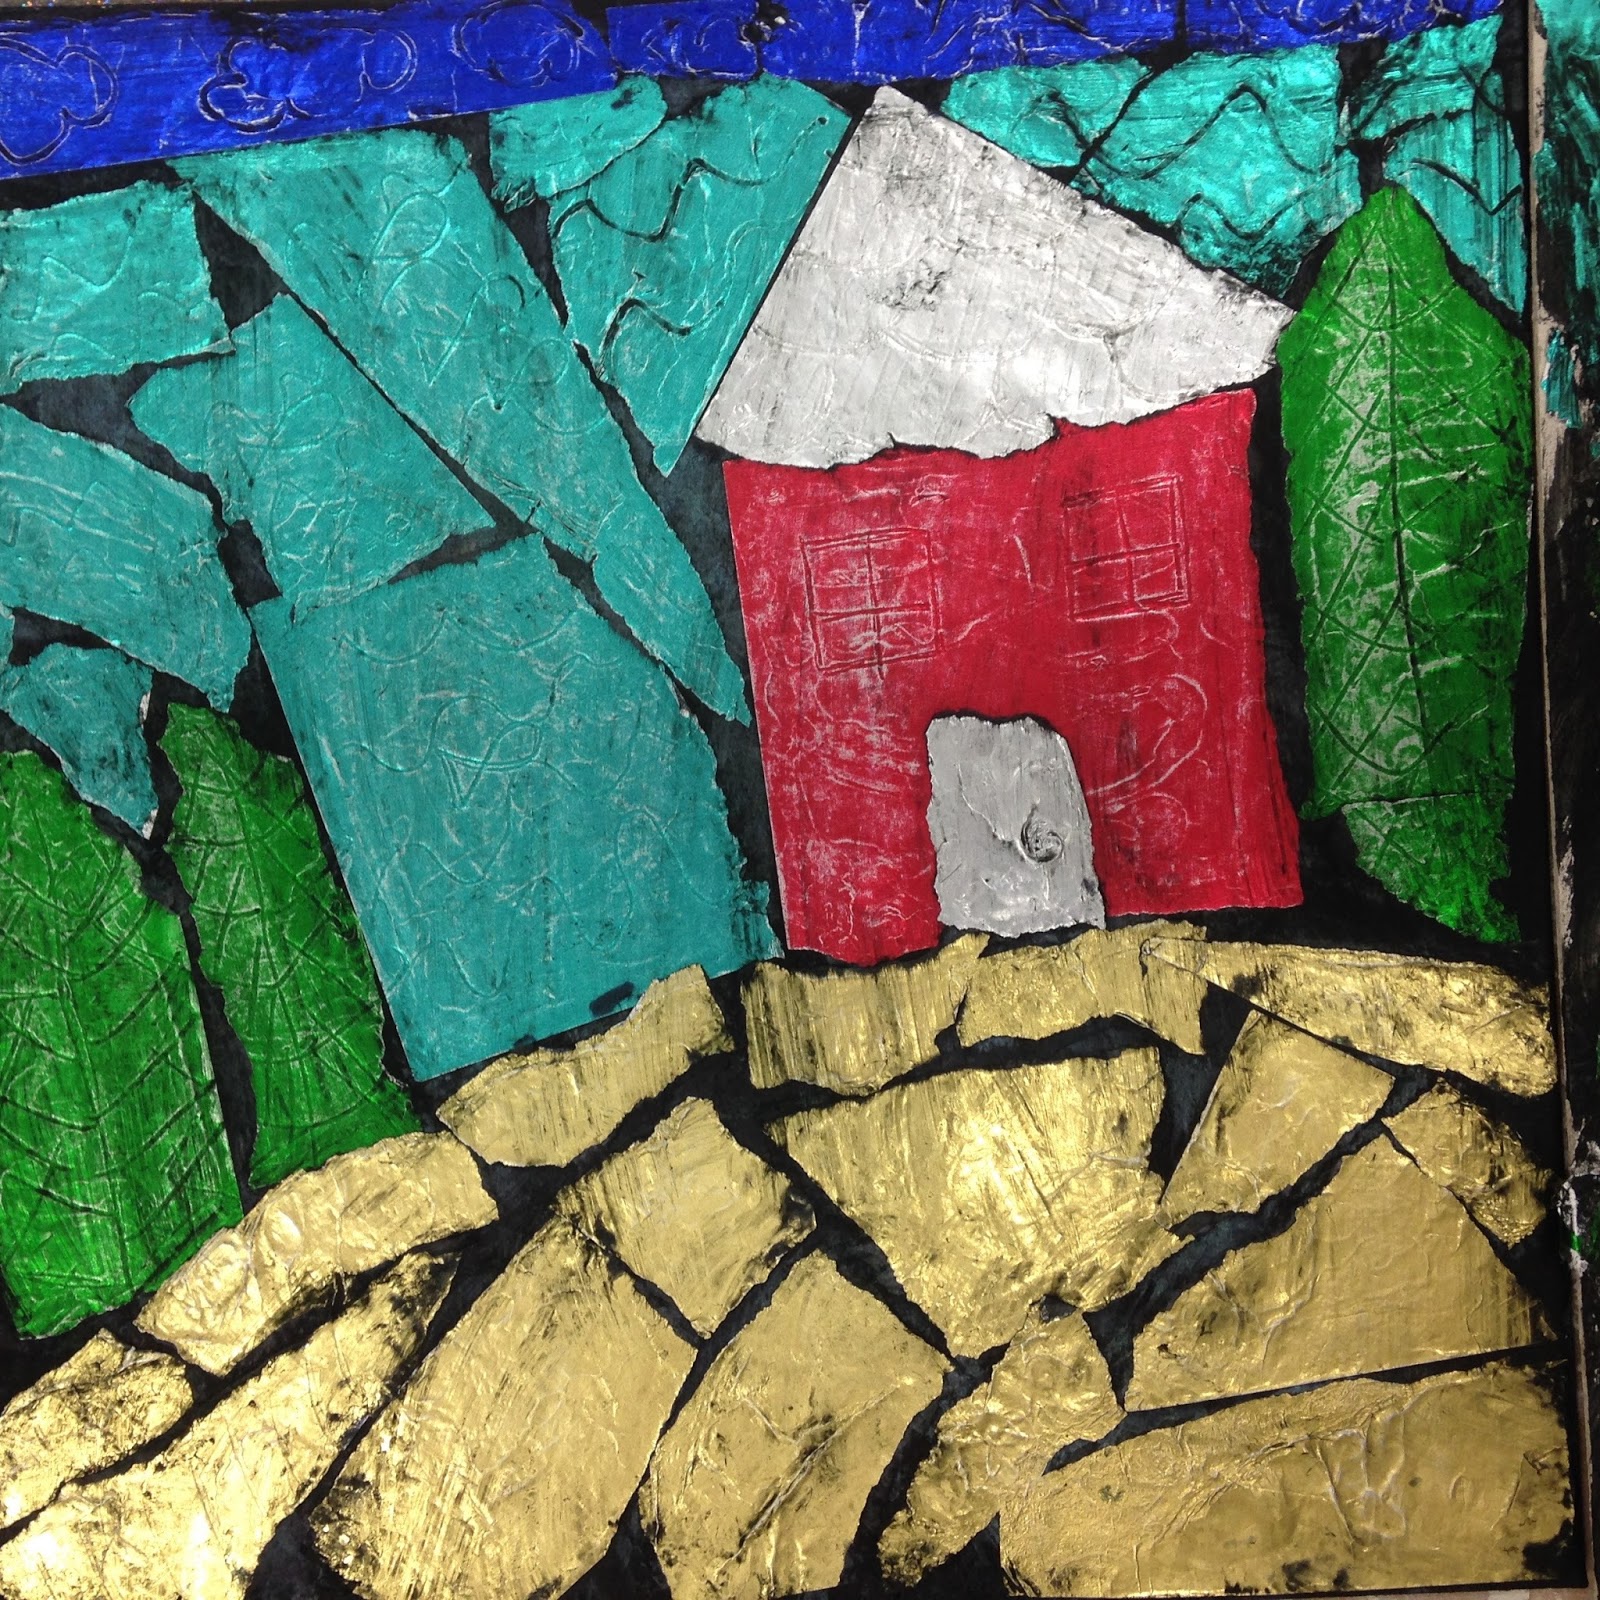
My art class just completed a week dedicated to Austrian symbolist artist, Gustav Klimt, whose use of gold and pattern helped usher in the Art Nouveau movement. Last year's film, Woman in Gold, was about his most famous painting, Portrait of Adele Bloch-Bauer, which is hailed as the "Mona Lisa of Austria. "
In the spirit of Klimt's metallic looking paintings, we made landscapes and figurative images using foil paper. This lesson plan idea was courtesy of art supply company, Dick Blick. My students each drew an image on chip board (although paper would work as well). Then they filled in each shape with color by gluing torn foil paper onto the board. Little cracks between the paper work well to break up the space. Several students used used plastic tooling tools to emboss a pattern onto the foil. And then they used black tempera to cover the entire image. When the paint was almost dry they wiped the it off using a damp paper towel, which gives a vintage feel to the piece. It was a trick getting the right amount of rubbing, as too much will take the color off the foil, and not enough will keep the color from being revealed.


Some students drew directly from posters I had of Klimt's paintings, while others chose to represent their interests (such as the Nike shoe below).


Wednesday, September 28, 2016

Leaf Stencils

Fall has officially started and it is the perfect time to explore the many types of leaves before they're gone. I took my students on a "scavenger hunt" last week, for as many different shapes and sizes of leaves as we could find. While collecting leaves took up most of the class period, the art project itself only took a minute. We simply set a few twigs and leaves on a sheet of paper outside, and spray painted them and the paper around them. When we picked up the leaves, the shape was documented as negative space. The documentation of the leaves will last years after the actual leaves shrivel and turn to dust. I love the ephemeral quality of the finished products and the instant gratification of this project.   
My friend, Matt Forrest helped me teach the concept of stenciling on a deeper level by making silk screen of a few of our spray painted images. My students learned how to pull serigraphs (screen prints) with textile ink. While the ink was wet, my students dusted the images with flocking which gave a fuzzy texture. The second day and added process was worth it to make the images more meaningful for my students who see with their eyes.


Saturday, September 24, 2016

Foil Relief Sculptures


This relief sculpture was a great assignment for my tactile students. My students did a couple preliminary sketches in which straight lines went  from one side of a rectangle to another, and then the favorite composition was re-drawn on a piece of cardboard. Students cut notches on the cardboard where the lines met the edge, and then followed their marker lines with yarn from notch to notch.

Aluminum foil is then wrapped around the front of the board and taped to the back. In order to make the yarn lines really stand out, it is important to rub down lightly using the fingers, on either side of the yarn.

Sharpies were used to add color, without decreasing the reflective metallic look. It is always my goal for visually impaired and blind students to be able to paint or color independently, and having the raised lines as boundaries allowed them to do that.