
Autumn is the perfect time to do a cross curriculum lesson by marrying printmaking and leaves. I began the lesson with a 5 minute video about why leaves fall from the trees as the days get shorter in the fall (hint, it has to do with chlorophyll and photosynthesis). Then we took a hike around campus, touching bark, identifying the trees and collecting leaves and pinecones as we went.
Our first art assignment, used the leaves we collected to make rubbings. The students would arrange their leaf or leaves with the vein sides up, lay a piece of copy paper or newsprint on top and rub the paper with the side of a crayon to reveal the texture and shape of the leaf. Rubbings are a simple form of printmaking and most households have all the supplies on hand.
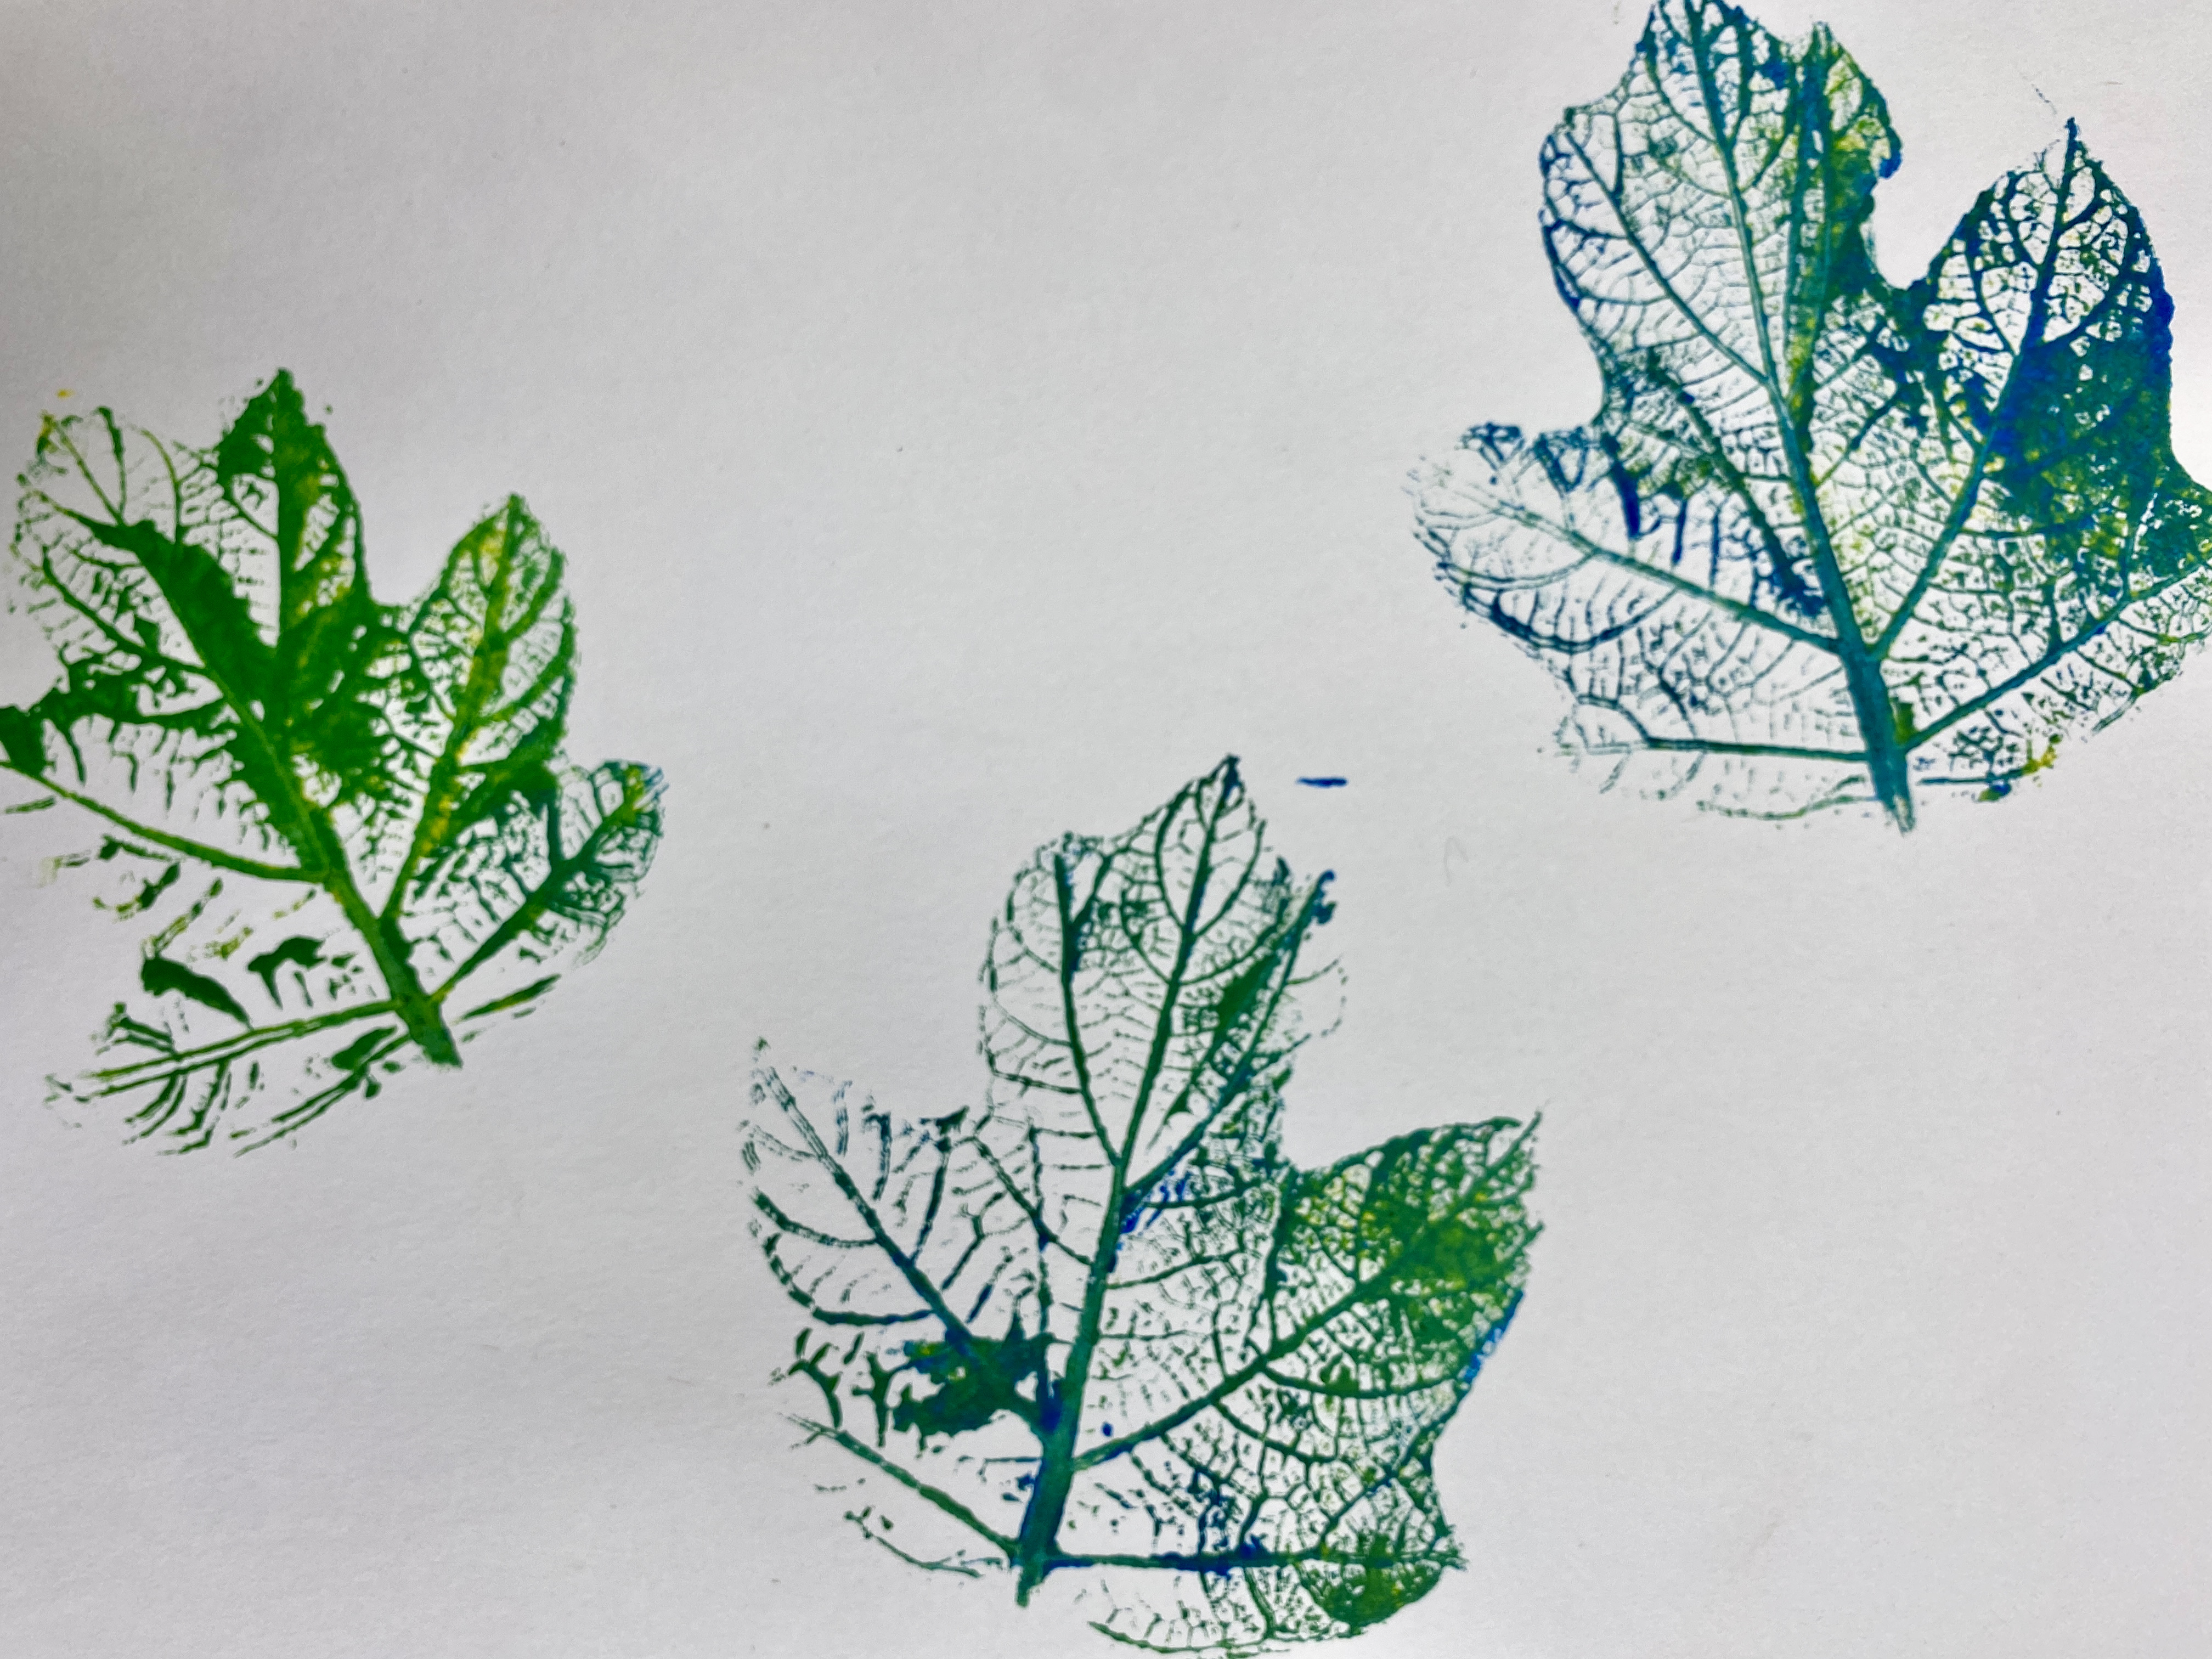
The second project was to make leaf prints by painting with tempera or acrylic on the vein side of leaves and then turn the leaf upside down and rolling it with a brayer or rolling pin. You have to be careful not to get uneven pressure through things like finger prints and it helps to place a piece of paper on top of the leaf as well to keep the roller clean. The same leaf can be used multiple times, although if more paint needs to be applied, use it sparingly so as not to fill in all of the gaps between the veins.

Finally we used stencils of various leaf shapes. Students placed a sponge in yellow paint to pat lightly, covering the exposed shapes. A sponge with blue paint dabbed around the edges creates green, and red paint sponged on the wet yellow creates orange. So students are learning leaf identification (biology), mixing of primary colors to create a secondary, (color theory), shape and texture (elements of design), and three different printmaking techniques (techniques and processes), in 3 hours of Art class.
Help the children in your life slow down and enjoy their fall through art making!


No comments:
Post a Comment