
Wednesday, November 28, 2018
Caulk and Cardboard
Saturday, November 17, 2018
Casting Plaster
 Plaster casting is not as hard as I thought it would be and it was a perfect tactile project for my students with low to no vision. I took them on a walk around campus to pick out leaves and berries that they might want to cast. Some chose to use tools and stamps to create texture into their slab of clay however. Once we pressed and rolled shapes and lines into the clay, we placed it in a pie tin, as though it were a crust.
The powder Plaster of Paris is added to water in a one to two ratio. It gets thicker with time, so we worked pretty quickly and made sure it was about the consistency of a runny pancake batter. I thought if it was really thick it would be stronger, but it made it crumbly and hard to manage.
Once it was poured into the "pie crust" I took a wire and bent it to make a hanging loop. This will make it easier to hang from the wall, so it is important that the loop is at the top.
 After an hour or two it was set. We flipped it up side down and pealed
the clay away from the plaster. Of course red Georgia clay is not the
first choice for this project since it is hard to get the dirty look
from the pristine clay, but we worked with what we had, and once it is
painted it won't show. This project can be used for a child's hand print, rubber stamp lettered words or ways of preserving nature. It was also a perfect way for us to create relief sculpture using a new medium and technique.
After an hour or two it was set. We flipped it up side down and pealed
the clay away from the plaster. Of course red Georgia clay is not the
first choice for this project since it is hard to get the dirty look
from the pristine clay, but we worked with what we had, and once it is
painted it won't show. This project can be used for a child's hand print, rubber stamp lettered words or ways of preserving nature. It was also a perfect way for us to create relief sculpture using a new medium and technique. 
Wednesday, November 14, 2018
Embossing Foil
 |
| A flying pig embossed in foil |
 Repousse is a metal working technique in which thin metal or heavy foil is hammered or embossed on the back to make it stand out in the front. My students totally understand the idea of embossing as they use braillers to emboss paper all the time. They used plastic pencil-shaped tools to "tool" the foil and create a wide array of images as part of a low-relief sculpture unit. Some students painted their images with black acrylic and then wiped it away to give it an aged, batik feel, some colored their image with markers and then gently wiped it away for a stained look, some did both. There's nothing quite like hearing kids who have never had vision, feel their artwork and say, "This looks great!"
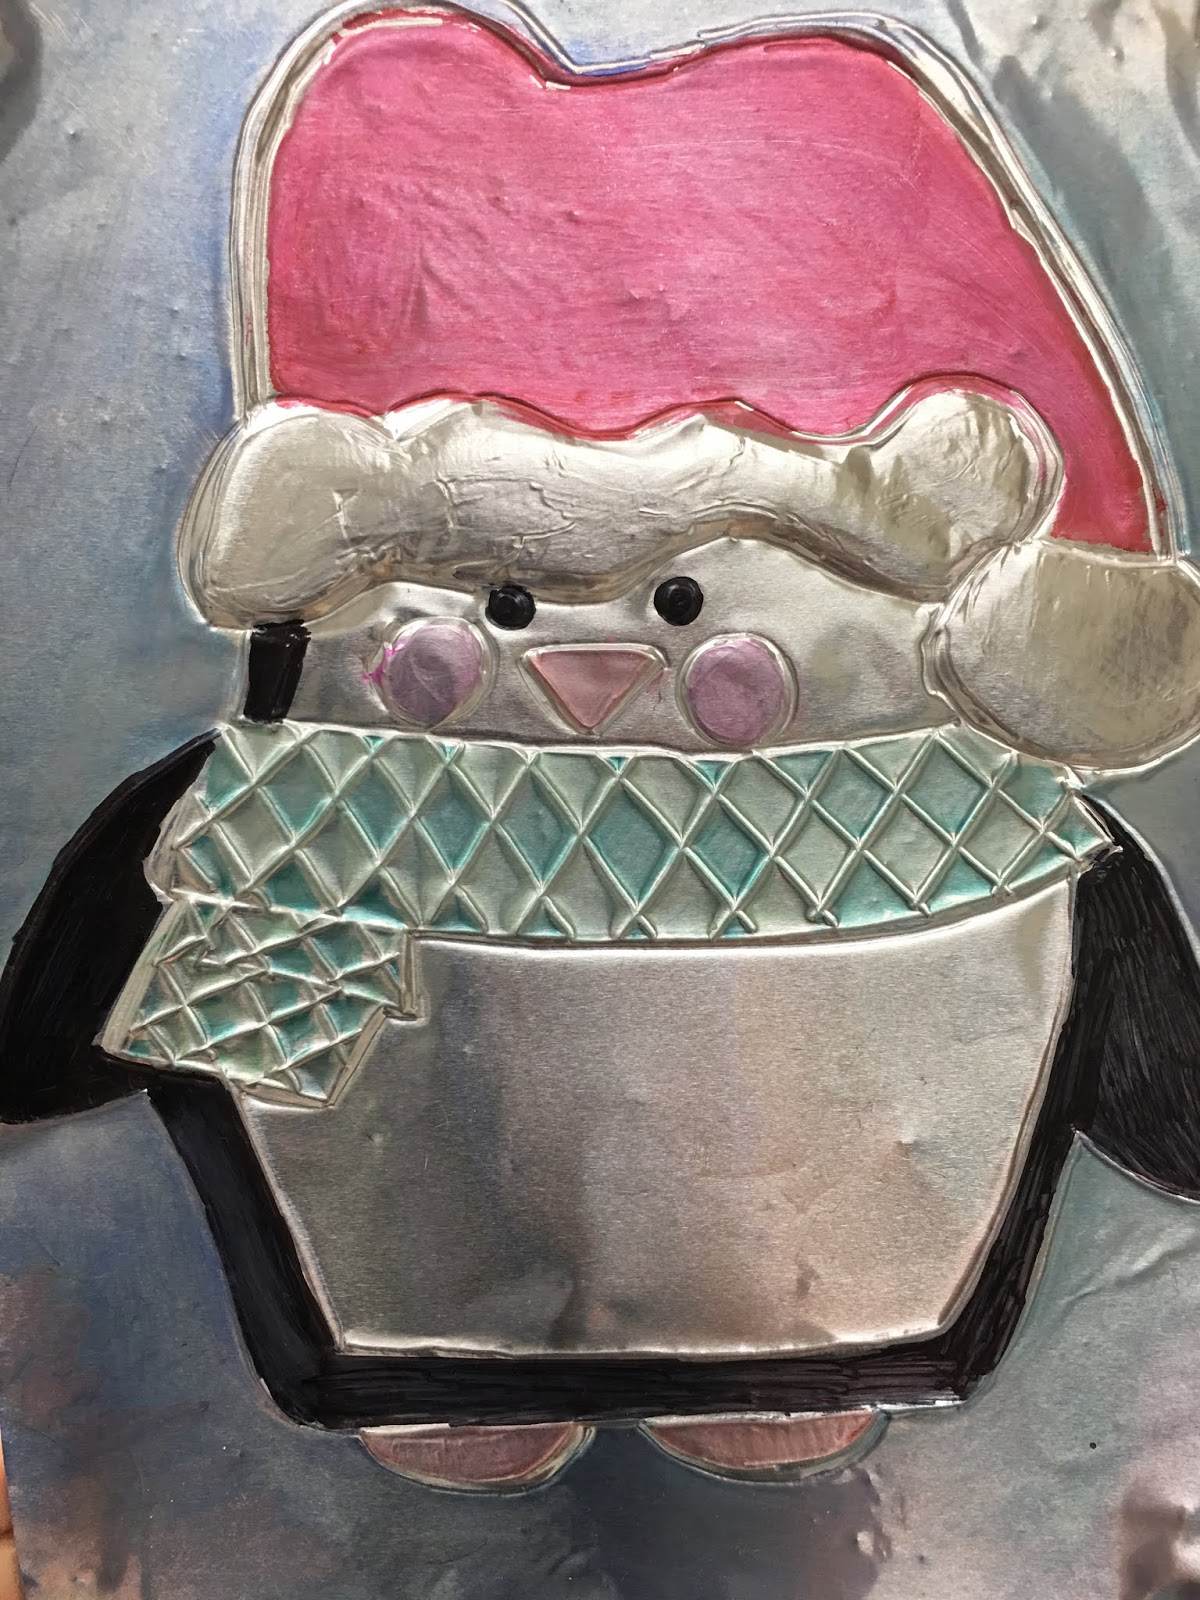
Carving Clay Slabs


Introducing students to relief sculpture is easy when you have a bunch of clay, a slab roller, and some carving tools. It was just a matter of having them come up with ideas, and decided how much to take away. Carving is a subtractive process and future ceramic projects will be an additive process, so there is yin and yang in my curriculum throughout the school year. Each student did some sketches. Rolled a slab, cut out the shape, and by the next day it was leather hard and ready to carve.
Once the pieces were fired and glazed, ribbons were tied through pre-made holes so that they could be hung on the wall. We had some trouble with our first glaze since the kiln didn't get hot enough.
Saturday, November 10, 2018
October Fun! Field Trips and Disaster Relief!
 |
| Happy birthday APH! My student took the picture, in Kentucky. |
 |
| Indian Mound field trip in Georgia |
I worked a second weekend in October by helping with a Short Course at the school. Our students went to the Ocmulgee Indian Mounds National Monument; I taught them how to make coil pots and led a drum circle.

 |
| From the student paper |
I was supposed to present at a state wide training for teachers of students who are visually impaired, but Hurricane Micheal came and shut down the conference along with my power. I ended up spending a weekend in the Tallahassee area with my family and some friends, helping get trees off of people's houses. Between cross country meets for my kids and helping my son get college applications together while simultaneously filling out a mountain of paper work that comes with being named my school's Teacher of the Year (yippee!) I've been pretty busy. I also managed to help sub for 6:10am class several times each week.
 |
| My hubby with his amazing Art Department colleagues |
And then there was getting my daughter to the state fair, attending artist's talks as well as Wesleyan College's presidential inauguration, volunteering at the children's home fundraising dinner, and my school's Halloween dance. (Breath.) Tell me how teachers don't have to work late nights and weekends again? But seriously, I hope to catch a break now that October is over...maybe after Christmas.
Saturday, November 3, 2018
Cut-away Cardboard

 For a fun and easy tactile project, students researched high contrast images online of the subject of their choice. Then they printed out a favorite, and cut away the darkest or the lightest areas. What remained was a spray paint stencil. If the light areas were removed, white spray paint on cardboard would replace those areas via the stencil. Some of the darkest areas, or just the back ground shapes, were outlined with an X-Acto knife and then the top layer of cardboard was peeled away, revealing the corrugation.
Some images were done by painting book board, and gluing parts of magazine pages onto the board before reusing the spray paint stencil. This wasn't as tactile, but still made for some interesting visual effects.

Subscribe to:
Posts (Atom)