
The lanterns can be made with card stock, construction paper, or copy paper of standard size, any color.
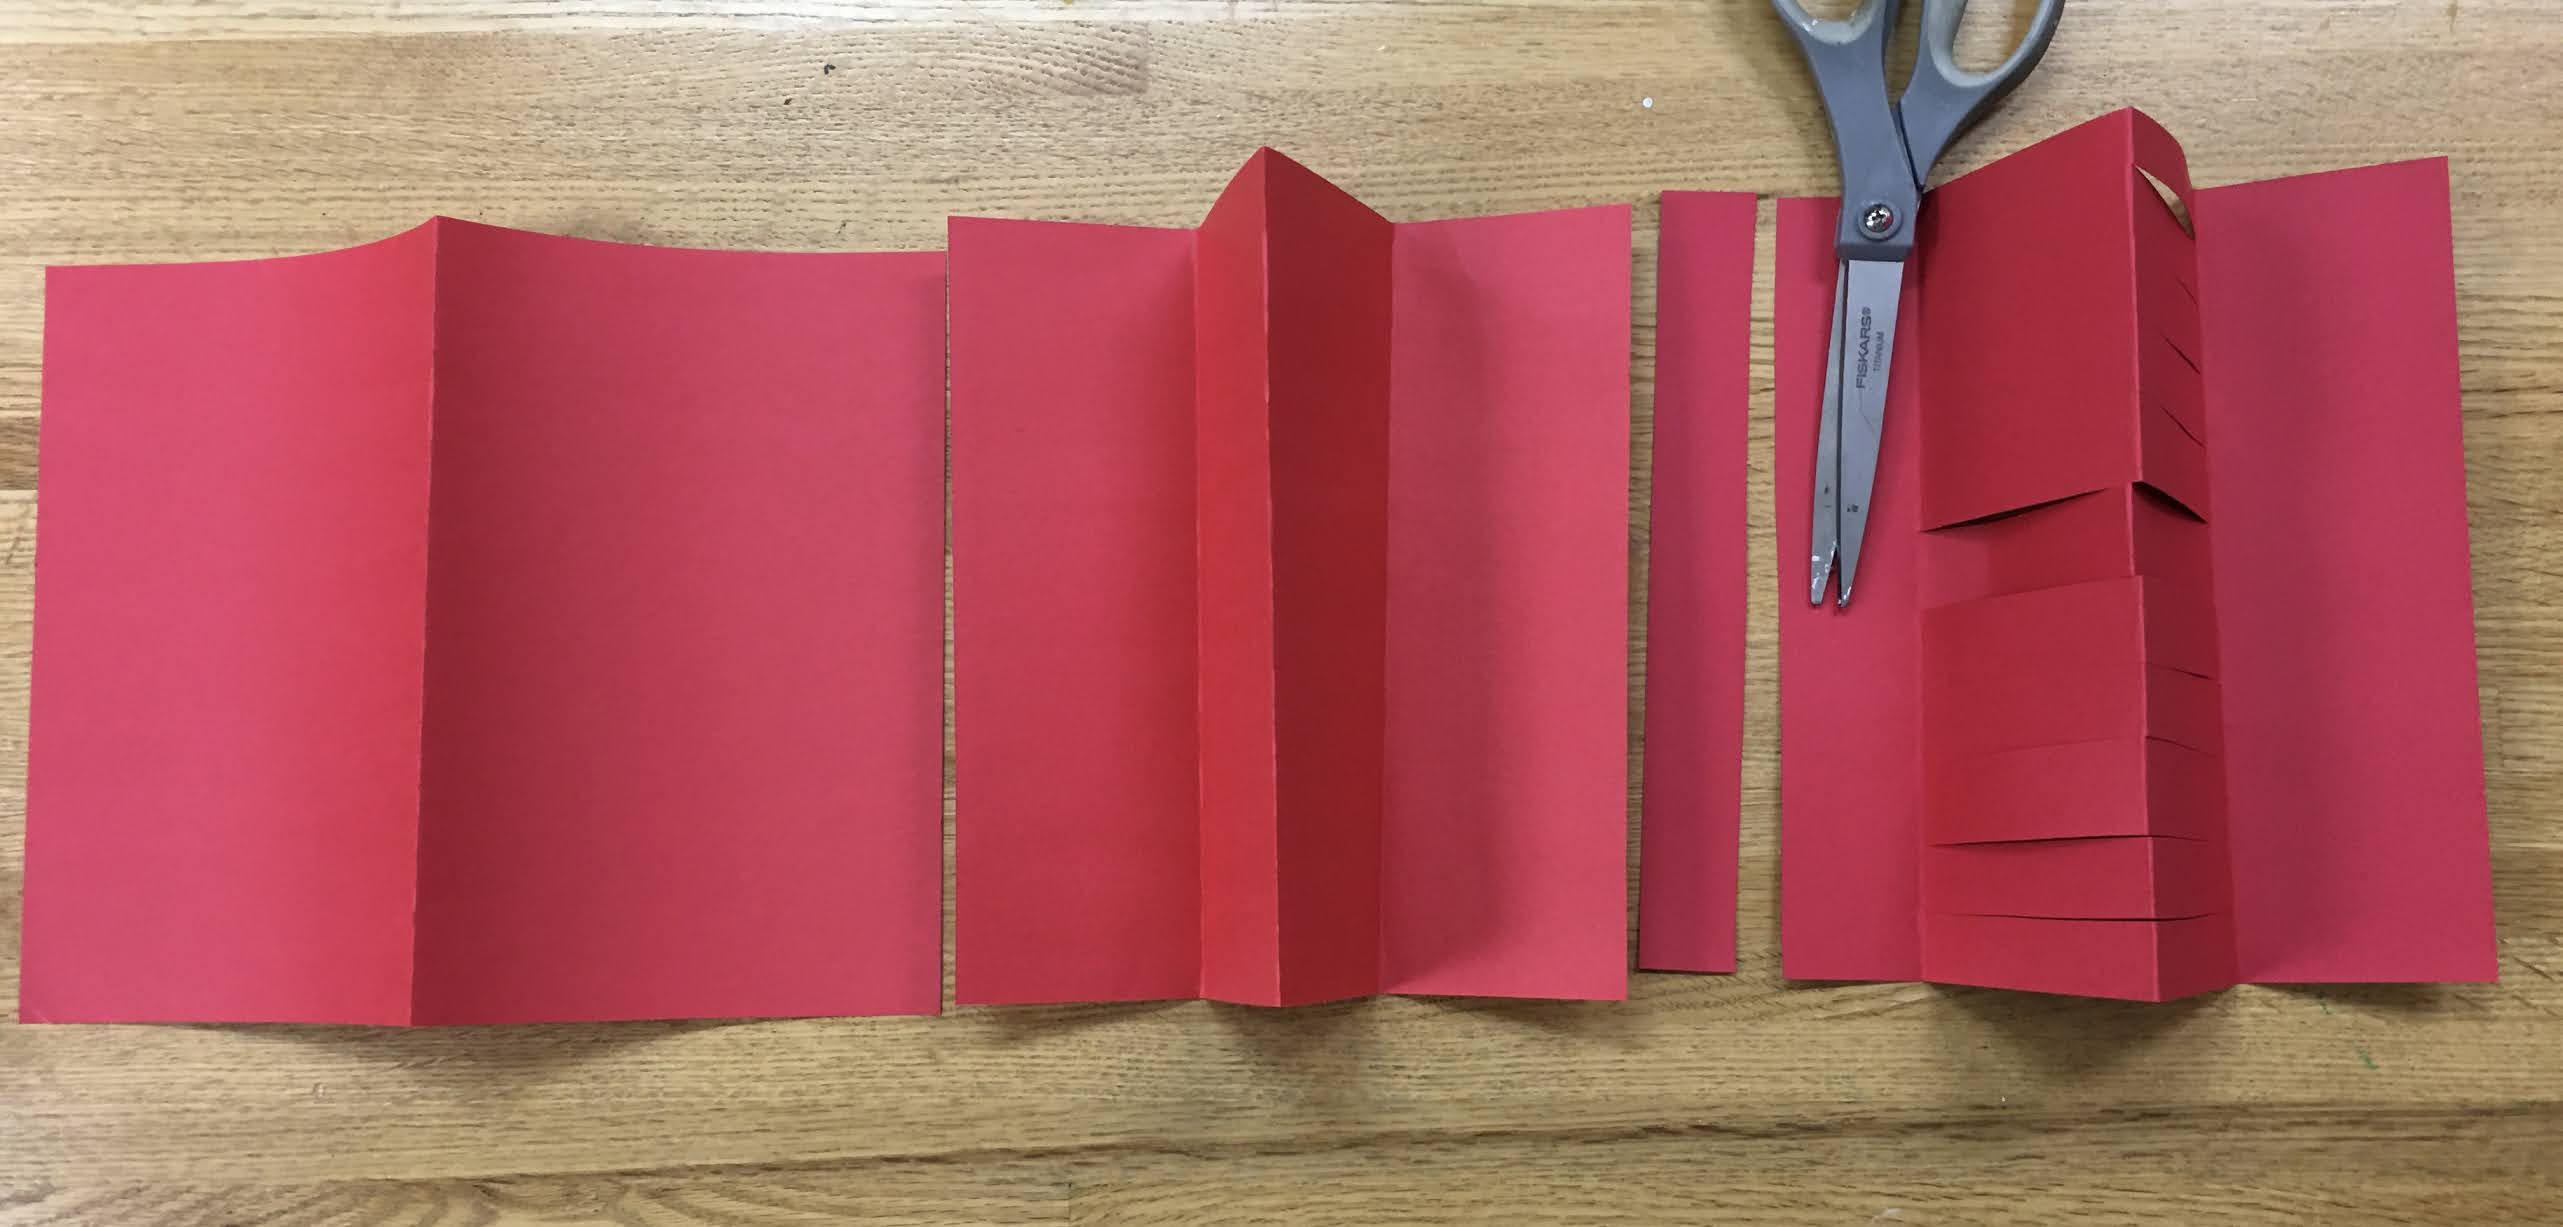
To make one, you fold the paper horizontally and make a vertical fold in the center, then you make two more vertical folds a couple inches from the center going opposite direction from the first fold. Wider folds with make a wider, shorter lantern.Cut slits, 3/4"-1" apart from the center fold to the outer folds. And cut a strip off one of the ends, for a lantern handle.

Then you make a cylinder by turning the paper vertically and wrapping the ends to overlap. Glue the top right to top the left of the lantern, and bottom right to bottom left. Add the lantern strip to the top and use a flashlight at the bottom to make the magic. They're not quite the same as the white and red Japanese paper lanterns that you find at celebrations such as the Cherry Blossom Festival, but they're fun to make and use.
One student made a larger version out of poster board. The weight of the top caused the sides to collapse when it sat on the table or to stretch straight when being held by the handle, so a couple of bamboo skewers were hot glued top and bottom to the inside of the lantern to keep the right shape with the slits open all of the time. I'm glad such a simple activity could provide a chance for creative problem solving and a source of pride.

No comments:
Post a Comment